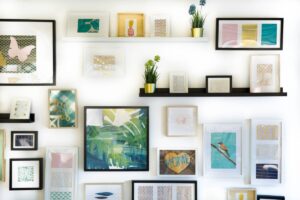
Your Guide to Product Photos

🖼️ The 10 Best Websites for Selling Your Artwork
Last Updated on December 4, 2018
Selling art is easier than ever before thanks to the World Wide Web.
At least that’s what everybody on the internet says.
If you are not raking in millions after a few button clicks, then you know that the reality: selling your art online can be tough.
This article walks you through the best websites to show your art on, highlighting the pros and cons of each.
In This Article...
The Reality of Selling Original Art Online
Though the internet is a huge opportunity, it requires a lot of knowledge, skill, and patience to use effectively.
This is the fact, and any other mindset will let you down.
The upside is that, though difficult, you can make the internet your home base for sales and new clients.
It’s possible and tons of people have done it (some very successfully).
That journey, however, starts with knowledge.
So without further ado, if you’re just starting out with selling art online, then the first thing your need to do is find a home.
Below, I go through the best places to put your artwork on the web.
1. Best Place to Sell Your Art = Your Own Website
👍 Rule of Thumb Your own website is by far the best choice
We’ll get into some great third-party websites in a moment, but don’t forget that it’s important for you to have your own site, too.
Setting up a portfolio style website couldn’t be easier.
I always mention Squarespace because they are so easy to use and so affordable.
Google around for other options, but in my experience there is no better platform for someone starting out, looking to show their work.
Check out Squarespace.com
Moreover, by having this home base website, you are hedging against any platform becoming more expensive or otherwise unusable.
At the end of the day, any one website could go offline, so having your own domain is a way to protect against that potential headache.
What’s more, almost all successful artists concentrate on their personal website, as eventually this is the best tactic for making money and connecting with your customers.
(This is not always the case initially, however, and I’ll discuss why in another post.)
WordPress is another well known place to start a website
Finally, having a site is like having a business card these days.
If you meet someone in real life who wants to see your art, you should have a site of your own to send them to.
Otherwise, they may take you for an amateur.
If you just have an Instagram, that’s cool but it also screams amateur.
Format is a site dedicated to artist and basically just hosts your portfolio
2. Websites Your Market Frequents
Many of you interact with your clients in person all the time.
Use this knowledge to understand where those very same people hang out online.
This simplest way to decide which websites to show your art is to look at where your customers (or potential customers) spend time.
Instagram is a great place to share visual content
Don’t forget that your customers are still people! There isn’t much mystery about who uses the web…it’s everyone.
So next time you have a conversation with a client, take a note about what they mention — Facebook, Instagram, etc.
Check out Facebook to show off your work and even buy an ad or two
Take this knowledge and then look into how you can become visible on those websites.
Remember, websites are really businesses, and most earn through advertising.
So look into how much ad space would cost on those sites or, if it has a forum, get involved on there to generate interest.
These are great shortcuts to bringing people to your site where they’ll become customers.
3. Etsy is our top choice for websites to show your art on
Let’s start our actual list with one of the most well known options on the Internet.
This site already gets a ton of traffic, so while you will need to work hard to stand out from other artists, the upside is that there are thousands of people visiting Etsy every single day, making it my top choice for websites to show your art on.
Go to Etsy.com and Sign up
People often just browse Etsy and provide feedback in the form of “likes” too.
Want to know if anyone will like the painting you just finished? Put it on Etsy and see how people react to it.

The site also has a very supportive community that will provide you with lots of helpful advice on how to make the most of it.
In this way, you can rely on other sellers from the community if you have questions about the process.
4. Artplode – The Best Place to Sell High End Art
If you plan on listing your art for more than $1,000, Artplode is definitely a worthwhile websites to show your art on.
The site takes a $60 fee to post any piece of artwork, but that’s remarkably low when you consider you’ll pull in at least $1,000 per buyer.
Check out Artplode Here
Artplode is a great option if you are looking for high-end sales.
The adage it takes money to make money applies here, but the high cost of admission makes the quality of the content on the site go way up, too.
Buyers know this, and series buyers who do not mind spending money will pay for the right to view premium content.
5. eBay – The Best Place to Sell Your Art for Free
eBay may not be the Internet powerhouse it used to be, but its art section still gets plenty of traffic.
You could easily begin selling art today by uploading photos of your work.
Here is Our Guide to Selling Art on Ebay
While you’ll want to put some time into making sure you understand the best practices for selling art on eBay, it will be worth it, as Ebay is one of the best websites to show your art on if you are looking to start quickly and find buyers.
One of the major benefits of eBay is that, after enough sales, you’ll have a very good idea what prices you should be charging.
This is always a challenge for artists, but eBay will give you some very real feedback to start with.
How to Sell Art on Amazon?
You may be asking yourself if Amazon would be a wise place to try and sell your work.
The truth is, there is tons of competition and selling for a good price tends to win the day on Amazon.
As such, I don’t think Amazon is the right place to start out if you haven’t sold your work anywhere else online yet.
Still Want to Sell on Amazon? Check out our guide to Amazon product photography
Wrapping Up – How To Sell Art Online and Make Money
There are countless other sites you could sell on, too.
For now, though, focus on getting your own site up and running, figuring out if there are specific sites that would be best based on your audience and then choosing one of the other three I listed.
Selling Art on Society6

Wall Art from Society6
Society6 is a platform that aims to make it easier for artists and designers to earn cash.
They not only allow artists to upload work and sell it through the site, but they have a “Membership Program” that enables art lovers to create a profile and promote the art they love.
With Society6, art connoisseurs can use the social media feature to like, share, and ultimately advocate for the artists they like. So, even if they can’t afford to buy anything, they can still support their favorite artists!
- Click Here to Learn More About Society6
Selling Art on Indie Walls

Artwork from Indiewalls
Unlike other online art marketplaces like Etsy and Society6, Indiewalls caters specifically to interior designers and decorators. This gives them a go-to-place to find great art for their design projects.
In other words, this is an amazing opportunity for artists to get their work into hotels, restaurants, and luxury homes! Simply by uploading your work to the Indiewalls catalog, you can get your art in some pretty high-end locations!
- Click Here to Learn About Joining Indiewalls
Selling Art on Turning Art
TurningArt is a platform that connects artists with some of the world’s top art advisors.
In case you’re unfamiliar, an art advisor is someone who gives collectors and commercial businesses advice about which artwork to add to their collections.
So, by partnering with TurningArt, you may be able to get some pretty big commissions!
- Learn More About Selling on TurningArt Here!
Selling on Saatchi Art
SaatchiArt is one of the largest online art galleries in the world. Founded in 2006, this platform was far ahead of the online art-selling game.
Essentially, this service allows artists to upload images of their work and price it however they’d like. Then, collectors will be able to find it and reach out to the artist if they think a piece would be good for their collection. It’s so easy!

Your Art Empire
- Marketing Tips
15 Best Sites to Sell Art Online And Make Money [REVIEW]

Are you going to sell artworks online or sell art prints online?
Before starting with any of the platforms, you need to figure out which one would best fit your art practice.
But of course, you can also sell both at the same time. You just have to weigh the pros and cons if you intend to take that route.
If you are going to sell both, will you discourage your high-paying clients from buying your paintings because you are also selling affordable printed versions ?
Or will your perceived value or image as an artist change if you are going to sell print-on-demand merchandise?
On the other hand, if you’ll sell art prints online , you are also opening yourself to a massive stream of passive income from your digital artworks.
It can be a tough decision, so do your research and again weigh the advantages and disadvantages.
So, go ahead and take a moment out from your studio to reflect. Once you have made up your mind, you can proceed with choosing the best platform to sell your art online.
At the end of the day, it all boils down to branding.
Without further ado, below are 15 of the best websites to sell your art online.
Selling Art Online Best Sites

Like what I’ve said earlier, you can either focus your artistic and entrepreneurial energies to sell artworks online or sell art prints online.
In this article, I am going to cover some of the best sites that specialize in these two art markets.
Sites to Sell Your Artworks Online
1. singulart.
If you’re someone who’ve had solo exhibitions before, and who have received recognition and prestigious prizes both locally and internationally, then you can be part of the Singulart community.
This platform works with artists all over the world to transform the global art market.
They believe that art has no boundaries. It’s their goal to market the works and profiles of their curated artists to collectors and online buyers around the world.
Singulart is an online art gallery powerhouse with over 50,000 artworks from more than 80 countries across the globe.
Although they are well-known in selling paintings of their curated artists, they also feature other forms of art such as sculpture, photography, drawings, mixed media, digital, textiles, and works on paper.
2. Artfinder
With more than 10,000 artists from 108 countries selling on this platform, Artfinder is certainly one of the most trusted sites to sell original artworks online.
They take pride in connecting buyers to independent artists around the world.
And all of their artists – painters, sculptors, photographers, and printmakers – sell on their own terms.
They have full control of their artworks from pricing to packaging.
To be a member of their growing community, you should go through their application process and before you can do that you need to create an account first. They will require you to submit high-quality images of your artworks, your artist statement or inspiration, and a short statement about yourself.
Once accepted, you can set-up your storefront easily and start selling your artworks.
Artfinder only allows the selling of original artworks , which means no reproduction prints or posters.
What’s the catch? They take a 33 to 40% commission on sales.
But with the amount of exposure that you can get and their established audience of art buyers and enthusiasts, 33-40% is just a fair cut.
And just to give you a comparison, most galleries take somewhere around 50% from pieces that you sell.
3. Azucar Gallery
Azucar is an online magazine and art gallery that features the works of young and emerging artists.
It’s a portal for the distribution of self-produced content, a platform to sell art online, and showcase the works of artists worldwide both online and through international exhibitions.
Beyond being an online art marketplace, Azucar Gallery is also known for organizing events for their artists.
Click here to submit your portfolio.
4. Saatchi Art
Saatchi Art is one of the most respected names in the art business with over 65,000 artists from around the world selling their artworks on their platform.
They also take pride in providing artists and art enthusiasts worldwide with an expertly curated environment.
Their unparalleled selections of art pieces – paintings, sculptures, drawings, prints, and photographs – are available in price points that range anywhere from $100 to $10,000.
As such, there’s certainly one of a kind piece of art that would meet the budget and taste of art lovers globally.
Artsper prides itself on being the European leader for online contemporary sales.
They partner only with the best galleries across Europe.
Hence, works feature on their platform are guaranteed of high quality and authentic.
Their prices are also the same with the galleries , so their buyers can save from making the trip.
Moreover, they also offer their buyers a free return if they fail to find a perfect spot for the artwork that they purchased.
Artsper will shoulder the shipping back to them and they will also reimburse the payment.
Their experts are also always ready to give personalized advice to assist their clients during the buying process.
6. UGallery
Having been in the industry since 2006 , UGallery has developed a massive following of artists, art collectors, and interior designers in over 50 countries.
Unlike other online galleries, they only sell artworks that are not displayed anywhere.
They work closely with all their artists to ensure the quality of their works and make sure that the artworks are priced consistently and all the necessary pieces of information are listed.

UGallery encourages top emerging mid-career artists with a positive attitude to apply .
Once accepted, every artwork that their artists show on their gallery needs to be exclusive with them for the entire time that they represent the piece.
If the artist wishes to remove it from their website, UGallery requires a two weeks’ notice and only after the artwork has been on their website for at least three months.
Also, for every sold piece, the sale of the artwork will be split by 50/50. They also cover the cost of packaging and shipping of the artwork.
Sites to Sell Your Art Prints Online
7. society 6.
Print on demand is one of the most popular ways to earn as an artist these days, and Society 6 is one of the more well-known sites in this field.
In this platform, artists can transform their artworks into different types of merchandise such as notebooks, phone cases, shirts, bags, yoga mats, and coolers.
Artists can also see their pieces have a new life and be sold in the forms of wall arts, furniture pieces, tapestries, rugs, pillows, posters, and a lot more.
Society 6 is an open community where anyone can sign up as an artist and sell. For every sale that you make, you get 10%.
For art prints, canvas prints, and framed prints, you can set your own price beyond the standard 10%.
You can also join in their affiliate program where you can earn an additional 10% on sales that you refer.
Kite.Ly is another popular print-on-demand solution that allows you to sell merchandise from your website using your original artworks.
So, you need to have a website to be able to use their services, which is also a good thing since as an artist and a business owner , you really need to invest on your website.
With ArtPal, you can create your gallery and start selling your art for free.
You don’t have to pay membership fees, and they also don’t take commissions.
You can start selling your art in no time. Whether you are an artist, a collector, a gallery, or someone who has artworks to sell, you can sign up on ArtPal and sell your art on their platform.
They also offer print on demand solutions so you can sell more, without working more hours.
Again, signing up is just free and easy. Check them out here .
Any product and design imaginable can be actualized with the help of Zazzle, one of the world’s on-demand online marketplaces.
Like the rest of the print-on-demand platforms, they also offer an affiliate program to increase your chances of earning.
And the wonderful thing about them is that they give their artists freedom when it comes to their desired royalty percentage.
As an artist on their platform, you can choose a royalty rate from 5% to 99% by increasing the price of your product so you can enjoy your desired percentage.
Do you want to try them out? Click here to check how their platform works.
11. Creative Market
With more than 6 million members to date, Creative Market is undeniably one of the world’s favorite marketplaces for design.
There are two ways to earn on their platform: you can open your shop to sell your art, or be an affiliate to earn a 10% commission on all new customer orders.
By opening your shop, you can set your own price on all the products that you sell and take home 70% for each sale.
Creative Market is passionate about giving the power to the creators.
12. This is a Limited Edition
If you’d love to sell your art to a commercial audience , then This is a Limited Edition is a great avenue for you to start your art business ventures.
Works of famous artists like Audrey Kawasaki, Jon Burgerman, and Mode 2 are also featured on this site.
However, unlike other platforms, This is a Limited Edition is strict with their vetting process for artists.
You can start your journey with them by sending a query.
Sites to Sell Your Artworks or Art Prints Online
13. amazon art.

I’m sure you are cognizant about Amazon but have you heard about Amazon Art?
Well, it was launched in 2013 to help artists all around the world widen their reach and increase their sales as an artist.
Amazon Art supports the selling of paintings, drawings, prints, and mixed media.
With Amazon’s good image and its massive global scope , there’s really a huge potential of earning a lot and extending your reach by signing up as a seller on Amazon Art.
Etsy is certainly one of the most popular sites for an artist to make money with their craft.
Although it’s well-known as a go-to online store for handmade products like jewelry, home decors, and other one-of-a-kind pieces, Etsy is also a haven for artists to sell their prints, paintings, drawings and illustrations.
Anyone can sell on Etsy without having to worry about recurring monthly fees.
You will just pay $.015 for every listing, which will be active for 4 months or until they are sold.
For every sale that you make, there is also a 5% transaction fee and a PayPal fee.
15. eBay Collective
If Amazon has Amazon Art, eBay also has eBay Collective .
However, unlike the former, artists can sell 3D arts like sculptures on eBay Collective.
Artists can also choose to auction their artworks instead of selling them at a fixed price.
Wrapping It Up!
Apart from selling on these sites, y ou should also make your own website.
Besides, you should first invest in your site before selling on other platforms.
Your site won’t j ust serve as your store, it can also be your portfolio allowing you to widen your reach and receive passive inquiries and custom orders from anywhere in the world.
What can you say about this article? Let me feel your presence by sharing your comments and suggestions below. I’d love to hear your thoughts out.
Looking For More?
Feel free to check out these other articles about art:
- Top 5 Reasons Why You Need to Hire Freelancers for Your Art Business
- How to Write an Artist Statement That Will Capture Your Audience
- Art Exhibition Checklist: Tips on How to Make Your First Art Show a Success

Patrick Redmond
Related articles.
How to Sell on Redbubble
Sell Your Art Online For Free

- Join for Free

7 Websites to Sell Your Art Online
- by Ingrid Constant @inuin
Learn about the pros and cons of popular art selling sites for different creative disciplines
If you are an arts, design, illustration or craft professional, you will surely know that it is a good idea to improve your sales method. In addition to having a sales strategy on your social networks, promoting your pieces on a specialized site could be of help to you.
We compiled some popular websites that you can explore to decide if they fit your sales needs.
Fine arts websites
Saatchi art.
One of the most famous virtual art galleries and accompanied by great prestige. You will find an audience specifically interested in acquiring art. The price range of the pieces goes from 500 to more than 10,000 USD, with artists from practically all over the world.
What to consider: The site that takes a commission of more than 30% for each of your sales, but they will take care of your shipping processes.
Exclusive content for registered users.
Recommended courses.

Painting in Procreate: Reimagine Your Surroundings
A course by Mikko Eerola
Learn to use the digital tools of Procreate to turn inspiration from the world around you into captivating digital illustrations on your iPad

Watercolor Urban Illustration: Portray your City
A course by Urban Anna
Master fineliner and watercolor to create captivating shop front illustrations. Learn perspective, shading and breathe life into your artwork.
- 100% ( 35 )

Portrait Sketchbooking: Explore the Human Face
A course by Gabriela Niko
Discover the fundamentals of portraiture by learning to draw facial features and tracking your progress in a sketchbook
- 95% ( 2.6K )
Get Domestika's news delivered to your inbox
- Follow Domestika
Enjoy more than 1000 Free courses for creatives
Join the largest community of creatives
10 Websites for Selling Art Online
The best places to sell your artwork online to support your creative business.

Back in the day, artists were pretty limited in how, when, and where they could sell their art. There were no websites for selling art online. If you wanted to get your art into art lovers’ hands, you had to find a way to get to them in person—whether at dedicated original art galleries, impromptu street sales, or by organizing art fairs.
But thanks to the internet, it’s never been easier for artists to share their work and sell art online to enthusiasts across the globe – at this point, it’s like starting your own business .
But how, exactly, do you do that? Let’s look at some of the best websites for selling art – so you can move your business online .
You can’t talk about sites to sell art online without mentioning Etsy . Launched in 2005, this mega-popular online marketplace has become the go-to spot for crafters, designers, painters, and artists of all kinds to showcase their work, connect with potential customers and sell their art online.
Etsy’s popularity is both the biggest draw and the biggest challenge for artists. Its online marketplace gives you exposure to a huge global audience of craft and art lovers—one of the largest audiences on the internet. On the flip side, because it’s one of the most popular websites to sell art, it also has one of the largest groups of independent artists (established and emerging artists alike!) trying to make a living off their work, which can make it hard to break through and get your art in front of the right people online.
How to Sell Art on Etsy:

To sell your art on Etsy, you’ll need to create an Etsy shop, which acts as your own online store for showcasing your art. Once you’ve created your shop, you can list your products (make sure to include high-quality photos!), start marketing, and making sales. Luckily, Etsy has a variety of tools to help you get your art in front of the right audience.
In terms of fees, Etsy charges a nominal listing fee. If your art sells, you’ll pay a 5% transaction fee and a 3% + $0.25 payment processing fee. There are also additional advertising fees if you want to promote your products on the Etsy platform or off-site.
These days, people buy just about everything on Amazon—and that includes art.
Depending on the type of art you’re selling, the world’s largest online retailer has a variety of opportunities to start selling art online, including Amazon Handmade , which features homemade, crafted items. Plus, there’s an entire section dedicated to fine art , featuring one-of-a-kind paintings, drawings, watercolors, and photographs from partner artists.
How to Sell Art on Amazon:

Amazon has different fee structures based on where and how you want to sell your products.
With Amazon Fine Art, you’ll need to get approval through Amazon. Once approved, you’ll pay $0.99 per unit sale and a referral fee of between 5 and 20% based on the total cost. You can get a full breakdown of fees on Amazon’s seller pricing page .
If you want to sell your art through Amazon Handmade , referral fees are 15% per sale (listing your art is free).

Fine Art America
If you’re looking for versatility, consider online art marketplace Fine Art America , one of the world’s largest online art marketplaces. Fine Art America combines a more traditional gallery model with extensive print-on-demand offerings. Whether you want to sell your original artwork online or give people the option to have your art transformed into an art print, T-shirt, an iPhone case, or a greeting card, they’ve got you covered.
How to Sell Art on Fine Art America:

The steps to selling art on Fine Art America are as follows:
- Open an account
- Upload photos of your artwork
- Choose which products to feature
- Set your prices and you’re ready to go
In terms of pricing, Fine Art America sets a base price for each product. Then, you set a markup, which you get to keep when the product sells. When you sell digital downloads, you get to keep 100% of your asking price. Fine Art America asks you to add a 30% markup, which they keep as a commission. And if you make a sale on an original piece of work? You get to keep 100% of the sale.
Saatchi Art
If exposure is what you’re after, Saatchi Art might be the place for you. The online art gallery and marketplace has a huge audience. Their website gets approximately 12 million page views and 1.6 million visitors each month, and they have almost 500,000 followers on Facebook and over 650,000 on Instagram . Saatchi Art also has a global audience—and can help you sell art online on a global scale. To date, the platform has sold to collectors in over 80 countries around the world.
How to Sell Art on Saatchi Art:

To get started selling on the Saatchi Art online art gallery, you just create a profile, then photograph and upload your artwork. When you sell a piece of work, all you have to do is package it. Saatchi Art handles the shipping and takes a 35% commission on the sale.
For more on selling your artwork online through Saatchi Art, check out their Artist’s Handbook .
Related Articles
If you’ve always dreamed of your art lining the walls of a high-end gallery, you might want to consider selling on UGallery . Its selection of paintings, illustrations, sculptures, prints, and photos are carefully curated to appeal to true art enthusiasts and art collectors. This online art market/carefully curated art gallery is also committed to showcasing new, exciting art. So in order to keep things new and interesting, they only exhibit art from emerging and mid-level artists—and that art must be original and exclusive to the platform. Basically, UGallery is looking to recreate the experience of visiting and shopping at a high-end art gallery—just in the digital space instead of in a physical location.
How to Sell Art on UGallery:
UGallery has a highly selective application process . To get started, artists have to submit digital copies of their art along with an artist statement, a completed application, and a $5 application fee. If you’re approved to exhibit at UGallery, they’ll take care of marketing your art to their audience. If you make a sale through UGallery, you’ll split the sale 50/50. Their team will send you a custom box to package your artwork for the buyer and cover all packaging and shipping costs.
Not every artist uses websites to sell art. Sometimes, if you want to make a living off of your artwork, the best thing you can do is to take things into your own hands.
And that means creating your own website and selling art online yourself.
Shopify is an e-commerce platform that makes it easy to sell art online. With Shopify, you can easily build a beautiful, easy-to-navigate e-commerce website to showcase your work (whether that’s art prints, print-on-demand products, crafts, or other types of artwork) to potential buyers and drive revenue for your business. Shopify also comes equipped with a host of features (including website templates and a suite of marketing tools) that make it easy to get your shop up and running.
How to Sell Art on Shopify:

To build and host your art shop, you’ll pay a monthly subscription fee that ranges from $29 (for the basic plan) to $299 (for a more advanced setup). You’ll also need to set up a way for your customers to pay when they buy your art. If you use Shopify Payments, there are no transaction fees—but if you choose to use an external payment gateway, transaction fees range from 0.5 to 2%.
Want to give Shopify a try but aren’t sure you’re ready to commit for the long term? The e-commerce platform offers a free 90-day trial, so if you want to try building a website and selling your artwork on your own, you can do it—risk-free and at no cost.
If you’ve ever walked down the halls of a large, upscale corporate building, chances are you’ve walked by at least a few paintings. And if you’ve ever envisioned your art lining those hallways, you’ll want to check out TurningArt . This service rents and sells art to commercial clients, as well as coordinates original commissions.
How to Sell Art on TurningArt:

There are 3 ways to drive revenue through TurningArt :
- Leasing: The artist earns a percentage of the artwork’s price every month it’s leased
- Sales: The artist earns a commission when they make a sale
- Commissions: The client commissions an artist for a specific project
The commission structure for TurningArt varies. For example, if an original work is sold, artists get 60% of the sale—but if a canvas print is sold, artists receive only 20%. For more on TurningArt’s pricing structure, check out the FAQ pages for the Partner Artist Program and the Affiliate Artist Program .
Want to showcase, sell, and share your artwork, all in one place? Try Pixpa —an easy to use, no-code website building platform. Pixpa empowers artists to easily build and manage their online portfolios, thanks to 150 responsive templates to choose from, and built-in features like an online store, blog, and client galleries.
How to Sell Art on Pixpa:
Pixpa offers a 15-day trial, which is a great way to get familiar with the website builder and check out the templates available. However, once your trial ends, you’ll need to upgrade to a paid plan.
Although the basic plan is approximately $8/month (and drops as low as $5/month if you pay every 2 years), it doesn’t support the online store feature. To sell your art online, you need to upgrade to their Creator plan, which starts at about $16/month.
Similar to Shopify, Pixpa doesn’t charge any commissions on your sales. You take home everything you earn, although keep in mind that standard translation fees still apply for payment gateways like Stripe and Paypal. For a breakdown of what Pixpa’s plans offer, check out their pricing page .
If you want to see your art plastered on a huge variety of products, you’d be hard-pressed to find a better partner than Society6 . This print-on-demand powerhouse has one of the largest product assortments in the industry, enabling customers to explore your art through a huge variety of categories, including furniture, tech, home decor, wall art, art prints, and apparel.
How to Sell Art on Society6:

To start selling your art on Society6 , you’ll need to create an account and upload your art to your artist’s shop. From there, you can choose which categories you want to enable and feature your art. For example, you might have one design that would look perfect on apparel, wall art, and phone cases and another that would work best for furniture. Once you’ve chosen your categories, buyers can choose which print-on-demand items they want to purchase.
The good news? Society6 is one of the easier places to sell art online. They take care of marketing, fulfillment, printing, and shipping. The bad news? Their print-on-demand model isn’t the most lucrative. Artists make just 10% of every sale. However, there are additional ways to drive revenue (including an affiliate program ), and opportunities to set higher markups for art prints, framed prints, and canvas prints.

Zazzle is another major player in the print-on-demand world. Similar to Society6, Zazzle has a huge variety of products where you can feature your art. Currently, the platform has over 1,500 blank product types. But unlike Society6, Zazzle allows you to set your own royalty rate, which can help you earn more per sale.
How to Sell Art on Zazzle:
To become a Zazzle designer , all you have to do is upload your art, choose your products, and put them up for sale on the marketplace. Zazzle takes care of the rest, including printing, shipping, and customer service.
As mentioned, Zazzle allows you to set your own royalty rates. You can set your rate anywhere from 5 to 99%; then, Zazzle will adjust the product price accordingly.
Obviously, there are benefits to being able to set your own commission rate for online sales—namely, that you can earn more per sale. But because you’re passing on that rate to your potential customers, it’s important not to set it too high. Otherwise, it can be hard to drive sales in the Zazzle marketplace, especially when other artists are offering similar designs or products at a lower price.
FAQs on Where to Sell Your Art Online
Still have questions about how to sell your art online? We’ve got you covered. Let’s take a look at a few frequently asked questions about selling art online (and, more importantly, the answers to those questions):
What Are Some of the Best Places for Beginners to Sell Their Art Online?
If you’re just starting out your career selling art online, you want whatever sites you work with to make it as simple as possible to sell your art. When considering the best websites to sell art for beginners, some things you’ll want to look for include:
- An online platform that makes it easy to upload and showcase your work
- A large, engaged audience of art enthusiasts
- Reasonable fee/cost structure
- Different ways to make money
- Customer support
While the “best” place to sell your art online will depend on a variety of factors, in general, as a beginner, the larger online marketplaces (like Etsy) and print-on-demand service websites (like Society6) are a great place to start. These sites have a high volume of traffic, which will help you get your work out to a larger audience. They’re also generally pretty user-friendly; the online platforms are easy to navigate, even if you’re not the most tech-savvy—and if you run into issues, they typically have a customer support team to help you troubleshoot. Also, larger sites generally have different ways to drive revenue within the site (like investing in advertising on Etsy or putting your art on a wider variety of products on Society6)—which can help you make more money.

Are There Any Places for Artists to Sell Their Art Online for Completely Free?
As the old saying goes, nothing in life is free—and that includes selling your art. If you want to showcase your art on online art storefronts, marketplaces, or online galleries there are going to be costs involved—whether those are upfront costs (like membership fees or listing fees), costs once you make a sale (like commissions), or a combination of both. So, in other words, none of these platforms are completely free.
If you’re concerned about costs, consider going with online platforms that don’t charge until you make a sale (like many of the platforms on this list, including Zazzle, UGallery, and TurningArt). That way, you only pay money when you make money.
I Need to Sell My Original Artwork Quickly. What Are Some Ways to Sell Pieces Online—and Sell Them Fast?
Similarly to costs, when it comes to the online art industry, there are no “get rich quick” schemes. If you want to consistently sell your art, you need to invest in promoting it and getting it in front of the right people—and the better you do that, the faster and more easily you’ll be able to sell your art.
How you successfully promote and sell your art is up to you; you can focus on building a social media following—and then direct your followers to purchase art on your own website. Or you can build an Etsy shop and invest in their advertising program to extend your reach and get your art in front of the right buyers. But whatever route you decide to take, be patient; it can take time to get traction selling your art online. But once the ball is rolling, it can have a snowball effect—and you just may find that you’re selling pieces faster than you can create them.
Get Out There and Use These Sites to Make Money Selling Art Online
As an artist, your top priority is to create. And with these sites to sell artwork, you can find new customers and drive revenue for your business—which will give you the financial stability you need to continue to do so. So all that’s left for you to do? Get out there and use one of these sites to sell original artwork; you’ll transition your work online and become an art powerhouse before you know it!
This post was updated in October 2023.

Written by Deanna deBara , Freelance Contributor
Posted on December 2, 2020
Freshly picked for you

Thanks for subscribing to the FreshBooks Blog Newsletter.
Expect the first one to arrive in your inbox in the next two weeks. Happy reading!
24 Best Places to Sell Art Online With Minimal Fees

Nikki Fiedler
January 18, 2024
[show_reviewed_by_link]
Darren DeMatas
In addition to receiving commissions generated through affiliate marketing, we are able to fund our independent research and reviews at no extra cost to our readers. Learn more.
There’s no shortage of online platforms to move your creative genius and make money through online art sales . Many art sites get your work out there quickly, providing a good option for artists looking to take their work to the world.

As you grow your brand awareness and online business, consider listing your works on specialist art marketplaces . Online magazines and art galleries, like Azucar Gallery , can be great for exposure, but you need a sales component to complete the sale. Listing your art on e-commerce websites allows for direct sales.
Your Own Website
The most obvious platform to promote your art is your personal website. Building from scratch can be hard work because you need to secure a domain name, choose an ecommerce platform , and set up your products .

However, there are many platforms, like Shopify , where you can make professional-quality websites within a few hours. Running your own online shop, such as a Shopify Store , means you’ll save on commission fees. But you’ll have to hustle hard on advertising to build brand awareness, grow your email list or list of buyers, and handle the full customer experience.
Use social media marketing to guide your existing fan base into viewing your fine artwork online.
Competition on the popular online retailer is fierce nowadays, but it has a large market share. Before you set up shop, you might want to check out 10 Amazon selling tips to boost your art sales .

Amazon Handmade is one of the online craft platforms specifically for artisans to sell their crafts online. This platform for artists waives the Professional selling account (usually $39.99 per month) for accepted artists. Creating a shop is free, and upon a sale, Amazon Handmade deducts a 15% referral fee. There are no other listing or payment processing fees.
You can use Fulfillment by Amazon (FBA) to store products in Amazon warehousing centers that they will pick, pack, ship, and provide customer service for.
Since it was established in 1995, eBay has become one of the most popular e-commerce marketplaces worldwide, connecting an audience of potential buyers and online sellers across the globe.

If you’re a casual seller, it’s free to list your art on eBay Art . If you list over 250 items per month, then you pay a $0.35 insertion fee per listing. When your art sells, there is an art commission of 5% on the total sale, plus $0.30 per order.
Etsy
Etsy is legit up there as one of the most incredible craft marketplaces for handmade products. It’s free for anyone to create a storefront and sell their handmade goods and craft products.

That said, competition is intense on Etsy, especially for printables and digital downloads , jewelry, and hair accessories. You’ll have to put in a real hustle to promote your store. But there aren’t many craft sites like this one.
Etsy’s fees are typically lower than what you’d pay on Amazon or eBay. List your first item for $0.20. Pay transactions, commission, payment processing, and any off-site advertising fees on sales. Plus, you’ll get your money transferred to you immediately after the sale. With eBay and Amazon, you’ll have to wait until the monthly payment date.
Sell on Facebook Marketplace or create a full-fledged online shop from within the social media platform. If you’re just getting started, you can create a marketplace listing for your art directly in Facebook. Choosing the right category for your art will help people find it. For example, Facebook marketplace has a category for Posters, Prints & Paintings.

You can also use your existing Facebook or Instagram account to create a shop directly on your Facebook page or Instagram profile. If you already have a separate website or another Internet store, adding Facebook as a sales channel can help you reach a larger customer base.
Instagram is a common way today’s generation shops online and how you can sell physical goods without having your own website. So it makes sense to have an online art store on the platform.

With over 2.3 billion monthly active users worldwide and 130 million users per month clicking on shopping posts , listing products on this site could be a game changer. Instagram Shop activates more sales by removing any unnecessary steps before a customer makes a purchase. When you use shoppable posts, you make it easy for customers to buy your work.
A business account is free. You can use this to set up an Instagram Shop without the cost of maintaining a separate ecommerce website . Your profile then becomes the main landing page for your art business. Work between Insta and Facebook under the parent company, Meta.
This social media platform allows users to share images and videos. It has 445 million active users (86 million in the United States), and it’s rapidly growing. Create an account, link your own online store to Pinterest, and start product pinning to reach a huge audience of potential art buyers.

You won’t pay a listing fee or other upfront costs when selling on Pinterest. However, there are a few things you’ll need to foot the bill for, such as ads and shipping. With ads, you’ll pay based on how much you spend on promoting your products. Shipping costs will vary depending on the product and the delivery destination.
Supporting independent artists, Artfinder allows shoppers to purchase directly from an artist.

The site’s worldwide audience of art buyers includes over 500,000 art lovers, and the community of selling artists receives exclusive benefits and discounts. Artfinder also has dedicated marketing tools to support business growth.
Commission rates and sales insights depend on the monthly Seller Plan subscription . Factors include:
- number of listed artworks
- monthly charge or commission
- creative works with limited edition prints
- site search tags
- promo and discount packages
- other marketing and profit insights.
Focusing on modern artworks for sale, Artsper bills itself as Europe’s leading online contemporary art marketplace.

You can boost your art’s visibility and sales by tapping into their:
- community of art collectors in over 130 countries
- substantial reach
- unlimited instant sales
- marketing tools and gallery profile pages.
Freelance artists’ rates are free or €39. You get two months free with annual subscriptions.
Online Gallery
This online art powerhouse uses a freemium model, showcasing over 30,000 artworks, and comprises a community of over 2,000 artists.

Choose your subscription plan (free or $10.79 per month), then create a professional portfolio page in 4 simple steps with this fast-growing digital art marketplace.
For an extra $10.79 (the Premium membership), you get a complete website with your own URL besides a profile. Choose from 3 available themes and use your own logo. The website automatically adjusts when you change your profile, so updates won’t cost you any time. You can have your art participate in an auction, write unlimited blog posts, and sell unlimited art directly from your profile page. You’ll enjoy secure online payment and both artist and buy protection.
There’s no commission on sold work with Premium Plans but a 25% commission fee for Basic Plan subscriptions. If you continue to sell more than five pieces of art, you’ll likely end up needing a Premium subscription.

Make money doing whatever type of artwork that you love, as Zazzle helps you monetize your creativity and designs by providing:
- advertising both onsite and offsite
- “Name Your Royalty” program, specifying your artist margin on each sale
- 100% of the fulfillment and customer service for you.
You can get:
- started at no cost, without monthly fees
- paid through PayPal or check.

This is an absolutely amazing site to sell on because it:
- facilitates a connection between artists and collectors through specialized listings
- has a 0% seller commission.
Upload your original artwork, then collectors can make requests for a specific piece. To start selling art, create a free listing by providing the following information:
- Title of the artwork
- Year created
- Frame details – Is it framed? Wood or metal framing? Does it have glass or plexiglass?
- Signature info (hand, plate, or estate signed, not signed)
Upload product photos of your masterpieces, then proceed with the rest of the on-screen instructions to complete your listing. Repeat for all the artwork you want to list.
Put your art prints on one-of-a-kind collectible metal posters. The Displate is a sturdy, magnet-mountable, durable modern canvas that can be set up in 20 seconds without power tools, wall damage, or customer frustration.

The company delivers to 46 countries, with 2.4 million social media fans and over 42,000 artists onboard. Submit your online portfolio to open your own free shop. Then, upload your designs, and Displate will promote your original art to 50 million people per month.
- commission on original pieces sold, fees, and discounting applies
- 50% commission of the total sale value by sharing the links to your artwork on social media.
Fine Art America
Fine artists looking for a spot to sell their original artwork on canvas or framed prints trust Fine Art America.

Power players sell art, prints, lifestyle products, and original items here, grow a fan base and use its fulfillment center. This online art industry baller also provides artists and photographers with sales and marketing tools to scale their careers. These tools allow art sellers to:
- set up branded web stores
- sell prints on Facebook
- create e-newsletters and more.
Choose a membership level and set your own art markup selling price on top of the base manufacturing cost.
Fine Art America has:
- 14 distribution centers in 5 countries to get items to customers in the fastest way.
- solely uses its site to sell products, so no integration methods are available.
Jose Art Gallery

This gallery service showcases:
- fine paintings
- popular graphics
- internet-based art
- photography.
Artists can register online in just one click to become a member of the Jose Gallery community. Fill in your profile, get verified, upload your art, and start selling online. They’ll take a 35% gallery commission.
Designed by artists, Society6’s artwork for sale primarily focuses on a wide range of home decor. Their global community includes over 450,000 creatives from over 170 countries.

If you’re a creator in the interior beautifying sector, you can lay your creative vision down on:
- welcome mats
- shower curtains
- acrylic trays, and a wide variety of other items!
Sellers that use Society6 determine how much they sell their creations for and how much profit they make.
When you sell products on Society6, you use their site. Therefore, no integration is available.
If you’re looking for free online galleries, then Art Pal is the artist stop. You don’t pay membership or commission fees.

Use it to list your art and buy art online from over 263,000 other artists. You can:
- start selling in minutes with unlimited space to sell all of your art
- sell any type of art, from artwork and photography to sculptures, handmade jewelry, crafts, and more
- get paid instantly with many payment options.
They also have a print-on-demand service that makes it easy to sell custom prints with framing. As a bonus, they’ve got materials to help you learn marketing so you can make more online sales.
This is where dealers, artists, galleries, and collectors buy and sell art with no commission charge. You keep 100% of the price for the artwork sold.

Artplode charges a flat fee of $60 to advertise each piece on the site.
You control all sale aspects of your art, including:
- the ad information and photos
- contact with interested buyers
- purchasing details and arranging payment
- sending the work to the buyer.
Design by Humans

It’s all about wearable art here, with print on demand clothing products like:
- sweatshirts
- phone cases.
Add your custom artwork and create a huge following thanks to the order printing services of this team.
As for integration access, the site can be linked up to your store and helps to promote creatives by using a Featured Artists section.
For payment, Design by Humans sets a schedule of royalties that the sellers earn.

This leading professional photography and print on demand site allows photographers and graphic designs to produce their art on:
They also offer framing options. Pro Prints charges by product and is ideal for artists and designers who are searching for printing and packing help for individual jobs as opposed to an online marketplace.
Items are created and shipped from Longmont, Colorado, and individuals can pick up their orders directly from the manufacturing and fulfillment area.
Redbubble is a well-known printing website option with a world audience.

Customers discover and buy products that feature the designs that you’ve uploaded to products in your shop. Redbubble manufactures and ships the items to order. Choose from over 70 unique, high-quality products like:
With a massive following of potential customers and a huge variety of merch, Redbubble draws both creators of artworks and collectors.
You earn a percentage for each sale that is successfully shipped. This doesn’t:
- include any applied sales or discounts
- take account fees into consideration.
Your payment is calculated when you add an artist margin (or markup) to Redbubble’s base service fee.
In order to make the selling and shipping process a quick one, Redbubble uses third-party printers across the globe and fulfills orders at locations closest to the purchaser’s location.
Saatchi Art
This online art marketplace represents artists from over 110 countries. Saatchi does more than sell art. They also organize art fairs and curator groups and actively promote artists.

This world-leading online art gallery is:
- one of the original art galleries for artists
- a brilliant choice for new and upcoming creators looking for top-rate exposure.
Because of the volume of artists, it’s difficult to get visibility. That’s where building relationships with the curating team comes in handy. If you become a featured artist at Saatchi, it can catapult your brand and global audience.
What to know about getting paid:
- Free to create an account
- Shipping handled but you pay for packaging
- Receive 60% on every artwork sold
- Non-exclusive policy
- Secure online payments and financial protection
Set up a free, fully customizable store through Artist Shops, powered by Threadless.

You choose either controlling the sales price or letting Threadless manage pricing and promotions for you. You make a margin profit on the difference between the retail and product costs.
For over 20 years, this site has partnered with hundreds of thousands of artisans to get their creative work on a range of products like:
- graphic designed t-shirts
- accessories and headwear

With this site, your work will be incorporated into collections the company creates for clients, including:
- commercial properties
- healthcare institutions
- private residences.
They take care of all the marketing, sales, and logistics detail and also have an Artist Services team to help you with anything else you might need.
You can earn revenue through:
- commissions
- listing originals.
Compensation depends on if you are an Affiliated Artist or a Partner Artist .
What Is The Easiest Way To Sell Art Online?
Ultimately, it’s easier to use a marketplace. List your artwork across multiple marketplaces for greater exposure.
There’s nothing wrong with building a store to sell artwork online, but it takes more time and effort to get established than an existing platform. You’ll have to work harder to create traffic to your site. To increase potential sales, you’ll want to increase both organic traffic and direct traffic.
When you first get started selling art online, working with online marketplaces is easier. They’ve already got an established presence, which helps with publicity and reach. Art buyers are likely already familiar with many of these platforms for artists, so it’s a matter of letting people know your art is available on these sites.
About the author

Leave a Comment
Featured on.

Join 30K+ entrepreneurs already learning ecommerce.
Ecommerce ceo.
Partner With Us
Editorial Policy
Review Guidelines
Terms Of Use
Affiliate Disclosure
Privacy Policy
Guides & Resources
Ecommerce Learning Center
How To Start An Ecommerce Business
How To Make Money Online
What To Sell Online
How To Sell On Amazon
Online Business Ideas
Best Ecommerce Tools
Ecommerce Platforms
Fulfillment Services
Shipping Software
Inventory Management
Print On Demand
Dropshipping Companies
Amazon Research
Online Course Platforms
POS Systems
3PL Companies
BigCommerce
Shopify vs BigCommerce
2800 N 6th Street #5156 St. Augustine, FL 32084 United States
(904) 458-7077
Copyright © 2024 - Mission Demand LLC . All rights reserved.
Exclusive Member of Mediavine Finance
Art Marketing
A complete guide for artists
The 15 Best Websites to Sell Art Online: A Comprehensive Guide for Artists
With the rise of e-commerce, selling art online has never been easier. But with so many options available, it can be overwhelming to know where to start. In this blog post, we’ll explore the 15 best websites to sell art online, taking into account factors such as fees, ease of use, and exposure to potential buyers.
Saatchi Art ArtPal ArtFinder Artsy Redbubble Society6 FineArtAmerica Artnet Artspace Zatista Imagekind Artmajeur ArtFire Artplode ArtWanted When choosing a website to sell your art, it’s important to consider the fees and commission rates as well as the website’s traffic and reputation. Some websites like Saatchi Art and Artspace, have a high reputation and a high number of visitors but also have a high commission rate. Other websites such as Redbubble and Society6 are more oriented to digital art, designs, and prints and have a lower commission rate.
Remember to include keywords like “best websites to sell art online”, “online art marketplaces” and “selling art online” in your post to increase the visibility of your post on search engines. The best website to sell your art will depend on your specific needs as an artist. Take the time to research and compare the options, and choose the one that will give you the best exposure and the most favorable terms for selling your art.
Share this:
Leave a comment cancel reply.

- Already have a WordPress.com account? Log in now.
- Subscribe Subscribed
- Copy shortlink
- Report this content
- View post in Reader
- Manage subscriptions
- Collapse this bar
How to Sell Your Art Online
There is now a multitude of options for selling your art, many more than existed a few decades ago thanks to the Internet.

You have to troubleshoot which venue is most appropriate for you and your work, as different venues will provide different results.
Experiment with different venues and platforms, and see what works and what doesn’t.
So much of selling your art online is doing the research to see what is the best fit for you, and then troubleshooting until you find a good work flow.

This video explains how visual artists can effectively sell their artwork online.

However, with so many options out there for selling artwork online, how can you know what is the best one for you?
- Buy Art from Artists (11 seconds)
- 1 min. version (finding your audience)
- 8 min. version (summary)
- 75 min. version (Prof Lieu)
- 40 min. version (2023 Guide)
- 90 min. version (Prof Lieu lecture for Nevada Arts Council)
packaging & Shipping
- 53 min. video (packaging & shipping)
- 1 min. short (packing slips)
- 1 min. short (packaging step by step)
- 1 min. short (shipping labels, post office)
Find out in this video all of the essential logistics for setting up to sell your artwork online.
Topics covered include the various platforms for selling, how to set up your shop, shipping details, marketing strategies, presenting your artwork to maximize visibility, and more.

Discussion led by Art Prof Clara Lieu .
Video Walkthrough
- Payment options
- Shop & website
- Separating sections
- Artist website video
- Choosing a platform
- Shop statistics
- Artwork sizes
- Signing your art
- Archival materials
- Descriptions
- Tough sells
- Stock as many items
- Where to print
- Considering other formats
- Pricing art video
- Photographing your work
- What’s likely to sell
- Accurate photographs
- Showing sizes accurately
- Consistency with style
- Shop policies
- Save all receipts
- Shipping supplies
- Postage prices
- Shipping profiles
- Printing shipping labels
- Tracking numbers
- Customer service
- Damaged items
- Social media for artists video
- Shop reviews
- Negative comments

A large factor of selling art is marketing and promotion, so keep in mind that creating work to sell is just half of the process. I’ve seen artists with mediocre work doing extremely well because their work was aggressively promoted the right way.
Prof Lieu’s Tips

Often people will buy things simply because they have a personal connection with a place. If someone is from Utah, and let’s say Cottonwood Canyon is where they got engaged, it’s almost like the painting technique doesn’t matter to the customer.

An artist told me someone bought one of their cat paintings at an art fair, the person said the painting looked exactly like her cat, so that’s why she bought it.
Often we assume that people buy artwork because it’s really well done, but more often than not, it’s for another reason. I’ve had people buy artwork because it was a specific color that matched their living room couch!

I’ve also seen some really wonderful artists who haven’t done as well because their work wasn’t marketed appropriately.
Below I list the main venues and opportunities for selling your work. Some of the venues below have a highly selective screening process, while others are open to anyone.

1. Selling online
Now with sites like Etsy and Ebay , selling artwork online is more popular than ever. When you sell online, you have 100% control over every facet of the selling process, in terms of setting prices, what you sell, etc.
This can be great to have so much control over the process, but it also creates a lot of work for you.

I’ve had an online shop for my fine arts work for several years now and enjoy having the additional income.
I’m not about to quit my day job any time soon, but I’ve had the chance to sell a lot of artwork that would otherwise be sitting in a closet collecting dust.
I sell drawings, hand-pulled prints, digital prints, and sculpture, with the drawings and hand-pulled prints being the most popular items.

The majority of my work that I’ve sold on my online shop has been in the $30-$200 range. I’m able to make a profit based on selling high volumes of relatively inexpensive pieces.
This seems to work well online as most people shopping online aren’t ready or prepared to plunk down several thousand dollars for a piece of art.

The most challenging part of selling online is that most shop platforms are so saturated with artists that it’s very, very hard to get noticed. You have to do a lot of marketing and promotion for people to even know that you exist, much less make sales.
The amount of time that I spend maintaining my online shop pales in comparison to the amount of time that I spend marketing and promoting it.

2. Open studios events
Every major city will generally have annual open studios events for local artists to participate in. Generally you pay a fee to participate and then everything else is up to you.
When I was just starting out as an artist, I used to live in Jamaica Plain in Boston.

I participated every year in open studios. I didn’t have a studio in Jamaica Plain, so I opted to show my work at one of the group sites that they had for artists.
It was definitely a lot of hard work and schlepping: packaging the art, presenting everything in bins that were easy to browse through, pricing everything, etc.

Open studio events usually get a lot of traffic, and it’s wonderful to get to talk to people and other artists in person about my work -something that you miss out on when you sell online.
I priced my prints, drawings, and paintings in the $20-$90 price range and usually made about $1000 over the course of two days.

I even got two major portrait commissions later from people who saw my work at open studios. The audience is casual, mostly local people who are just browsing and making impulse purchases.
All in all, it’s a great event to do if you’re just getting started.
Like selling online, you get to control every part of the selling process at an open studios event.

3. Non-commercial art galleries
There are a lot of different kinds of non-commercial art galleries out there. There are galleries at academic institutions, artist co-op galleries, galleries at non-profit arts organizations, etc.

Generally artwork is for sale at all of these different kinds of galleries, but in most selling the work is not the main priority of these types of galleries.
Non-commercial galleries will take a smaller percentage of commission, they usually take about 30% commission whereas a commercial gallery will take a 50% commission.

As far as how much you control, at each gallery you’ll likely be working with a curator and/or gallery director who will select the work to be shown.
Prices are usually set by the artist. Non-commercial art galleries are usually (but not all the time) easier to break into for artists. Most artists get exhibitions by having connections with other artists, curators, and gallery directors.
That’s certainly the quickest and most direct way to securing an exhibition, and curators and gallery directors like to work with people who they trust and know.

However, I’ve gotten shows at non-commercial galleries just by contacting the gallery director and submitting my work to them. I once got a solo show at an artists’ co-op gallery just because I had entered one of their competitions.
I didn’t win the competition, but they liked my work and asked me to apply for a guest artist solo show.

Many artist co-op galleries require membership, in which you pay a monthly fee and are guaranteed a solo show at the gallery every two years or so.
4. Commercial art galleries
There are commercial art galleries at all different levels. There is everything from the small, local gallery to high end galleries that are at the top of the food chain in terms of selling art.

At these different kinds of galleries, clients can range from people who want a painting that will match the color of the sofa in their living room all the way to powerful clients who purchase art for their personal art collections or for the sole purpose of donating the art to a museum.

The major advantage is that a commercial gallery’s primary objective is to sell the art.
Commercial galleries have an established audience and clientele, and they will do the marketing and promotion for you, which can be an enormous advantage.

One of the drawbacks of commercial galleries is that you will probably not have much control over the kind of work that you’re showing and the prices.
At the beginning of my career before I knew better, I once got into a heated argument with a commercial gallery director over the pricing of one of my oil paintings.

Remember that commercial galleries are focused on selling, so they will sometimes exert pressure on artists to show certain kinds of work.
One of my colleagues once told me that when he wanted to switch from making his popular city paintings to something else, his dealer “had a heart attack.”

The more prestigious the gallery, the more difficult it can be to get into as an artist, and even more challenging is to get representation with a gallery.
In general, most artists get into commercial galleries (especially the high end ones) by having an artist who is represented by the gallery recommend them. Most galleries refuse to even consider unsolicited artist submissions.

Mia Rozear Blogs • Digital Magazines • Instagram Museum Collections • Websites Blogs Austin Kleon…

This video provides practical tips and important factors to consider when pricing your artwork. 1…

Shahzia Sikander Art New EnglandArt in PrintArtforumArtscope Magazine Bomb Magazine New American Paintings Printed Matter…
How to Sell Art Online in 8 Easy Steps
Want to learn how to sell art online?
Good idea! Selling art is an incredible way to make money doing what you love. People all over the world are prepared to spend on creative art prints and designs, with the global art market worth around $50 billion .
Fortunately, with all of the tools now at your fingertips, you can set up an online art store to showcase your prints and merchandise and begin accepting payments from people all over the world with ease. While a gallery showcase is still a great way to promote your works, the online market represents a huge opportunity to reach larger audiences.
Whether you’re a beginner artist just dipping your brush into some new sales avenues, or you’ve been a creative mastermind for years, here’s how you can sell your art online in 8 simple steps .
Start selling online now with Shopify

How to Sell Art Online: 8 Steps to Success
1. original or reproductions take your pick.
One of the first decisions you’ll need to make when selling artistic pieces online is where you’re going to focus your business. As an artist, you may choose to sell reproductions of your creations (like prints), curated pieces (from other artists), or originals.
Some entrepreneurs sell a combination of different art types to attract a wider audience. Your options include:
- Original works: Drawings, paintings, and other original artworks designed by you. You can sell prints and reproductions of these artworks too.
- Limited-edition prints: You might sell a certain number of prints for a limited time to generate more interest in the items.
- Custom art: These are artworks generally designed after a client commissions something from you. For instance, you might create drawings of a person’s dog or best friend. These pieces are usually one-of-a-kind.
- Merchandise: Thanks to print-on-demand companies , it’s easy to place your designs on all kinds of t-shirts, enamel pins, and more.
- Licensing: You can license certain works to other companies, like photography or illustrations designed for another brand.
- Digital downloads: Templates, desktop wallpapers, artworks people can bring at home, and other digital downloads are popular (and cheap to sell).

2. Make Your Prints
If you decide to create original works and produce prints, you’ll need to find the best way of creating your prints. Fortunately, there are a lot of options here. If you have the right printing machine at home, you can create DIY prints in high-quality inks and on all kinds of beautiful paper.
DIY printing can be a good way to keep profits high if you’re worried about spending too much as a beginner artist. If you can’t afford a professional printer at home, you can potentially use a local printing service every time someone makes an order. As order numbers increase, you can consider using printing companies online to reproduce your work in higher volumes.
Print-on-demand is another option for keeping costs low. The cool thing about print-on-demand is you can print on a lot more than just paper. Companies in the POD landscape allow you to print your works on canvases, metal, and even accessories, like bags and mugs.
3. Digitizing Your Work: Photography vs Scanning
Digitizing your art for online selling can be tough. As you may know, simply snapping a photo of your latest work might not be the perfect way to demonstrate all the details of your piece accurately. Photos can leave a shine on images or cause colors to appear a little different from their shade in person. Everything from your lighting to camera choice will impact the quality of your photos.
Here are a few tips to follow when photographing and scanning your art:
- Take multiple pictures: Take clear shots from multiple angles and zoomed-in pictures to show detail and texture. Lifestyle photos (such as your artwork on a bedroom wall) are excellent for making an emotional impact on your audience
- Edit images : Recalibrate the picture once it’s digitized using contrast, brightness, and other settings to make it look as true to life as possible. Avoid using any filters or additional features that might make customers uncertain about what they will get.
- Crop images: Remove unnecessary edges and background elements unless you’re providing a contextual shot. Make sure hands and extra props aren’t visible, as they can detract attention from your piece.

Remember to save images in the right format too. PNG images often hold onto high resolution and clarity much better than JPEG files.
Pro tip: For flat or 2D images, it’s often best to use scanning, as the scanning machine can carefully examine and upload images pixel by pixel.
4. Get the Pricing Right
Pricing is one of the toughest parts of starting your own business. Choose a price too high, and you risk scaring away customers. Price something too cheap, and you convince your audience they’re not getting the best quality -- it’s a fine balance
Pricing original art is particularly tough, as it’s difficult to place value on your skill. If you’re just getting started and don’t have many followers or fans, you might want to start with simple pricing. For instance, combine your time and labor costs with material costs and expenses. Add a small markup at the end to give yourself a profit. Once you have a better sense of demand for your art and have amassed a following, then you could consider charging a premium. Also, think about your competitors and the kind of prices they offer. Should your fees be lower or higher?
If you’re selling curated art or prints, pricing becomes a little simpler. All you need to do is take the cost of printing and add on the fees of selling and marketing the print, as well as your markup (profit). You might charge a slightly higher price for limited edition prints.
Pay attention to your competition and marketplace to see what kind of prices your customers tend to respond best to. Don’t be tempted to undervalue yourself just to attract more customers; you need to make a profit to make your endeavor worthwhile. Check out these pricing strategies to better understand how much to charge for your art prints or merchandise.
5. Create Your Online Store
It’s finally time to create and launch your online store.
You can build a store in a matter of 30 minutes with a solution like Shopify . This ecommerce site-building service comes with everything you need to showcase your art and start making profits. You can customize a theme to suit your brand image, set up a checkout page, and even add apps to help you sell your art.

Shopify's app market comes packed full of tools to make life easier for creative professionals. For instance, there are:
- Email marketing tools: These are great for keeping your customers up to date on your latest pieces, generating hype about new collections, and even providing information to clients about their previous orders.
- SEO solutions: SEO apps help with keyword research and tracking to ensure you can boost your visibility online. If you want your customers to find your art when searching for certain terms on Google, you need SEO.
- Print-on-demand apps : If you’re selling art merchandise and want to work with another printing company to mass-print your products, print-on-demand services will be a great blessing. Make sure you choose a POD service you can trust to produce high-quality products for your customers.
Shopify also has a range of free applications , like countdown timer apps if you want to create a sense of urgency and convince people to buy. Everything you need to supercharge your online store is available in the Shopify App Store .
6. Explore Additional Platforms for Online Selling
If you really want to boost your chances of getting as many sales as possible, then you’ll need to sell on more than just your own website. There are dozens of art-focused marketplaces online with pre-existing customer bases, making it easier to find potential buyers. Options include:
- Etsy : Probably the best-known site for artistic creations and crafting. Etsy is an online marketplace where you can list your art alongside other local and global creators.
- CafePress : A solution for turning your art into unique products and collectibles, CafePress helps you to unlock new formats for your art. You can also get your pieces featured in front of a huge potential audience.
- ArtFire : Similar to Etsy, Artfire is a marketplace for makers and crafters around the world. Artfire helps you capture your target audience’s attention with things like podcasts, articles, and more.
- eBay : If you’re selling one-of-a-kind creations, eBay might be a good choice for you. This is the world’s largest auction site, where people have the option to bid exactly what they think your piece is worth.
- Artfinder : Artfinder is a dedicated marketplace for curated artwork. You’ll need to apply to the site if you want to be featured. There are tons of seller plans available and various commission options to consider as well.
- UGallery : Aiming to democratize art selling, UGallery connects artists directly with collectors. This is an excellent site to consider if you’re selling one-of-a-kind pieces. The website has an application process to ensure all art sold through the site maintains a high standard.
You can also consider selling directly through social media channels like Facebook, Pinterest, and Instagram .
7. Protect Your Work
One of the toughest parts of building your brand as an artist is protecting yourself against people who would try to steal your talent. It’s common to see people online claiming that they made a particular design or even replicating an art piece to sell as a print through various websites and marketplaces. Hiring a legal team can be extremely expensive and complicated, so it’s best to be proactive and work on defending yourself from day one.
Get your major pieces copyrighted as quickly as possible, and keep an eye out for anyone who might be trying to replicate your design. It’s also important to work with reputable marketplaces and third-party sellers when distributing your art online.
The right print-on-demand companies, marketplaces, and curators will work with you to protect your art and inform you if other people attempt to claim your images as their own.

8. Market Your Art Brand
Now you’re ready to get out there and create some buzz for your art brand.
There are plenty of great ways to generate attention for your site and your creations. For instance, you could launch a social media page where you share snippets of your latest works. Instagram and Pinterest are great environments for this. Other options include:
- Run paid ad campaigns on Facebook and Google with PPC
- Invest in word-of-mouth marketing through engaging competitions and events on social media.
- Reach out to influencers and connect with the press in your industry
- Learn about SEO and improve your ranking with sites like Google naturally
- Use content marketing to drive organic traffic to your website.
- Consider offline marketing options, like participating in art shows and working with galleries to expand your reach to new audiences
Summary: How to Sell Art Online in 2023
Selling art online is a wonderful way to transform your passion into something capable of paying the bills.
Whether you choose to create custom pieces for customers around the globe, or sell prints of your images online, there are tons of ways to get started.
All you need to do is take the leap.
In summary, here are all the steps to selling art online:
- Decide whether to sell originals or reproductions
- Print your works via DIY printing or print-on-demand
- Photograph and scan art to digitize it
- Choose a price point
- Build your online art store
- Identify other places for selling your art online
- Copyright your art pieces
- Promote your art brand
What’s the best way to sell art online?
This depends on your personal preference. However, most artists say they love having their own website they can attract attention to. Building an ecommerce site with a platform like Shopify will give you a professional image and help you reach customers around the world. You can also sell through social media channels, online marketplaces, and more.
Is it profitable to sell art online?
You can definitely make a profit selling art online. The first step is making sure you choose the right pricing, taking things like time spent and materials into account. Make sure you have a good marketing strategy in place for attracting customers too.
Which art is the most profitable?
Art is a broad and subjective concept. Different people fall in love with different kinds of art. Your best bet is to start by deciding which kinds of art you’re most likely to enjoy selling. Once you’ve set up your store, you can begin to track which of your pieces seem to get the most attention from buyers. Over time, your store analytics will show you where you can focus your attention to get the most return on your investment.
Want to Learn More?
- Branding Your Ecommerce Business [A Step-by-Step Guide]
- How to Sell On Instagram: 9 Tips That Actually Work
- Test Orders Are So Important in Ecommerce. Here’s Why.
- How to Create a Powerful Marketing Funnel for Your Store

11 Top Search Engines to Optimize For in 2024
Discover 11 leading search engines of 2024. Find out where to direct your optimization efforts for maximum impact.
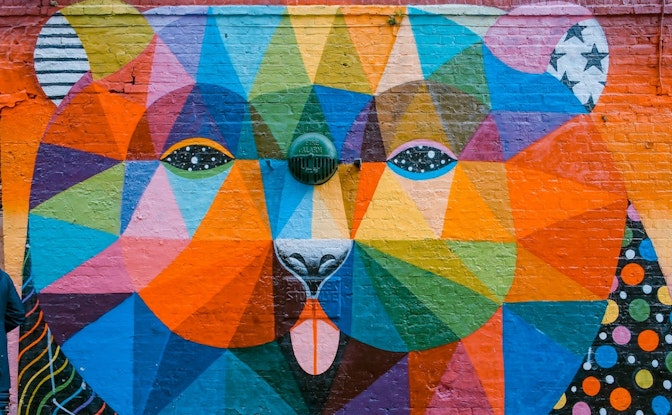
19 Color Combinations To Use In Your Campaigns
Find 19 color combinations that pop and engage. Boost your brand's appeal with these vibrant selections.
Business Ethics: Key Principles and Tips for Implementation (2024)
Business ethics shape company integrity and trust. Learn about their types and how to implement them for ethical decisi…
Oberlo uses cookies to provide necessary site functionality and improve your experience. By using our website, you agree to our privacy policy.
How to Sell Art Online & Make Money in 2023? - Complete Guide
If you’re an artist or a designer, selling your art online is one great way to earn a living doing what you love. With the global art market reaching $67.8 billion , selling art online has become an increasingly lucrative avenue for artists to sell their work and generate income. From having your own online store to marketplaces like Etsy & Creative Market, selling your art to a global audience is now easier than ever without the constraints of physical galleries or exhibitions.
The digital realm offers a diverse range of platforms and strategies that empower artists to connect directly with art enthusiasts, collectors, and potential buyers from the comfort of their studios or homes. Read along to learn the best way to sell art online, the essential strategies and tools you need, and unlock the vast potential of the online art market.
Here are 7 essential steps to help you sell art online and make money in 2023
- Register your art business
- Setting the stage for online art sales
- Showcasing your art online
- Pricing your artwork
- Online sales platform & marketplaces
- Marketing & Promoting your art online
- Building Trust & Credibility
Step #1: Register Your Art Business
Registering your art business is a crucial step in establishing a solid foundation for your artistic venture. It not only provides legal and financial benefits but also helps you build credibility, protect your intellectual property, navigate the business landscape more effectively, and lay the groundwork for long-term success.
Follow these steps to get started:
- Choose a Business Structure: Before registering your art business, determine the most suitable business structure . Common options include a sole proprietorship, partnership, limited liability company (LLC), or corporation.
- Register Your Business Name: Select a unique and memorable name for your art business and register it with the appropriate government agencies. This process typically involves conducting a name search to ensure availability and then filing the necessary documents with the local or state authorities.
- Obtain Necessary Licenses and Permits: Depending on your location and the nature of your art business, you may need to obtain specific licenses and permits . This could include a general business license, sales tax permit, or industry-specific license.
- Protect Your Intellectual Property: As an artist, protecting your intellectual property is vital. Consider copyrighting your original artworks, registering your trademarks or logos, and understanding the rights and protections afforded to artists in your jurisdiction.
Remember to research local regulations, consult with professionals when needed, and stay informed about ongoing compliance requirements to ensure your art business operates smoothly and successfully.
Step #2: setting the stage for online art sales.
Creatives and artists spend countless hours perfecting their craft, delving deep into the intricacies of color, form, and texture. While some possess extraordinary skills and hold advanced degrees, most of them find themselves lost while navigating the unfamiliar territory of business.
Hence, the best way to sell art online successfully is by understanding the factors involved in operating the business. Follow these steps:
- Assessing your Art Inventory and Target Market: Before diving into online art sales, assess your art inventory and identify your target market. Take stock of your artwork, evaluating its quality, variety, and thematic coherence. Determine the unique selling points of your art and consider the preferences of potential buyers.
- Building an Online Presence as an Artist: To succeed in selling art online, establish a robust online presence that showcases your talent and captivates potential buyers. Here are two key steps to consider:
- Creating a Professional Artist Website: Design a professional website that serves as a virtual gallery for your art. Include high-quality images, detailed descriptions, and pricing information for each artwork. Make your website visually appealing, easy to navigate, and mobile-friendly.
You can quickly build stunning artist portfolio websites on Pixpa with the help of our comprehensive suite of features tailored specifically for artists to showcase their artwork in visually captivating galleries and seamlessly integrate an online store to facilitate sales.
Christie Joyce , a professional wedding photographer, uses the ecommerce gallery feature by Pixpa to enable viewers to purchase their favourite pictures.
- Establishing a Strong Social Media Presence: Harness the power of social media platforms to reach a wider audience and build a community around your art.
Choose the platforms that align with your target markets, such as Instagram, Facebook, or Pinterest, and consistently share engaging content showcasing your artwork, behind-the-scenes glimpses, and artist insights.
Step #3: Showcasing Your Art Online
One of the primary obstacles for artists when sharing their work online is determining how to stand out from the lot. Artists can share their work on a variety of websites and social media platforms. Nonetheless, with so much art being published every day, it might be difficult to ensure that potential purchasers notice your work. Follow these tips to get your art noticed:
1. High-quality visuals
Invest in professional photography or learn techniques to capture your art in the best possible light. Ensure that the colors, textures, and details accurately convey to potential buyers.
Theresa Kao , an artist and illustrator, uses vivid and bright colours in her website built on Pixpa.
Additionally, explore digital representation options such as creating digital versions or 3D renderings of your artwork to offer a more immersive experience for online viewers.
2. Compelling art descriptions and storytelling
Art descriptions are crucial in engaging potential buyers and giving them a deeper understanding of your artwork. Craft compelling descriptions beyond mere technical details and evoke emotions or themes related to your art. Incorporate storytelling techniques that enhance the meaning and significance of your artwork, making it more memorable and enticing for potential buyers.
Step #4: Pricing Your Artwork
1. Factors to consider when determining pricing
If you have ever wondered how much money one can make selling art online , it can range anywhere from $2000 to $200,000 a month. But to start earning the big money, you first need to set up the pricing for your art. Consider the following factors when determining the pricing:
George Shubin , an urban landscape photographer, sells his work in the form of calendars, greeting cards and prints.
- Artistic Merit: Consider the quality, skill, and uniqueness of your artwork. Factors such as technique, materials used, and the level of craftsmanship can influence its value.
- Size and Complexity : Larger and more intricate pieces often command higher prices due to the additional time and resources required for their creation.
- Artistic Reputation and Experience : Your reputation as an artist, previous exhibitions, awards, and the demand for your work can influence the perceived value of your art.
- Market Demand : Research the current art market trends, analyze comparable artworks, and evaluate the demand for your art style to determine a competitive price range.
- Cost of Production : Consider the cost of materials, framing, shipping, and other expenses incurred while creating and selling your artwork.
Checkout these articles related to Art & Ecommerce
- 14 Inspiring Painter’s Websites of 2023
- 15 Top Examples of eCommerce Websites and Online Stores
- Top 25 Art Blogs for Inspiration
- How to build an eCommerce website
2. Strategies for pricing art competitively online
You can strike a balance between affordability and the value of your art by leveraging the following strategies:
- Research Comparable Artworks : Investigate the prices of similar artworks by artists of similar stature to gain insights into market standards and competitive pricing.
- Start Conservatively : If you're relatively new to selling art online, consider starting with slightly lower prices to attract buyers and build a customer base. As your reputation and demand grow, you can gradually increase your prices.
- Offer a Range of Prices : Provide a variety of price points by offering artwork in different sizes or formats. This allows you to cater to different budgets and attract more potential buyers.
Wayne Holt Chan , a photographer, has created a dedicated ‘Limited Fine Art Prints’ page on her website.
Leverage limited editions and exclusivity. By limiting the number of available copies, you create a sense of rarity and exclusivity, which can justify higher prices for these limited editions. Also, offer exclusive pieces that cannot be replicated.
This can include one-of-a-kind originals, commissioned artworks, or collaborations. By positioning these exclusive artworks at higher price points, you create a sense of prestige and desirability.
Step #5: Online Sales Platforms and Marketplaces
There are several popular platforms and marketplaces that cater specifically to artists and art enthusiasts. Here's an overview of some of these platforms:
- Your Online Store : Creating your own online store provides you with complete control over your brand, customer experience, and sales process. With your store, you can customize the design, layout, and functionalities to showcase your artwork in the best light. Additionally, having your online store allows you to establish a direct relationship with your customers and retain complete control over pricing and profit margins.
Pixpa, a popular portfolio builder and online store platform, can be an excellent choice for artists looking to create their online store. Pixpa provides various features specifically designed for artists, including customizable templates, gallery layouts , and e-commerce capabilities.
Austin Siadak , a landscape photographer, sells his spectacular expositions of nature in the form of art prints.
Other Popular Marketplaces to Sell Art Online
1. Etsy : Known for its focus on handmade and unique items, Etsy provides a vibrant marketplace for artists to sell their art, including paintings, prints, sculptures, and more.
2. eBay : As one of the largest online marketplaces, eBay offers a diverse range of art categories, providing artists with a broad audience and potential for sales.
3. Shopify : While not art-specific, Shopify allows artists to set up customizable online stores, providing complete control over the branding, presentation, and selling process.
4. Saatchi Art : A dedicated art marketplace, Saatchi Art showcases a wide range of artworks from emerging and established artists, attracting a global community of art collectors and enthusiasts.
5. Artsy : Artsy is an online platform that connects artists, galleries, and collectors. It offers an extensive range of artworks and allows artists to exhibit and sell them.
- Merchandise : Artists can sell art through merchandising by leveraging their creative designs and concepts to create a range of merchandise items that resonate with their audience. They can start by identifying popular or iconic pieces of their artwork that can be adapted into various products such as prints, posters, t-shirts, hoodies, mugs, phone cases, and more.
These items can be sold through their own online store or platforms like Redbubble , or Society6 , which provide a ready-made marketplace for artists. Additionally, artists can collaborate with local or online stores that align with their artistic style to stock and sell their merchandise.
2. Optimizing your listings for maximum exposure
To maximize exposure and increase the chances of selling your art online, optimize your listings on the chosen platform:
- High-Quality Images: Capture high-resolution images that accurately represent your artwork. Use good lighting and different angles to showcase its unique features.
- Detailed Descriptions: Write compelling and informative descriptions for each artwork. Include dimensions, materials used, techniques employed, and any relevant stories or inspirations behind the piece.
- Keywords and Tags: Use relevant keywords and tags to optimize your listings for search engines within the platform. This will improve the visibility of your art in online searches.
- Promotion and Engagement: Actively promote your listings through social media, newsletters, and collaborations with influencers or art communities. Engage with potential buyers, respond to inquiries promptly, and offer exceptional customer service.
Step #6: Marketing and Promoting Your Art Online
Social Media has touched all aspects of our lives and the art market is no exception. In fact, social media platforms can be used as one of the best ways to sell art online. It offers artists powerful tools to sell their artwork, expand reach, build a solid online presence, and promote their art to a broader audience of art enthusiasts and potential buyers. Consider the following strategies for effective art promotion on social media:
- Choose the Right Platforms: Identify the social media platforms that align with your target audience and artistic style. Popular options include Instagram, Facebook, Twitter, and Pinterest.
- Engaging Visual Content: Share high-quality images of your artwork that highlight its unique features. Experiment with different angles, compositions, and behind-the-scenes glimpses to engage and captivate your audience.
- Consistent Posting: Regularly share your art and relevant content to maintain an active presence. Develop a content calendar to plan your posts and maintain consistency.
- Engage with Your Audience: Respond to comments, messages, and inquiries from your followers. Show genuine interest in their feedback and build meaningful connections with your audience.
- Influencer Collaborations: Identify influencers who align with your artistic style and have a relevant following. Reach out to them to explore collaboration opportunities such as joint projects, featured posts, or artist spotlights.
- Guest Blogging and Interviews: Contribute guest blog posts or participate in interviews with art-focused websites or blogs. This allows you to share your expertise and reach a wider audience within the art community.
- Participate in Online Art Communities: Join online art forums, groups, or communities where artists and enthusiasts gather. Engage in conversations, share your artwork, and provide constructive feedback to build connections and gain exposure.
Step #7: Building Trust and Credibility
Building a reputable artist brand is crucial for establishing trust and credibility with potential buyers. Consider the following strategies:
- Artistic Identity: Develop a cohesive artistic identity that reflects your unique style, vision, and values. Ensure that your brand elements, such as your logo, color scheme, and visual language, are consistent across your website, social media profiles, and promotional materials.
- Artist Statement : Craft a compelling statement that conveys your artistic philosophy, inspirations, and intentions. This helps potential buyers connect with your art on a deeper level and understand your creative process.
Roxane Fiore , a visual artist, has created a stunning artist statement that defines her vision and inspiration as an artist.
- Professional Presentation: Pay attention to the presentation of your artwork online. Ensure that your images are high-quality, your descriptions are clear and informative, and your online presence is well-maintained and up-to-date.
- Feature Testimonials: Displaying customer testimonials and reviews is an effective way to showcase social proof and build trust with potential buyers.
- Exceptional Customer Service : Respond to inquiries, messages, and emails from potential buyers and customers promptly. Address their questions, provide additional information, and offer personalized assistance.
- Secure Online Transactions: Utilize secure payment gateways and SSL encryption on your website to ensure that customer transactions are safe and protected. Communicate your privacy policy and data handling practices to assure customers of their security.
- Packaging and Shipping: Pay attention to the packaging and shipping process to ensure your artwork arrives in excellent condition. Use appropriate materials, provide tracking information, and consider insurance for high-value pieces.
Explore Our Essential How-To Guides Right Here!
- How to Create a One Page Website: Complete Guide
- How to Create a Tattoo Apprenticeship Portfolio (With Examples)
- How to Create the Perfect About Us Page
- How to build an eCommerce website in 2023 - A Step-by-Step Guide
Making money by selling art online becomes achievable when you have the knowledge and guidance to navigate the process effectively. While pricing, marketing , and selling your art require additional research and effort, implementing the tips provided here will set you on the right path. By establishing these preliminary elements, you can shift your focus to creating high-quality art and building a profitable business.
Ready to start selling your art online?
You can leverage Pixpa's user-friendly interface, customizable templates, and robust e-commerce capabilities to effectively market your art and convert visitors into paying customers.
Try Pixpa - the easy, all-in-one portfolio website builder loved by photographers & creators.
Explore More Articles See all articles
Top-rated by creatives for 10+ years
All-in-one website builder for creatives.
Build Your Website
Start an Online Store
Sell Images
Marketing Tools
Client Galleries
Photo Gallery Apps
Start a Blog
Creatives love Pixpa
15-day free trial. No credit card required.
Beautiful Templates Made for Creatives Awesome Support Really Easy to Use Affordable Pricing
Rated as top website builder by creatives for 10+ years.
What's new on Pixpa
- Join Newsletter
- Artist Gallery
- Get Started
It’s super easy to build a gorgeous artist website. No code. No credit card.
Use artweb's website builder today.
- Carol Burns
- July 28, 2023
How to Sell Artwork Through Online Shops and Galleries

Continuing our series on ways to make a living as an artist , we look at the options for making money through third-party seller websites, like Etsy or Amazon, or online galleries.
What is an online art shop or gallery?
There’s never been so much choice when it comes to selling online: Etsy, eBay, Amazon and social media all offer a chance to sell your work, often to different audiences. Plus, you can join online art galleries, from international sites like Saatchi or smaller local sites, of which there are hundreds.
Should you have a shop on every seller site and online gallery?
Probably not. The time it would take to set up and manage would probably leave you little time to work in your studio. There is also an issue of keeping the inventory up to date. If you sell one-off pieces and you have one for sale in six online galleries, what happens if different buyers purchase it from each site?
What’s the best site for selling artwork?
Cost will be a major factor in your choice. Seller sites make their money from commissions, so it is important to calculate how much you will really be making from your sales.
Here’s a breakdown of the main seller sites and how much it costs to sell on them.
Etsy is purpose-built for artists and makers. The site promotes items that are original and handmade.
They boast around 40 million active buyers. But with more than 2 million sellers, its buyer-to-seller rate is a lot lower than other non-specialist sites, like eBay and Amazon. That said, buyers coming to Etsy are more motivated and more likely to be looking for your kind of crafts.
Anyone can open an Etsy shop. The site is mostly populated by hobby businesses, which are businesses that might make a little money, but less likely to make you a million. Average sales on Etsy are at the lower end, but that might be because of the type of sellers it attracts, rather than buyers.
Have a look at shops similar to yours and see what their sale numbers are like. Some shops have only a few sales, but there are plenty that run into five or even six figures.
How much does it cost to sell on Etsy?
Etsy’s fee structure is the same for everyone. They promote a 6.5% transaction fee, but with additional costs the amount is closer to 15 percent.
- $0.20 for each listing.
- Additional listing costs if the listing contains different options (designs, sizes, colors, etc.).
- Transaction fee of 6.5% of your sale.
- A processing fee of 3% of your sale.
- Plus tax is added to all their fees.
For that, you get access to those 40 million buyers and an online storefront that takes minutes to set up, just follow the easy-to-use listing steps.
You can also see viewer habits, for example, how many people visit your products or pages and how many add your product to their basket (but don’t buy). You can also set up special offers. Etsy shops also allow buyers to “favorite” items in your shop, and offer detailed metrics on sales, visits and fees paid.
It also offers an advertising package and a postage service, with a discount, so you can pay and print labels from your account.
Should I sell my art on Etsy?
- Is my art or craft likely to attract viewers and buyers?
- Am I setting up a business or making money from a hobby?
- Are there already lots of people selling similar items? And if so, for how much?
- Do I want to be an Etsy seller if it’s just for hobbyists?
- Will I need to pay for advertising to be seen?
As you would expect from such a huge organization, Amazon offers different selling plans aimed at those selling a few items a month to international brands selling thousands of items.
Amazon boasts 300 million active buyers, including 65% of the American population . But competition is heavy—there are anything from six to 10 million active sellers on the site worldwide.
How much does it cost to sell on Amazon
The individual selling plan charges $0.99 per sale.
If it looks like you are going to sell a lot of items, there are flat-rate plans, where you pay a set fee, starting at $39.99, to sell up to a certain amount.
There are more plans for bigger sellers, but artists and makers are likely to be in the lower end of the sales.
Artists and makers can also apply to Amazon Handmade, which offers a professional-level selling plan, but with no monthly fee.
Should I sell my art on Amazon?
- Does your product meet Amazon’s guidelines?
- What’s the right selling plan for you?
- Can I apply for Amazon Handmade?
- Where in the world do you want to sell?
- Are you selling one-off items?
- How crowded is the marketplace for your offering?
eBay has moved on from selling secondhand and unwanted items. Plenty of businesses now make a very good living by selling new items, either as a manufacturer or an online eBay shop.
eBay boasts 134 million members. That’s a lot of potential traffic, but how many of them are looking to buy art? And how will they find you?
How much does it cost to sell on eBay?
The cost of selling on eBay is varied.
Private sellers get 1,000 free listings a month and pay 12.8% of the sale amount (including the sale price, postage, taxes and any other fees).
There are business accounts for those looking to shift more inventory, but for most artists, 1,000 listings will probably be enough. And setting up a free private membership is a good way to test the water.
Fees for Basic eBay Stores are around $20 a month, but the subscription increases the number of free listings each month and offers an online storefront, essentially giving you a better-looking online gallery.
Should I sell my art on eBay?
- Will an eBay shop devalue my artist credentials?
- Is it worth having an online storefront on eBay or should I focus on my own site ?
- Do you want to auction your items?
Online galleries
If you are looking at online galleries, Saatchi Art will usually come out on top. It has a million page views a month and offers a chance to take part in shows.
One of the benefits of online galleries is that they carry more kudos than other online selling platforms. Being sold by Saatchi is about as high as an artist can get!
How much does it cost to sell on online galleries?
For the privilege of being on Saatchi Art, you pay the gallery 35% of your earnings. This is less than commercial galleries (which are more like 50 percent), but you will need to do more marketing and promotion of your work than simply uploading a few images. And there’s a lot of competition.
Other online galleries include Artfinder . Commission is based on the type of seller plan subscription you choose. The free starter plan has 40% commission on sales, with professional and business plans offering lower commissions based on whether you choose to pay subscription costs.
There are dozens of other online galleries, so ask yourself:
- Are there upfront fees or a subscription fee?
- Do I have to pay anything if I don’t sell anything?
- What’s the commission rate?
- How many artists are on the site?
- How many buyers visit the site?
- How many sales does the site make? Look at its conversion rates: how many sales per 100 visits? One sale gives the rate of 1%, five sales give a rate of 5%. Look for sites with a rate of 2.5% and above.
- Is there any marketing or promotion?
- Does the gallery showcase work (i.e., put work on its homepage) and how is this managed?
- Is there any quality control, or can anyone upload artwork? If the gallery is choosy, it will have a higher reputation.
Related posts:

Ready to Grow Your Art Business?
Join our bi-weekly newsletter to receive exclusive access to the free tools, discounts and marketing tips that help 66,000 artists sell more art., recent posts, the best photography competitions, how to run an open studio, how to put on a group art show, how to win art competitions, monthly art competitions to build your reputation, the best art exhibitions in 2024, search our blog, create your website, join our artists newsletter.
A monthly newsletter of what’s hot on Artweb, made by Artists for Artists.

Ready to have your own art website today, but don’t know where to start?
Artweb’s got you covered.
No coding, no stress, so you can spend more time on your art, not your website.
Sell Online With Zero Commissions.
Just for Artists
Join thousands of artists who subscribe to The Artists Newsletter .
Just wanted to say what a fantastic support/info system you run. I've just read the newsletter regarding image copyright law and it's very informative... thanks!"

- Shop All Products
- Best Sellers
- Shop by Catalog
- Shop Memorial Gift
- Custom Oil Painting
- Custom Canvas Painting
- Custom Coal Painting
- Custom Color Pencil Portrait
- Custom Acrylic Portrait
- Custom Pastel Portrait
- Custom Pencil Portrait
- Photo Manipulation
- Photo Restoration
- Faceless Self Portrait
- Digital Art
- Custom Watercolor Portrait
- Personalized Birthday Painting
- Christmas Gift Art
- Father's Day Painting
- Anniversary Painting
- Graduation Painting
- Pet Memorial Painting
- Valentine's Day Painting
- Mother's Day Painting
- Wedding Portrait
- Personal Portrait Painting
- Family Portrait Painting
- Custom Couple Portraits
- Custom Pet Portraits
- House Paintings
- Mother and Child Portrait
- Painting for Dad
- Painting for Grandparents
- Child Portrait
- Dog Portrait
- Cat Painting
- Gallery Shop All Products Best Sellers Shop by Catalog Shop Memorial Gift By Art Style Custom Oil Painting Custom Canvas Painting Custom Coal Painting Custom Color Pencil Portrait Custom Acrylic Portrait Custom Pastel Portrait Custom Pencil Portrait Photo Manipulation Photo Restoration Faceless Self Portrait Line Art Vector Art Digital Art Custom Watercolor Portrait By Occasion Personalized Birthday Painting Christmas Gift Art Father's Day Painting Anniversary Painting Graduation Painting Pet Memorial Painting Valentine's Day Painting Mother's Day Painting Wedding Portrait By Subject Personal Portrait Painting Family Portrait Painting Custom Couple Portraits Custom Pet Portraits House Paintings Mother and Child Portrait Painting for Dad Painting for Grandparents Child Portrait Dog Portrait Cat Painting
Everything You Need to Know About Selling Artworks

Selling artwork is not just about finding a potential buyer. It's an intricate dance between creativity, business acumen, and effective marketing. For artists and creators looking to turn their passion into a sustainable profession, mastering how to sell artwork is crucial.

Photo by Markus Spiske from Pexels
It entails understanding the art business, mastering pricing strategies, building a solid online presence, and effectively promoting physical art products. Whether you are a successful artist seeking to expand your target audience or an independent artist eager to make your mark, this article is your comprehensive guide to navigating the art market and mastering the best way to sell art.
What is The Best Way to Sell Artwork?

Get an oil painting of your kids' photos here.
The best way to sell artwork in today's digital age is to harness the power of online platforms and establish a solid online presence. Utilizing well-established online marketplaces like Etsy Ads, Society 6, or Artfinder can provide access to a larger audience of art lovers and potential buyers. Whether it is a custom child oil painting or a digital artwork, your online gallery can pave the way for a successful career in selling artwork.
What are The Different Platforms for Selling Artwork?
Online art galleries.

Order your wife a digital artwork of her favorite photo here.
You can connect with potential customers worldwide, greatly expanding your market and increasing the chances of finding the right audience for your art. This accessibility makes it convenient for art lovers to explore a wide range of art pieces, such as custom wife digital art , watercolor paintings, or graphic design, without the limitations of physical location
Art buyers can browse and purchase art prints anytime and anywhere on an online art marketplace with an internet connection.
Physical Galleries

Get an oil painting of your wedding moments here.
Compared to digital downloads or online shops, personal interaction in a physical gallery allows you to share the stories and inspiration behind your physical piece.
For example, you can create a deeper connection and emotional resonance with your target audience while telling the story behind your custom wedding oil painting .
While online art sales have grown significantly, some collectors still prefer the traditional approach of buying art in person. You can set up a small gallery in coffee shops, share your business card, or be a business owner and open your small gallery to share your custom products.
Social Media Platforms
Social media channels have emerged as one of the powerful ways of selling art online. You can engage with followers and art buyers on social media posts, build personal connections, offer customization options, and receive feedback, fostering a sense of community and loyalty.
Artists can display a single piece in the Facebook marketplace or create a page showcasing a variety of products you offer.
What Are The Steps Involved in Selling Artwork?
Identify the selling price.
Determining the right sale price ensures that your artwork is fairly valued. Pricing it too high may discourage potential buyers, while pricing it too low may undervalue your skill level and effort. Understanding the online art market and researching the prices of similar artworks by other artists allows you to position your art competitively.
Choose Sales Channels
Selecting multiple sales channels, such as online shops, physical galleries, art fairs, or your website, expands your market reach. Each channel provides unique opportunities to showcase your art or design skills to diverse audiences.
Create a Strong Online Portfolio
You need a professional and organized portfolio to present your artwork and product descriptions to sell art online. It creates a cohesive and visually appealing presentation that reflects your artistic style and brand. It typically includes your contact information, making it easy for interested buyers to contact you for inquiries, sales, or commissions.
Create a Marketing Strategy
Selling artwork online requires a marketing tool to identify and target specific audiences most likely interested in your artwork. You can effectively position your art in the market with a marketing strategy. You can highlight the unique aspects of your artwork and communicate its value to potential buyers.
Provide Excellent Customer Service
Excellent customer service ensures buyers have a positive experience when purchasing your artwork. Happy customers are likelier to leave positive reviews, recommend your art to others, and become loyal patrons. It also enhances your credibility as an artist and reflects positively on your brand.
What Are Some of The Challenges of Selling Artwork?
Competition is fierce, as the art industry is saturated with thousands of artists vying for attention and recognition. Standing out and finding a unique selling proposition can be daunting. Another hurdle is the unpredictability of the art market, where demand for specific styles or genres can fluctuate, making it challenging to predict sales and income.
Additionally, managing the logistical aspects of selling, such as shipping, handling payments and shipping costs, and ensuring authenticity and copyright protection, can be time-consuming and complex.
Where Can I Find More Information About Selling Artwork?
Online platforms such as art-related websites, blog posts, and forums offer valuable insights into art sales, marketing strategies, and industry trends. Reputable art magazines and publications often feature articles and interviews with artists and experts on selling art.
Additionally, attending workshops, webinars, or seminars conducted by art organizations or galleries can offer practical knowledge and networking opportunities. Joining art communities and social media groups dedicated to art sales can also facilitate discussions and exchange experiences among artists.
Own an Artwork from Memorialize Art Today
Memorialize Art specializes in crafting artworks that celebrate the beauty of life's fleeting moments. With our skilled artist, you can translate your memories into stunning visual narratives that capture the essence of your most cherished experiences. Whether it's a wedding, a graduation, a family reunion, or a moment of triumph, owning an artwork from Memorialize Art allows you to relive those precious times anytime.
Featured collection View all
You may also like view all.

- Website Examples
- Website Builder Comparisons
- WooCommerce
- HTTP Errors
- WordPress Errors
44 Artist Website Examples to Use as a Template or Inspiration

1. Ketakuma
- 2. Shantell Martin
- 3. Brooke Cormier
- 4. Alex Fisher
5. James White
6. phillip pop off.
- 7. Mathieu Levesque
- 8. Alicia Haberman
- 9. Grand Deluxe
10. Mathias Ball
11. benjamin hardman.
- 12. Philippa Rice
- 13. Gusté Design
- 14. Nathalie Lete
- 15. Michelle Carlos
- 16. Jon Burgerman
- 17. Pedro Campos
- 18. Levon Biss
- 19. Alice X Zhang
- 20. Michael Burk Studio
- 21. Mike Perry Studio
- 22. Brad Albright
- 23. Elena Iv Skaya
24. Robert Wilson
- 25. Wenting Li
- 26. Edzera Gallery
- 27. Jessie Maxwell Bearden
- 28. The Art of Irina
- 29. Magnolia Visual Arts
30. Zaria Forman
- 31. J.K. Rowling
- 32. Anton and Irene
- 33. Amy Krouse Rosenthal
- 34. Peter McKinnon Photography
- 35. Woohyon
- 36. Nicole Lapin
- 37. Pierrick Calvez
- 38. Wayne Pearce
- 40. Maegan Guerette
- 41. Emily Mercedes
- 42. Alison Lyons
- 43. Jason Arkles
- 44. Julio Salgado
How to create your own website
Get a head start on website creation with ai.
Create a custom website tailored to your business needs 10X faster with 10Web AI Website Builder!
What website is best for artists?
- 10Web: A comprehensive solution that combines ease of use with powerful AI-driven website building, making it quick and efficient for artists to create visually stunning and functional websites.
- Squarespace: Offers designer-quality templates ideal for visually impactful portfolios and direct art sales.
- Wix: Features a user-friendly drag-and-drop interface and a wide range of customizable templates.
What does an artist website look like?
Does an artist really need a website?
What should I name my artist website?
- Your name: The most straightforward approach is to use your full name or artist name (e.g., [YourNameArt.com]). This is professional and makes it easy for people to find you, especially if you’re building a personal brand.
- Art medium and name: Combine your name or nickname with your primary medium or style (e.g., [NameWatercolors.com], [NameSculptures.com]). This gives visitors an immediate idea of what to expect.
- Creative and memorable name: A unique, catchy name that reflects your artistic style or philosophy can stand out (e.g., [EternalCanvas.com], [VividBrushstrokes.com]). Ensure it’s easy to spell and remember.
- Geographical reference: If your work is strongly tied to a location, including a geographical refefence can add a personal touch (e.g., [CityscapeArtistJohn.com], [DesertHuesByJane.com]).
- Conceptual name: Names that evoke a concept or emotion related to your art can be intriguing (e.g., [EchoesOfColor.com], [ShadowsAndLightArt.com]).
Before deciding, check the availability of the domain name and consider how it aligns with your brand and long-term goals. Your website name should not only resonate with your artistic identity but also be flexible enough to grow with your career.
How can I create an artist website?

What we liked the most about this site:
- The vibrant color palette immediately captures attention and creates a playful atmosphere.
- Animated images of the brand’s mascot, Takadabear, add a unique and entertaining element to the user experience.
- An integrated shop where visitors can purchase Ketakuma merchandise.
Ketakuma is an Asian-based artist who creates LINE stickers, animations, and illustrations. His website is one of several artist website examples of a fun and cheerful platform.
A neutral background forms a canvas for colorful, interactive animations and drawings. This engaging artist website example practically begs users to scroll down just to see what happens next. The site mentions that “The purpose of life is to move vigorously.” and it certainly delivers on that notion. Humorous animated comics and sliders filled with animated characters bring the length of the page to life.
2. Shantell Martin

What we liked the most about this site:
- The homepage features a high-resolution image of the artist surrounded by her doodles.
- The page background’s abstract patterns follow the cursor, adding an interactive element.
- Unobtrusive access to header navigation appears on hover, allowing the user to focus on the striking above-the-fold content.
The multidisciplinary artist Shantell Martin is a public speaker, curator, philosopher, cultural facilitator, teacher, choreographer, songwriter, performer, and much more. Even with various artist website templates on our list, this stands out as one of the most creative artist website examples for doodle art enthusiasts.
This site stands out in our list of artist website templates with its visually engaging and uniquely artistic interface. Visitors’ cursors act with a gravitational force on the background’s abstract art, drawing the stark black lines toward its direction. The site is organized into sections like Work , News , Info , and a link to a separate shop page. Interactive elements, such as words like Dance , Party , Love appear throughout, enhancing the user experience with a playful, dynamic touch. Preview How to Build Your Own
3. Brooke Cormier

- Interactive buttons and outstanding visual design.
- Systematically categorized all her artwork for easy navigation.
- Integrated storefront to purchase her creations directly.
- Using a signature as a logo to give a creative touch
Canadian artist Brooke Cormier creates realistic, naturalistic oil paintings but tries out new themes, mediums, and approaches. This is one of the artist’s website templates for someone looking for a simple theme with an artistic design.
The website has a clean and straightforward layout with a white background, highlighting the artist’s colorful paintings. A warm, casual photo of the artist herself alongside an invitingly blank canvas adds a welcoming personal touch. Key sections include Shop , About , and Contact . The shop section makes it easy for patrons to purchase artwork. Navigation is simple, with categories for Original Paintings, Prints, Jewelry, and Greeting Cards. Preview How to Build Your Own
4. Alex Fisher

- Unified theme with a tasteful color blend, consistent with her brand and style.
- The diamond-shaped mouse pointer adds a creative and unique touch to the user experience.
- Highlighted works to showcase Alex’s standout artwork as visitors scroll.
Alex Fisher is a freelance illustrator and graphic designer in Winnipeg, Canada. She has worked at agencies for almost six years, mostly on branding, identity, and illustration projects.
Parallax scrolling effects with layers of nature-inspired graphics add a feeling of depth and substance. A revolving slider tantalizes visitors with examples of the artist’s work and provides an interactive element. Overall, this highly-graphic design delivers its messaging in a readable, skimmable format. Preview How to Build Your Own

- Dark backdrop to highlight vibrant artwork colors.
- The grid-based display showcases James’s artistic range and provides insight into creation.
- Multiple collections of diverse art styles highlight versatility.
James White, a renowned graphic designer, is known for using bold, vibrant aesthetics. Since his collection of paintings is so rich, a portfolio layout that complements them is necessary. This template is one of the best artist website templates for dark themes.

What we liked the most about this site:
- Captivating GSAP-based hero animation accompanied by a uniquely designed menu.
- Detailed CV and Portfolio to Showcase the artist’s background and featured projects.
- One of the most unique artist portfolio website examples we’ve seen.
Bulgarian artist Phillip Popoff is a highly skilled digital animator. If you’re looking to showcase your animated art, Phillip’s website offers the ideal inspiration for an artist website template.
With the site’s minimal navigation, visitors are invited to learn more about the artist and selected artwork. Each page’s transitions and animations add a dynamic touch to this artist portfolio website example. Preview How to Build Your Own
7. Mathieu Levesque

- Unique design with appealing font, elegant content presentation, and smooth scrolling for a polished user experience.
- Comprehensive artwork insights and an off-canvas menu for seamless navigation.
- Social icons for easy sharing and a dynamic video reel showcasing the artist’s work.
Mathieu Levesque’s photography website displays a dynamic and visually engaging portfolio. It’s one of the best artist website examples that feature different galleries featuring innovative work. It provides a unique layout to help photographers in creating their portfolio websites . Preview How to Build Your Own
8. Alicia Haberman

- Showcases partnerships with artists, vocalists, and composers.
- Displays wide-ranging artistic skills and client base.
- Distinct sections for film, home, experiential, and illustration work.
Alicia Haberman is a production designer for a prestigious marketing and audio company. She has designed album covers for artists like 50Cent and Kanye West.
The Conscious Ink is a visually appealing website that blends art, illustration, and design. The layout is artistic and immersive, offering a unique visual journey through Haberman’s work. Preview How to Build Your Own
9. Grand Deluxe

- Each illustration links to a detailed description.
- A streamlined three-section layout for a focused user experience.
- Smooth section transitions via the navigation bar and easy access to social media accounts through the ‘contact’ or ‘follow’ page.
When it comes to artist website examples, Sami Viljanto’s illustration portfolio knows how to captivate an audience through his vibrant color palettes and vivid illustrations.
This can be a website template for artists who want to display their work illustratively. It’s a great example of a portfolio website that allows the artist’s work to shine through its simple, yet effective design. Preview How to Build Your Own

- Mathias’ vibrant hand-drawn logo adds a unique touch to the site.
- White spaces perfectly highlight each piece.
- Footer icons directly link to her email and social media profiles.
Mathias Ball is an illustrator from a small Canadian town. He specialized in crafting vibrant illustrations infused with emotions, animals, and warm hues. His artist portfolio website lets visitors take in selected works at a glance in an easy-to-understand grid-based layout. Preview How to Build Your Own

What we liked the most about this site:
- The website impressively showcases Arctic and Icelandic landscapes through high-quality photography.
- It features user-friendly layout and smooth navigation for exploring various photography sections.
- Offers a print store for purchasing artwork and a masterclass section for educational resources.
Benjamin Hardman is an artist known for his beautiful photos of the Arctic and Iceland. His website is easy to use, letting people explore his photos, buy prints, and learn from him through a masterclass. It’s a place where you can see how he captures the amazing beauty of nature through his camera. Preview How to Build Your Own
12. Philippa Rice

- An asymmetric grid layout with comic images and videos to showcase design projects.
- Unique comic book aesthetics and vibrant color palettes offer inspiration for children-oriented design.
- Easy to understand navigation and organization.
Phillippa Rice is a gifted artist who enjoys creating comics, illustrations, animations, and crochet. She brings life to her creations in Nottingham, often drawing inspiration from everyday life.
The site’s design is charming and colorful, reflecting Rice’s playful and creative style. It includes diverse projects, comics, and illustrations, highlighting her versatility as an artist. Preview How to Build Your Own
13. Gusté Design

- Customization via interactive design.
- A simple cyan background allows the artwork to take center stage.
- Integrated shop for purchasing artwork.
Lithuanian artist Gusté Vasiliauskaité has a decade-long career in creative fields. Her website is an interactive platform that allows visitors to engage with the artwork.
The navigation is intuitive, offering an accessible view of Gustė’s services and artistic creations. The site also includes a call-to-action for scheduling a consultation and a sign-up option for a newsletter, promoting user engagement.
14. Nathalie Lete

- Journal-style design with a grid backdrop for an artistic structure.
- Thematic hand-drawn fonts: to enhance the website’s theme.
- In-depth project descriptions contribute to the site’s unique style.
Nathalie Lete is a versatile artist known for her unique mix of mediums, from illustration to ceramics. Her work draws inspiration from vintage toys and historic floral and animal engravings, blending color, innocence, and poetry. Her website is an enchanting gallery of her artistic works. It showcases a whimsical and vibrant array of art pieces, ceramics, and textiles. The layout is visually rich, immersing the visitor in a world of vivid colors and imaginative designs. Preview How to Build Your Own
15. Michelle Carlos

- Features a unique hand-drawn design.
- Michelle’s travel and experience-inspired illustration pieces.
- Unique hand-drawn fonts to boost the site’s appeal.
- Engaging blog to offer insight into Michelle’s inspirations.
Michelle Carlos is a gifted artist and illustrator from the Philippines with a rich Fine Arts and filmmaking background. Her style is beautifully reflected in the children’s books she writes and illustrates.
The site’s layout is intuitive. Each section reveals her detailed and imaginative artwork portfolio, offering a glimpse into her creative process. The user-friendly design ensures easy navigation while immersing the visitor in her artistic world. Preview How to Build Your Own
16. Jon Burgerman

- A full-screen image carousel provides an immersive display of Jon’s artistic breadth.
- Use of parallax scrolling to enhance the depth and interactivity of the site.
- Fun animations to demonstrate Jon’s versatility and engage users.
- Vibrant colors to attract attention, stimulate interest, and match Jon’s style.
Jon Burgerman is a renowned artist whose hyper-realistic drawings, cartoons, characters, and murals display astounding skill. His work is part of important collections like the Victoria and Albert Museum in London, and his digital art is now in Austria’s OÖ-Kultur Museum.
The website is an interactive exploration of his diverse and playful art. It features a dynamic layout where moving the cursor reveals different project thumbnails, inviting visitors to engage actively with the content. Burgerman’s quirky and fun style is evident throughout, making the website an extension of his creative world. Preview How to Build Your Own
17. Pedro Campos

- High-quality images prominently showcase the artist’s masterpieces.
- Single-page design to ensure user-friendly navigation.
- Smooth transition effects to enhance the browsing experience between pages.
Pedro Campos, a Madrid-based hyperrealist, designs paintings renowned for their photorealistic aspect. His art captures the perfection of materials from aluminum Coke cans to blown glass marbles.
The site is elegantly simple, with sections providing insights into his methods and background. Each painting is presented with clarity, emphasizing Campos’ mastery in capturing lifelike details and textures. Preview How to Build Your Own
18. Levon Biss

- Minimalist design to optimize screen space for showcasing design works.
- Collapsible navigation to improve user navigation and seamless page movement.
- Full-screen gallery of elegantly presented artwork invites scrolling for more.
Levon Biss is a photographer with a vivid imagination that allows him to present his work originally and spectacularly. Around the world, his large-scale photographs are exhibited in museums and private collections. The site uses a clean and modern design to focus on the intricate details of his subjects. His works are presented in a way that highlights the complexity and beauty of each photograph, making the website a visual journey into the micro-world. Preview How to Build Your Own
19. Alice X Zhang

- Unique logo to highlight her name prominently.
- Use of dark background to draw visitors, resulting in vibrant, emotionally charged art.
- Online store to sell fine and artist prints.
Alice X Zhang is a well-known illustrator and artist for her symbolic portraits. Since graduating from the Rhode Island School of Design, she has freelanced in film, comics, and gaming, working for big names such as Marvel and Lucasfilm. Her art is showcased in Doctor Who, Sherlock, Star Wars, and a number of other famous series.
The gallery layout displays her high-resolution works, allowing visitors to appreciate the vivid details. Her style is characterized by intense color palettes and dramatic lighting, making this site stand out as an excellent inspiration for an artist website template. Preview How to Build Your Own
20. Michael Burk Studio

- Yellow background to boost the design’s visual appeal.
- Eye-catching logo to promote brand recognition.
- Clear navigation sections for work and photography to simplify navigation.
- Integrated social media connections to foster accessibility and engagement.
Originally from Los Angeles, Michael Burk is a multidisciplinary director, designer, and maker. Michael has collaborated with agencies such as 1st Avenue Machine, Media.Monks, and partners including Adidas, E! Network, Macy’s, and Michael Kors.
The site’s design is sleek and modern, focusing on high-quality visual content. The page’s length is filled with a collage of various photos and artwork overlaid on a colorful yellow background. Preview How to Build Your Own
21. Mike Perry Studio
- Features a horizontal scrolling photo gallery for seamless browsing.
- Animated navigation adds an artistic touch.
- Colorful artwork to showcase vibrant artwork in various hues.
- Footer art sections to showcase additional studio work.
Emmy-winning artist Mike Perry creates paintings, animation, sculptures, books, public art installations, monographs, exhibitions, drawings, and silkscreens, among other things. His website is among the best artist website examples out there, providing an in-depth look into her creative process. The site uses a bold color scheme and playful graphics, reflecting Perry’s energetic and eclectic style. Each project is presented with engaging visuals, providing a comprehensive view of his creative endeavors.
If you’re captivated by vibrant, animated navigation layouts, you can design a similar-style website using 10Web AI Website Builder . This tool allows you to craft a website that resonates with your aesthetic preferences and offers an engaging, dynamic user experience.
22. Brad Albright

- Showcase of unique comic-inspired art influenced by pop culture, Wild West, and live music.
- Textured background to complement Brad Albright’s art.
- Poster presentation displayed on click.
- Integration of newsletter signup and social network links.
Based in Dallas, Brad Albright works as a gallery artist, poster designer, and freelance illustrator. He is most famous for his modern take on ‘OldSchool 3D’ anaglyphic posters.
Related Articles
- 21 Musician Website Examples to Use as a Template or Inspiration
- 31 Event Website Examples to Use as a Template or Inspiration
- 15 Food Website Examples to Use as a Template or for Inspiration
23. Elena Iv Skaya

- Art collection to display captivating, high-quality contrasting art.
- Unconventional hero shot to draw the viewer’s attention
- Prominent Artwork on simple pages to maximize focus and visibility.
Elena Iv Skaya is a gifted photographer who uses bright brushstrokes and color schemes to turn her photographs into stunning works of art that resemble paintings. Elna Iv Skaya transitioned from modeling to expressing her creative vision behind the camera. Elena’s photography resonates with gorgeously expressive and lucid imagery.
The site’s sleek and sophisticated layout, with large, high-quality images, showcases her work’s vibrant colors and compositions. Its minimalistic design emphasizes the photos, with categories like Commercial , Editorial , Artistic , and Various allowing easy exploration of her portfolio. Preview How to Build Your Own

- Feels like sitting in a darkened theater – perfect for this artist’s expertise.
- Full-screen background images take center stage, showing visitors the story.
- Simple navigation encourages visitors to explore and engage.
Robert Wilson has been a transformative figure in theater and opera, renowned for his innovative use of lighting and movement. Wilson’s work is further distinguished by his collaborations with eminent artists, writers, and musicians, captivating audiences across the globe.
Robert Wilson’s website is a comprehensive portal to his work in performing arts and visual art. The site effectively presents Wilson’s extensive body of work, including stage productions and installations. The visual design is understated yet elegant, allowing the focus to remain on his diverse artistic projects. Preview How to Build Your Own
25. Wenting Li

- The elegant, simple logo features the artist’s name for recognition.
- Strategic whitespace usage boosts readability and appeal.
- Colorful art display using vibrant colors
- Categorized Sections for illustrations, murals, art, and comics for easy navigation.
Wenting Li is a Toronto-based artist. She specializes in comic books, painting, and general illustration design. Her work is vibrant, colorful, and brimming with shapes that captivate attention. Preview How to Build Your Own
26. Edzera Gallery

- Showcases diverse Inuit art, including carvings, sculptures, and modern paintings.
- Diverse Art Categories for various art forms like sculpture, paper, canvas, and glass.
- Integrates live chat and helpful FAQ section.
Edzerza Gallery is a Canadian online art gallery specializing in Inuit art. An artist website example like his is ideal for showcasing a range of art sections. Preview How to Build Your Own
27. Jessie Maxwell Bearden

- The dynamic and colorful background image on the homepage
- Clear, easy-to-use menus guide visitors.
- Works page to display a variety of images and videos.
- Comprehensive client page to feature previous clients, boosting credibility.
Jesse Bearden is a versatile multidisciplinary artist, creative director, and skilled problem solver based in Los Angeles. Leveraging her advertising background, she’s strategically collaborated with major brands like ESPN, McDonald’s, and American Express. Preview How to Build Your Own
28. The Art of Irina

- Colorful traditional art on the homepage
- Well-organized portfolio with three categories: paintings, available art, and DREAM series.
- Live chat feature for direct artist chat.
The Art of Irina highlights her artistic talent with a large painting featured on the homepage. Drawing inspiration from her orthodox icon painter ancestors, Irina charts her creative path by reimagining iconography uniquely. Preview How to Build Your Own
29. Magnolia Visual Arts

- The interactive Slideshow features the most recent album photography.
- The bottom navigation bar is placed for different user impressions.
- Chronological Blog Section for more straightforward navigation.
Magnolia Visual Art is a fine art photography website and one-of-a-kind website templates for artists featuring a unique homepage with a slideshow of recent photography projects.
A large featured image catches the eye, while the camera roll style thumbnails below invite further exploration. Preview How to Build Your Own

- Extensive Portfolio with specific project categories.
- A simple logo with social media icons on the right side of the page.
- Provides detailed information on various art exhibits and extensive press coverage of Zaria and her works.
Zaria Forman is an artist who captures climate change through pastel drawings. She embarks on journeys to remote corners of the world to gather imagery and inspiration, and her work gains global recognition through exhibitions.
Zaria Forman’s art website stands out as a website template for artists due to its front-page display of the artist working on a powerful half-finished piece. Preview How to Build Your Own
31. J.K. Rowling

- Age-based content to divert visitors into separate sections.
- Playful design with a fantastic background.
- Using visual illusions to divide sections.
Joanne Rowling is a famous British author and philanthropist known primarily as a Harry Potter series author. J.K. Rowling’s website is one of few artist website examples that employ a unique technique, providing content based on the visitor’s age. Preview How to Build Your Own
32. Anton and Irene

- Parallax scrolling to illustrate a unique experience and artistic appeal.
- Snowy effects, bold colors, and quirky visuals create a truly captivating experience.
- Scrolling down the length of the page is a journey through the artist’s work.
Anton & Irene is a Manhattan-based design agency with a distinctive web presence. This website stands out among artist portfolio website examples that are highly interactive, and each element contributes to the website’s function. Preview How to Build Your Own
33. Amy Krouse Rosenthal

- Engaging option to choose a customized website experience.
- Uses a soothing audio track on the website that changes with customizing ambiances.
- Fun design with playful typography.
Amy Krouse was a prolific author known for her children’s books, a pioneer in interactive memoirs, and creating engaging guided journals. Amy Krouse Rosenthal’s website is a perfect website template for an artist who wants to illustrate creativity and a playful interface using different elements and font styling.
34. Peter McKinnon Photography

Peter McKinnon is a globally recognized photographer, filmmaker, YouTube influencer, and entrepreneur based in Toronto, Canada. He leverages his platforms to inspire and support enthusiasts’ creative ventures behind the camera.
There are a number of artist website templates; however, its user experience makes this one particularly visually pleasing and responsive. Preview How to Build Your Own
35. Woohyon

- Aesthetic Design with a classy write-up
- A well-written story that spans the whole website and highlights the accomplishments of the Woohyon.
- Using videos to compel visitors to see his artwork and his story
- Uses a dark background to complement the graphic components of the website.
A Korea-based paper artist, Woohyon specializes in creating highly detailed pieces of paper. Woohyon’s website greets visitors with the smile of the artist, uniquely showcasing his biography. Preview How to Build Your Own
36. Nicole Lapin

- High-quality personal pictures to draw visitor connection.
- Professional Web Writeup on Lapin’s work and achievements.
- Integrated Shop for purchasing Lapin’s books and products.
Nicole Lapin is a leading financial expert and author who simplifies money matters with her accessible approach. Nicole Lapin’s website stands out among artist portfolio website examples that welcome visitors with a bright, professional photograph of the author. Preview How to Build Your Own
37. Pierrick Calvez

- Modern layout with large fonts for immediate attention.
- Vivid artwork and engaging art that seems realistic.
- Diverse offerings include a variety of art for sale and unique projects.
- Studio insights by listing Pierrick’s publications, appearances, and past clients to enhance trust.
When it comes to browsing artist website examples, Pierrick Calvez’s portfolio stands out for its striking minimalist design. Pierrick Calvez is a renowned artist who resides and works in Huizhou, China.
38. Wayne Pearce

- A light background makes the colorful artwork pop, drawing the visitor’s attention.
- Captivating User Interface to encourage users to explore further.
- Smooth scrolling for an enjoyable user experience.
Wayne Pearce is a talented motion designer from Ft. Myers, Florida. Wayne works as a freelance artist specializing in captivating visual narratives. Wayne Pearce’s website showcases his unique, zombie-inspired art pieces visually strikingly. Preview How to Build Your Own

- Features high-quality, professional photographs of Guilbo’s paintings.
- The visually pleasing design effectively showcases the artist’s work.
- A black background adds depth to the site and allows the paintings to stand out.
Quebec’s painter Guilbo shines with extraordinary accomplishments due to his bespoke creations and captivating live painting sessions. While various artist website templates are available, this particular one shines due to its creative display of projects. Preview How to Build Your Own
40. Maegan Guerette

- Use of a horizontally scrolling gallery to showcase outstanding works uniquely.
- Features a well-designed navigation bar, ensuring easy access to various sections.
- Simple, easy-to-navigate layout allows the artwork to shine.
Maegan Guerette is a freelance photographer who provides services for weddings, families, engagements, and other events. She has dedicated herself to marketing her photo-based paintings influenced by botanicals and her ink and watercolor creations. Preview How to Build Your Own
41. Emily Mercedes

- Website used as an effective online store.
- Navigation menus for quick artwork finding.
- Instant answers via live chat boost user experience.
- The unique ostrich logo adds a creative site touch.
Emily Mercedes, an Indiana-based artist, has an art website that functions as an online store showcasing her stunning paintings. It serves as one of several artist website examples for artists interested in focusing on selling their art.
Notable features include an intuitive shopping experience with clear categories and quick view options, enhancing the user’s interaction with her work Preview How to Build Your Own
42. Alison Lyons

Alison Lyons is a talented photographer based in Sydney. She balances her photography career with her role as Creative Director for an advertising agency, showcasing her diverse skill set.
The site’s clean layout focuses on the visual storytelling of her photography, with each gallery offering a unique perspective. Preview How to Build Your Own
43. Jason Arkles

The brilliant artist Jason Arkles conveys his desire to combine a historical style with a more contemporary and forward-thinking approach on his art website. It is an excellent website template for artists who want a basic and minimalist design. Preview How to Build Your Own
44. Julio Salgado

An artist, Julio Salgado, is a self-described queer activist who uses visual arts to express his content. Julio Salgado’s website is one of many artist website examples leveraging the powerful use of bold colors and compelling images to capture visitors’ attention. Preview How to Build Your Own
Creating a website involves a series of strategic steps. This section will help you in turning your vision into reality and creating your ideal website.
1. Gather inspiration : Begin by exploring the various examples of the websites listed in this article that are handpicked by the 10Web Editorial team. Take notes of all the things that you like and that you’d like to see on your website as well.
2. Select the right platform: There are different website builders and platforms, each with its unique advantages and disadvantages. For example, WordPress stands out with its customization and wide range of themes and plugins, while Wix stands out with its easy-to-use editor.
3. Optimize website performance : Your website’s speed and responsiveness are crucial for engaging visitors and improving search engine rankings. Opt for reliable hosting that ensures your site is fast and accessible to all users.
4. Use AI to simplify website creation: AI can help with everything from design decisions to content creation, making the process more efficient. Use AI to automate and innovate, reducing the time you spend on website building and focusing more on growing your business.
All these and even more can be automated with 10Web’s AI Builder:
- Create a website with AI in less than a minute
- Super fast Google Cloud Partner hosting
- Website performance & speed optimization
- Managed security & backups
Generate Your Website
As an artist, gaining visibility from your audience is crucial. However, many artists overlook the significance of their website portfolio and fail to recognize what it lacks. Considering that potential clients form their first impression of an artist’s work through their website, infusing it with an artistic vibe and personal style is essential.
Factors such as usability, color scheme, navigation, style, font, and readability contribute to a website’s overall feel and uniqueness. In this article, we have examined 44 artist website examples from which you can draw inspiration to create your website. If you’re hunting for artist portfolio website examples, these options spotlight creative designs and artistic layouts.
To streamline the website creation process, there are AI website builders available that make your work easier and give you complete control over the appearance of your website. For example, 10Web utilizes Artificial Intelligence to design websites. By responding to straightforward questions about your business, you can leverage AI to craft customized content and images. This unique approach ensures that your website perfectly aligns with your needs. In essence, 10Web AI Website Builder empowers artists to create portfolios tailored precisely to their requirements.

34 AI Marketing Tools to Scale Your Business in 2024
AI marketing tools are essential for enhancing marketing and business operations. With many options available, choosing the right one can be challenging. This article highlights 34 AI marketing tools for 2024, including general marketing, content creation, SEO, sales and PR outreach, email marketing, social and influencer marketing, advertising, and video generation. Best AI marketing tools summary table General Marketing Content Creation…

11 Easy Steps to Start Online Food Business from Home in 2024
The Internet has become a powerful enabler, shaping how we communicate, interact, and conduct business. The accessibility and connectivity provided by Internet platforms have led to a significant surge in the emergence of many online businesses across diverse industries. For instance, we have witnessed a surge in online food businesses in the food industry. Unlike the traditional brick-and-mortar business model,…

11 Revolutionary AI Web Design Tools and Trends in 2023
AI web design is a booming industry that is changing how designers work forever. While you might be excited by the prospect of using AI to improve and accelerate your design work, you may not know where to begin. When looking at AI for website design, the sheer number of tools to consider is staggering. To help you out, we…

Convert HTML Website to WordPress With & Without Coding Skills
In 2011, more than 70% of all websites across the Internet were built through coding, and without any Content Management System (CMS) involved. By 2022, this figure has drastically fallen to less than 33%. On the other hand, popular CMS platforms like WordPress continue to gain market share, with WordPress being used by almost 43% of all websites across the…

Best Social Feed Plugins for Your WordPress Website
These are the best free plugins to enhance your website’s social media functionality. Meet the Best Social Feed Plugins for Your WordPress Website.
31 Famous WordPress Websites for Inspiration in 2024
22 smartest law firm website examples in 2024, top 33 stunning travel blog examples to inspire in 2024, 51 most impressive personal websites to inspire in 2024, 31 best portfolio website examples for inspiration in 2024, leave a comment cancel reply.
Your email address will not be published. Required fields are marked *
Your email address will never be published or shared. Required fields are marked *
Email address *
Save my name, email, and website in this browser for the next time I comment.
Small Business Trends
The 27 best places to sell photos online.

If you buy something through our links, we may earn money from our affiliate partners. Learn more .
Discover the best places to sell photos online and turn your photography passion into profit. This article is designed for those who cherish capturing moments and aspire to make their hobby a lucrative venture.
Here, you’ll find an extensive list of 27 outstanding online platforms where you can market your stunning photographs. Catering to both enthusiasts and professional photographers, these stock photo websites provide the perfect opportunity to display and monetize your creative work.
Table of Contents
The Best Places to Sell Photos Online
- Stock Photo Websites : Platforms like Shutterstock, Getty Images, and iStock offer photographers a chance to earn through stock photography. These sites have broad market reach and diverse audiences, making them ideal for photographers looking to sell generic or niche-specific images.
- Artist Marketplaces : Etsy, Fine Art America, and Society6 allow photographers to sell their work directly to consumers. These platforms are perfect for photographers with unique, artistic images that appeal to individual buyers looking for something special.
- Nature Photography Outlets : Websites like Blue Planet Archive and CanStockPhoto are excellent for photographers specializing in nature and wildlife photography. They cater to specific audiences looking for high-quality nature images.
- NFT Platforms : For photographers interested in the digital art space, NFT marketplaces like OpenSea, Rarible, and SuperRare provide a modern avenue to sell unique digital assets. These platforms offer new ways to monetize digital photography through blockchain technology.
Where to Sell Stock Photos
If you’re looking to sell your stock photos, several platforms can help you turn your passion into profit. Check out these options to start monetizing your photography skills:

Join Alamy to sell your work globally and earn up to 50% commission. They pay out over $1 million monthly. Enjoy global exposure, empowering tools, and complete creative control. There are no long-term commitments, and students get the added benefit of receiving 100% commission for two years.

500px is a leading online network for photographers, offering exposure, recognition, and opportunities for growth. They help photographers showcase their work, challenge themselves, and gain recognition for their skills. Their platform provides immediate exposure, career-building tools, and performance insights to help photographers succeed.

SmugMug is a photography platform that helps photographers sell their photos with ease. It offers quick setup, customizable pricing, efficient billing, and robust sales tools. Users can display their photos creatively, control privacy settings, and access professional-grade printing options.
4. Shutterstock

Join Shutterstock’s global community of contributors and earn money sharing high-quality images and videos. Upload content easily, get tips for success, and earn from worldwide customer downloads. Showcase work, grow skills, and reach millions of customers.
5. iStock Photo

iStockphoto is a stock content site founded in 2000 and part of the Getty Images family. It offers ready-to-use photos, illustrations, vectors, and video clips. Key features include exclusive content, worry-free licensing, free content, inclusive storytelling, and royalty-free files.
6. BigStockPhoto

BigStockPhoto is a platform where you can earn money by uploading your original photos and illustrations. Sign up for free, upload your images, retain copyrights and track sales. It was founded in 2004, acquired by Shutterstock in 2009, and offers over 124 million royalty-free images.
7. Getty Images

Getty Images offers a creative community for photographers, videographers, and illustrators to share their content. Earn money with licensed work seen by top brands and agencies. Keep copyright ownership while accessing a vast global distribution network.
Where to Sell Your Photos
Looking to turn your photos into income? Check out these platforms to sell your work and start earning money. Discover the various opportunities available and find the best fit for showcasing and monetizing your photography skills:

Etsy offers a marketplace where photographers can showcase and sell their work to a wide audience. Etsy’s user-friendly interface and global reach allow photographers to monetize their craft and connect with potential customers who appreciate their unique style and creativity.
9. Fine Art America

Fine Art America is a leading online marketplace for artists and photographers to sell their art and prints. They offer a wide range of products like canvas prints, phone cases, home decor, and more. With global fulfillment centers, artists can set their own prices and reach a large audience worldwide.
10. Redbubble

Redbubble is a platform for artists to sell their art on products worldwide. Artists upload designs, customers purchase products, and they’re produced and shipped on demand. With over 70 products available, artists have control over pricing and receive support and protection features.
11. Society6

Society6 empowers artists by providing a marketplace to sell their original work. They offer a variety of products to showcase artwork, handle fulfillment, and support artists with a thriving community and resources. Start selling on Society6 and get paid for your art.

ArtPal is a free platform for artists to sell their art. They can create galleries, sell originals or use Print-on-Demand, and receive 100% of profits. Payments are processed instantly, and artists retain all rights to their work.
13. Artfinder

Artfinder is an art marketplace that connects artists with buyers worldwide. They offer artists a global audience, control over their store and pricing, and exclusive benefits. Their mission is to make art accessible and affordable while supporting artists’ careers. They prioritize originality, openness, courage, and decency in their approach.
14. Saatchi Art

Saatchi Art is a leading online gallery connecting artists with a global community. With representation in 110+ countries, artwork sold in 140+ countries, and millions of monthly page views, it offers support, secure payments, shipping assistance, and exposure through curated features, shows, and promotional initiatives.
Where to Sell Nature Photos
If you have a knack for capturing the beauty of nature through your camera lens, there are numerous platforms where you can sell your stunning nature photos. Here are some options to showcase and monetize your captivating nature photography:

Payhip is an online platform that helps sellers monetize their nature photos. It offers a user-friendly interface, optimized checkout, and supports various payment methods. Payhip handles payment processing and file delivery and offers marketing tools. They’re also trusted by over 130,000 sellers worldwide.
16. Blue Planet Archive

Blue Planet Archive is a specialized stock photo agency founded by photographers. They offer amazing images of the Earth, including wildlife, landscapes, underwater scenes, and environmental issues. Aspiring photographers and artists are welcome to contribute.
17. CanStockPhoto

CanStockPhoto allows photographers to sell their images easily and for free. They earn commissions when their images are downloaded, and referrals can earn them $5 USD. CanStockPhoto also partners with Fotosearch, giving maximum exposure. The upload system is fast, supporting simultaneous submission of up to 20 images.
18. Dreamstime

Dreamstime is a platform where anyone can sell photos, images, and videos. To get started, register for free and upload your files, ensuring they meet the necessary criteria. Contributors can earn 25-50% revenue share and exclusive files receive bonuses. As your content gets downloaded, it moves up in levels, earning higher prices. Dreamstime also offers extended licensing options.
19. Adobe Stock

Join Adobe Stock to sell your content and expand your creative career. Benefit from native integration into Adobe apps, market insights, and superior tools like machine learning and a fast workflow. You retain ownership of your work and earn a 33% royalty on sales.
20. Creative Market

Creative Market is a design marketplace connecting creators with millions of customers. Shop owners can earn money selling their work, set prices, and enjoy perks like a 9-million-member network. No exclusivity lock-in, instant delivery, and tools for managing shops are provided. Join today to start your own shop.

With a global marketplace, Fiverr connects sellers with millions of buyers on its platform, offering a vast potential customer base. Set your own prices, showcase your portfolio, and deliver high-quality images. Join Fiverr today and start earning from your stunning nature photography.
Where to Sell NFT Photos
If you’re interested in venturing into the world of NFTs and selling your digital photos as unique and valuable tokens, there are dedicated platforms available. Explore the options below to delve into the exciting realm of NFT photography:
22. OpenSea

OpenSea is the largest marketplace for non-fungible tokens (NFTs), unique digital goods with tradeable and usable properties. Their vision is to create vibrant economies using open protocols and interoperable standards. Founded in 2017, OpenSea supports multiple blockchains and is backed by top firms, offering a wide range of categories for digital items.
23. Rarible

Rarible is an online marketplace for non-fungible tokens (NFTs). It allows creators to mint and sell their own NFTs, providing a platform for artists, musicians, and other creators to showcase and monetize their work. Users can also buy, sell, and trade NFTs within the Rarible community.
24. SuperRare

SuperRare is a digital art marketplace for NFTs on Ethereum. Artists create and tokenize their work as digital assets. It’s a curated platform to buy, sell, and discover digital art. Features include top artist rankings, curated exhibitions, and blockchain tokenization. It connects artists and collectors in a unique art market.
25. MakersPlace

MakersPlace is a marketplace for digital creators to sell NFTs to a community of 100K+ collectors. It protects artwork, offers earnings on sales and royalties, and pioneers blockchain tech. The platform verifies authenticity and has a diverse team of experts from art and technology backgrounds.
26. Nifty Gateway

Nifty Gateway , a part of Gemini, provides secure storage for NFTs. Publishers can create and publish their own NFTs with flexible payment and custody options. They offer creator-owned smart contracts, easy payouts, and various drop types. Nifty Gateway aims to make NFTs accessible and collaborates with artists and brands.
27. Quantum Art

Quantum Art partners with influential artists, curating collections of artwork for a new generation of global collectors. Led by Kris Graves and Rodolphe Ködderitzsch, the Quantum Curatorial Team collaborates with artists to create optimal drop stories, sizes, selections, sequences, and values. They welcome submissions from established artists and collections of historical importance.
Our Methodology: The Best Places to Sell Photos Online
Choosing the right platform to sell photos online is crucial for photographers, whether they are professionals or enthusiasts looking to monetize their work. Here are the criteria we used for selecting the best online platforms for selling photos. Each is rated on a scale of importance from one to ten, with ten being of utmost importance.
- Platforms with a wide reach and a large audience base.
- Targeted audience relevant to your photography niche.
- Fair and transparent commission structures.
- Higher earnings potential based on sales or downloads.
- User-friendly interface for uploading and managing photos.
- Efficient and straightforward upload process.
- Clear policies on copyright and usage rights.
- Control over how and where your photos are used.
- Reliable and convenient payment methods.
- Regular and timely payments.
- Understanding of the platform’s quality standards for photos.
- Reasonable acceptance rates for submitted work.
- Platforms that offer community engagement and networking opportunities.
- Access to feedback, collaborations, and learning resources.
- Tools and features for promoting your work.
- Good visibility and exposure within the platform.
- Options for selling photos as prints, digital downloads, or licensing.
- Well-established platforms with positive reputations.
- Reliability in terms of site uptime and customer service.
Incorporating these factors into our assessment, we aim to guide photographers to the platforms where their work will not only be seen but also be rewarded with sales.
The Upsurge of Selling Photos Online
The online selling of photos is on the rise, fueled by the increasing demand for high-quality images from businesses, marketers, bloggers, and more. Photography equipment has also become more accessible, making this a popular way for people to build a business or earn some extra side income.
This growing trend has created opportunities for photographers to monetize their work and cater to the needs of various industries.
Understanding Stock Photography Sites
Stock photos are pre-existing images licensed for specific uses, usually commercial ones. These images play a crucial role in the digital landscape, offering a vast array of visuals that cater to a diverse range of themes and concepts. From marketing materials to web design and editorial content, stock photos enhance visual storytelling across different mediums.
Stock photography sites act as a bridge between photographers and potential buyers. They provide a platform where photographers, under their photography business names, can upload and sell their pictures online.
At the same time, businesses, content creators, and individuals can easily search and buy these high-quality visuals for their projects using specific keywords or photography business names . This two-way arrangement serves as a convenient marketplace for high-quality visuals. It helps photographers reach a wider audience while offering users a one-stop solution for their visual needs.
The benefits of using stock photography sites include:
- Access to a diverse range of images: Stock photo sites offer an extensive library of images across various categories. This vast selection makes it easier for users to find the perfect image for their projects.
- Affordability: Unlike commissioning a photoshoot, buying stock photos is usually more cost-effective, especially for businesses with tight budgets.
- Time-saving: Stock photos are ready for immediate download and use, saving users the time to organize a photoshoot.
- Ease of use: Stock photo sites usually have user-friendly interfaces, making it easy for users to search, select, and purchase images.
- Support for photographers: These platforms provide photographers with a global platform to showcase their work and generate income.
Stock photography sites offer a win-win situation for both photographers and users. Photographers get to monetize their creativity and talent, while users gain access to a broad array of high-quality images for their various needs.
Strategies to Sell Photos Online
To further enhance your success in selling photos online, consider the following strategies:
- Build a Personal Brand : Establishing a strong personal brand as a photographer can help differentiate you in the market. Utilize social media, your own website, and blogging to share your story, your photography philosophy, and behind-the-scenes content.
- SEO for Photographers : Optimize your website and online portfolios for search engines. Use relevant keywords, meta descriptions, and alt text for your images to improve visibility and attract more visitors.
- Network and Collaborate : Engage with other photographers, artists, and potential clients through social media, photography forums, and in-person events. Collaboration can lead to new opportunities and increased exposure.
- Offer Bundles and Promotions : Create bundle offers or limited-time promotions to encourage more sales. Offering discounts on multiple purchases or exclusive packages can attract buyers looking for a deal.
- Leverage Analytics : Use analytics tools provided by the platforms or your own website to understand which images are performing best, who your audience is, and how they find your work. This data can guide your marketing strategies and help you create more targeted content.
- Customer Engagement and Feedback : Engage with your customers and followers by responding to comments, asking for feedback, and encouraging them to share your work. Positive customer experiences can lead to repeat business and referrals.
By leveraging the best places to sell photos online along with effective marketing and engagement strategies, photographers can significantly boost their success in the competitive online marketplace. Persistence, creativity, and adaptation are crucial in transforming your photography passion into a lucrative business.
FAQs: Best Places to Sell Photos Online
What are the differences between a stock photography site and a stock photo site.
A stock photography site and a stock photo site are essentially the same thing. Both platforms offer a collection of professional images that can be licensed and used for various purposes, such as websites, advertisements, and publications.
What are some considerations when choosing a stock photography website to sell images?
When choosing among the best places to sell stock photos online, consider factors like the platform’s reputation, customer base, pricing, royalty structure, licensing terms, ease of image management, and promotional opportunities. Opt for platforms known for their reliability, fair royalty payments, appropriate licensing agreements, user-friendly interfaces, and strong promotional tools to increase visibility to potential buyers.
How can stock images be optimized for better visibility on stock photography websites?
To improve the visibility of your stock images on photography websites, it is important to focus on high-quality and relevant content. This involves using appropriate keywords and descriptions, properly tagging and categorizing images, adhering to technical specifications, and regularly updating your portfolio with fresh and diverse content.
Can digital images other than photos, such as illustrations and graphics, be sold on stock photo sites?
Stock photo sites accept illustrations and graphics, offering a diverse marketplace for photographers and digital artists to monetize their work. Buyers benefit from a wide range of visual content options, while creatives expand their income potential and gain exposure in various mediums. Collaboration among artists fosters a rich and inspiring community.
What are some ways to ensure a stock photo stands out among millions of images on a stock photo website?
To make a stock photo stand out, choose a visually appealing and unique image that captures attention, use descriptive and relevant keywords for better search results, and make sure the photo has good composition and clarity. You should also consider adding a personal touch or a creative element to make it memorable.
How profitable is it to sell your photos online?
If you’re interested in learning how to make money with photography , selling your photos online can be a profitable venture. With the right platform and marketing, you can earn money from your creative work. By reaching a global audience, you increase your chances of making sales. However, it’s important to invest time in learning about the market, optimizing your images, and staying consistent to maximize your profitability.
Image: Envato Elements

Your email address will not be published. Required fields are marked *
© Copyright 2003 - 2024, Small Business Trends LLC. All rights reserved. "Small Business Trends" is a registered trademark.
IMAGES
VIDEO
COMMENTS
Artfinder takes a 35% to 42% commission on sales. Historically, Artfinder only allowed original artwork, but artists can now apply to sell limited editions after their original artwork has been accepted. The platform focuses on painting, photography, digital art, collage, sculpture, drawing, and printmaking.
4. Artplode - The Best Place to Sell High End Art. If you plan on listing your art for more than $1,000, Artplode is definitely a worthwhile websites to show your art on. The site takes a $60 fee to post any piece of artwork, but that's remarkably low when you consider you'll pull in at least $1,000 per buyer.
7. Society 6. Print on demand is one of the most popular ways to earn as an artist these days, and Society 6 is one of the more well-known sites in this field. In this platform, artists can transform their artworks into different types of merchandise such as notebooks, phone cases, shirts, bags, yoga mats, and coolers.
Here are 13 best websites to sell your art - from paintings and photos to printed media and sculptures. 1. Saatchi Art. Saatchi Art is a prominent online art gallery established in 2006. Saatchi Art has over 1 million artworks from 90,000 artists and enjoys millions of visits each month, making it one of the best websites to sell art.
Learn about the pros and cons of popular art selling sites for different creative disciplines If you are an arts, design, illustration or craft professional, you will surely know that it is a good idea to improve your sales method. In addition to having a sales strategy on your social networks, promoting your pieces on a specialized site could be of help to you. We compiled some popular ...
How to Sell Art on Fine Art America: The steps to selling art on Fine Art America are as follows: Open an account. Upload photos of your artwork. Choose which products to feature. Set your prices and you're ready to go. In terms of pricing, Fine Art America sets a base price for each product.
Saatchi Art: Best Online Gallery For 2D & 3D Art. ArtPal: Best Free Online Art & Jewelry Marketplace. Printful: Easiest Print-On-Demand Website. Fine Art America: Best For Selling Fine Wall Art & Stationary. Creative Market: Best Marketplace To Sell Digital Art Online.
Artplode. This is where dealers, artists, galleries, and collectors buy and sell art with no commission charge. You keep 100% of the price for the artwork sold. Artplode charges a flat fee of $60 to advertise each piece on the site. You control all sale aspects of your art, including: the ad information and photos.
ArtPal *. ArtPal is a popular, FREE gallery to sell art and buy art, representing many thousands of artists. No membership fees. No commission. Completely free with unlimited space to sell all of ...
Imagekind. Artmajeur. ArtFire. Artplode. ArtWanted. When choosing a website to sell your art, it's important to consider the fees and commission rates as well as the website's traffic and reputation. Some websites like Saatchi Art and Artspace, have a high reputation and a high number of visitors but also have a high commission rate.
2. Register Your Business. Before you start selling and making income from your artwork, it's important to have all of your paperwork in order. You can register as a sole proprietorship for free ...
For artists looking to sell their work online, choosing the right platform can make all the difference in terms of exposure, sales, and overall success. In this post, I'll provide a brief comparison of 10 leading art marketplaces, including popular platforms like Etsy, RedBubble, Saatchi Art, Artfinder, and more.
The best way to sell art online depends on the artist's specific needs and goals. Options include online marketplaces like Etsy, ecommerce platforms like Shopify, social media channels, or your website. Consistent marketing and high-quality product images are key to online art sales success. Explore the 15 best places to sell art online in 2024.
Writing About Yourself And Your Work. Selling art with images on a computer screen is very different from selling art at your studio or a gallery exhibition. Moreover be aware that your artwork is unlikely to simply 'sell itself'. It is essential that your potential buyers feel they can understand and relate to your work and the words that ...
Sell art from your collection. With our global reach and art market expertise, our specialists will find the right buyer for your work. Start Selling. Get in Touch. Hunt Slonem, Lily White, 2020. Alex Katz, Large Birch, 2005. Andy Warhol, Queen Margrethe II of Denmark (FS II.345), 1985.
1 min. short (shipping labels, post office) Find out in this video all of the essential logistics for setting up to sell your artwork online. Topics covered include the various platforms for selling, how to set up your shop, shipping details, marketing strategies, presenting your artwork to maximize visibility, and more. Mia Rozear.
Everything you need to supercharge your online store is available in the Shopify App Store. 6. Explore Additional Platforms for Online Selling. If you really want to boost your chances of getting as many sales as possible, then you'll need to sell on more than just your own website.
Here are 7 essential steps to help you sell art online and make money in 2023. Register your art business. Setting the stage for online art sales. Showcasing your art online. Pricing your artwork. Online sales platform & marketplaces. Marketing & Promoting your art online. Building Trust & Credibility.
The individual selling plan charges $0.99 per sale. If it looks like you are going to sell a lot of items, there are flat-rate plans, where you pay a set fee, starting at $39.99, to sell up to a certain amount. There are more plans for bigger sellers, but artists and makers are likely to be in the lower end of the sales.
Where Can I Find More Information About Selling Artwork? Online platforms such as art-related websites, blog posts, and forums offer valuable insights into art sales, marketing strategies, and industry trends. Reputable art magazines and publications often feature articles and interviews with artists and experts on selling art.
Explain where the different work positions at the fast food restaurant are located. A year-round public school is helpful to parents for various reasons, but it also has some negative aspects for students. Write about the various websites available for selling artwork using a paragraph for each website.
Emmy-winning artist Mike Perry creates paintings, animation, sculptures, books, public art installations, monographs, exhibitions, drawings, and silkscreens, among other things. His website is among the best artist website examples out there, providing an in-depth look into her creative process.
There are many ways for artists to sell their art online and see more people. Here are a few methods: 1. Create an online store. This is probably the most common way for artists to sell their work. Many platforms, such as Squarespace and Etsy, make it easy to set up a store and sell your art immediately. 2. Share your artwork on social media.
Society6 empowers artists by providing a marketplace to sell their original work. They offer a variety of products to showcase artwork, handle fulfillment, and support artists with a thriving community and resources. Start selling on Society6 and get paid for your art. 12. ArtPal. ArtPal is a free platform for artists to sell their art. They ...