
FREE K-12 standards-aligned STEM
curriculum for educators everywhere!
Find more at TeachEngineering.org .
- TeachEngineering
- Design and Build a Rube Goldberg

Hands-on Activity Design and Build a Rube Goldberg
Grade Level: 8 (7-9)
Note: 25 minutes one day, 50 the next day
Expendable Cost/Group: US $1.00
Group Size: 3
Activity Dependency: None
Subject Areas: Physical Science, Science and Technology
NGSS Performance Expectations:

Curriculum in this Unit Units serve as guides to a particular content or subject area. Nested under units are lessons (in purple) and hands-on activities (in blue). Note that not all lessons and activities will exist under a unit, and instead may exist as "standalone" curriculum.
- A Simple Solution for the Circus
- Tools and Equipment, Part I
- Machines and Tools, Part II
- The Magician's Catapult
TE Newsletter
Engineering connection, learning objectives, materials list, worksheets and attachments, more curriculum like this, pre-req knowledge, introduction/motivation, vocabulary/definitions, troubleshooting tips, activity extensions, activity scaling, user comments & tips.

Designing and building is essential to engineering. Engineers follow the steps of the design process to help them create the best possible solutions to real-world problems. These challenges may be simple or complex and the wide variety of solutions can also cover a range of effort for the user. In general, complex designs require more effort to develop than simple ones. Rube Goldberg designs are meant to show the unnecessary complexities in machines, which sometimes result from modern technology.
After this activity, students should be able to:
- List the general steps of the engineering design process .
- Think critically about the importance of the machines they encounter in life.
- Use their knowledge of simple and compound machines to design and build a small Rube Goldberg machine.
Educational Standards Each TeachEngineering lesson or activity is correlated to one or more K-12 science, technology, engineering or math (STEM) educational standards. All 100,000+ K-12 STEM standards covered in TeachEngineering are collected, maintained and packaged by the Achievement Standards Network (ASN) , a project of D2L (www.achievementstandards.org). In the ASN, standards are hierarchically structured: first by source; e.g. , by state; within source by type; e.g. , science or mathematics; within type by subtype, then by grade, etc .
Ngss: next generation science standards - science, common core state standards - math.
View aligned curriculum
Do you agree with this alignment? Thanks for your feedback!
International Technology and Engineering Educators Association - Technology
State standards, colorado - math, colorado - science.
During the first part of the activity, which is the design of the machines, tell the students that the following materials will be available for them. Anything else they think of requires teacher approval, for example, dominoes, an egg, a wooden dowel, wheels, etc.
- construction paper
- small paper cups (such as Dixie cups)
- paper towel tubes
- jumbo paper clips
- rubber bands
In order to understand compound machines, it is helpful if students are familiar with the six individual simple machines and their abilities to make work easier, as discussed in lessons 1-3 of this unit. Compound machines are described in Lesson 4 . This activity works is intended as a finale to the simple machines unit.
We have been learning about simple and compound machines, calculating mechanical advantage and thinking about machines as a part of society. What is a simple machine? A simple machine makes work easier for people. We also know that engineers build complex machines upon a foundation of knowledge of simple machines. Now we will look at how all of these things that we have been studying come together, as we take on the role of the engineers who design machines. We are not going to design just any machine though; we are going to invent Rube Goldberg machines. Recall that a Rube Goldberg is a contraption that accomplishes a simple task in a fantastically complicated way.
Several steps compose the process of inventing, regardless of the type of machine you want to create. Who knows the first step in the engineering design process ? The first step in designing a good solution is to define the need and the audience. You will need to work with your team to decide what you will be designing. What is the problem you are trying to solve, and who are you designing it for?
Next, an engineer thinks about information that might help to solve the problem. Needed information might include the constraints or limitations on the problem, such as materials or time or safety. For this project, we have some materials already available and we want to use at least three simple machines. We definitely have limited time to our class period, and we want to make sure our contraption is safe.
After all of these things have been decided, engineers brainstorm design ideas. With your team, you will come up with many different simple machine ideas that could be used to accomplish your final task. Then your engineering team will choose which ones to use and create a plan or drawing of the design.
Why is it important to design your machine first, either as a drawing or a clear idea in your mind? (Answer: To just start building could lead you to a machine you don't like or doesn't work, and we don't want to waste materials and time.)
Make sure your machine has many different steps and motions in order to complete the end function and look like a Rube Goldberg. Professional engineers draw their inventions before the thing is built, so we will do that, too. Remember to include a materials list.
Once you have a drawing and materials list, and the design has been approved by the teacher, begin building. Remember that good engineers try not to use more material than necessary and are interested in an attractive product that works as designed. After everyone is finished, we will rotate through and see all the machines in action.
Before the Activity
- For Part 1, gather paper and pencils for students to draw their designs and list any additional materials.
- Gather all materials, including any additional materials requested by groups.
With the Students
Part 1: Design the Rube Goldberg Machine (25 minutes)
- In groups of three, have student engineering teams decide on simple tasks to create machines for, intended audiences, and any information they know that will help them solve the problem.
- With every group member contributing ideas, have students brainstorm ideas about how they will accomplish the simple task (such as getting a marble in a cup one meter away) in an overly complex way. Remind them that they must use at least three simple machines in their final designs.
- Next, have each team collectively produce machine drawings that include dimensions.
- Have teams include materials lists, including any special-request materials.
- Teams show their designs and materials lists to the teacher for approval.
- Have students make design alterations if not immediately approved. After approval, make the design more specific or the drawing more detailed as other groups finish up their designs.
Part 2: Build the Rube Goldberg (50-60 minutes)
- Have students spend a few minutes reviewing their drawings from Part 1 before starting to build.
- Have student teams gather their materials and begin to build their designs.
- Emphasize that each group member participates.
- Direct the students to follow the planned design as closely as possible.
- Once teams, have completed their designs, have them test their machines. Evaluate competing design solutions to determine how well they meet the criteria and constraints of the problem.
- Allow student teams to return to their seats and make adjustments, as necessary. Re-test any re-designs.
- Have each engineering team display its Rube Goldberg contraptions to the class during the last 10 minutes of the period.
design: To form a plan.
Rube Goldberg: Cartoonist and engineer who poked fun at overly complicated machines; a machine that operates in a complicated way in which the procedure could have been much simpler.
specification: An exact and detailed statement of something to be built.
Pre-Activity Assessment
Discussion Questions : Solicit, integrate and summarize student responses.
- What is a Rube Goldberg? (Answer: A machine that does a simple task in a complicated way.)
- Do such machines exist in the world? (Answer: Sure, otherwise Rube Goldberg would not have made it to the dictionary. They are any wacky looking device that seems too complex for its own good; moreover, it probably does a task you don't really need done in the first place.)
Activity Embedded Assessment
Activity Discussion : Review and discuss the activity with the entire class. Use the answers to gauge students' mastery of what it means to design and build. Be sure to cover both the process and the purpose of its design.
- How does Rube Goldberg fit in to all of this? (Answer: His cartoons help us think about the meaning of machines in our society.)
Engineering Design Process : Have students acknowledge each step of the engineering design process as they are completing them. Write the steps on the board for student reference. The steps include: Define the problem, gather information, brainstorm ideas, select the most promising idea, explain your design, build and test your design, and redesign for improvement based on what you have learned from testing.
Post-Activity Assessment
Rube Goldberg Worksheet : Use this worksheet to assign students to take a closer look at a Rube Goldberg cartoon and, drawing upon previously learned concepts, develop arguments that say the machine could in fact work.
Remind students that the Rube Goldberg cartoon machines would probably never work in the real world, so they should not design something that closely resembles his cartoon, because they probably would not be able to build it.
Have students explain how they would find the mechanical advantage of their Rube Goldberg machines.
- For lower grades, designate a specific function for the machine. Students' machines should include at least three steps to completing the task.

Through the cartoons of Rube Goldberg, students are engaged in critical thinking about the way his inventions make simple tasks even harder to complete. As the final lesson in the simple machines unit, the study of Rube Goldberg machines can help students evaluate the importance and usefulness of th...

Students expand upon their understanding of simple machines with an introduction to compound machines. This lesson encourages students to critically think about machine inventions and their role in our lives.

Students apply the mechanical advantages and problem-solving capabilities of six types of simple machines (wedge, wheel and axle, lever, inclined plane, screw, pulley) as they discuss modern structures in the spirit of the engineers and builders of the great pyramids.

Students research and learn about simple machines and other mechanisms through learning about a Rube Goldberg machine. Student teams design and build their own Rube Goldberg devices that incorporate at least six simple machines. This project is open-ended with much potential for creativity and fun.

Contributors
Supporting program, acknowledgements.
This digital library content was developed by the Integrated Teaching and Learning Program under National Science Foundation GK-12 grant no. 0338326. However, these contents do not necessarily represent the policies of the National Science Foundation, and you should not assume endorsement by the federal government.
Last modified: April 1, 2021
Group Rube Goldberg Machine Project

Introduction: Group Rube Goldberg Machine Project

Everyone loves watching a Rube Goldberg machine run, but getting them to work reliably can be a real test of engineering. And while having students create their own Rube Goldberg machine is a fairly common project in engineering classrooms, having them work together to create one GIANT Rube Goldberg machine is a whole new challenge! This project is without fail students' favorite project of the year and it gives me a great opportunity to cover some real-world engineering concepts that otherwise are a bit bland to work into the curriculum (such as quality control, negotiation skills, and FMEA - Failure Mode and Effects Analysis).
This instructable walks you through how to implement a full-class Rube Goldberg project that covers a bunch of useful engineering skills along the way.
Step 1: Introduction to Rube Goldberg Machines
While most people are familiar with Rube Goldberg machines, you will likely have a few students who are not. I like to begin this project by showing a few of my favorite, inspirational Rube Goldberg machine videos to get the students excited about what they are about to start working on.
OK Go created a music video (linked HERE and shown above) that is one giant Rube Goldberg machine and this is definitely my go-to. The music is great and the machine is intense. There is even some behind-the-scenes footage you can show ( HERE ) that talks about the process of creating the video.
There is an almost unlimited number of videos you can find of different types of Rube Goldberg machines, so pick whatever you think will best appeal to and excite your students to share. Here are another few of my favorites for reference:
- This one is an old commercial by Honda that I can't get enough of
- This one is an old Target advertisement that is beautiful in its simplicity
While the excitement is still high, take the opportunity to brainstorm as a class to decide what task you ultimately want your machine to complete. Some examples we have done over the past few years include raising a flag, pressing an ironic "That was easy" Staples button, turning on the theme song from Rocky, and pulling a pinata open. Once you have your overall goal determined, you can begin layout out the space and generating ideas for the machine.
Step 2: Create the Machine Layout

Just like on the floor of a manufacturing facility, machines often have space requirements they need to fit within - and connect to other machines or processes around them.
To ensure that concept is addressed through this project, begin by taping off contiguous spaces around the classroom where the machine will be built so that the starting point of one box connects to the end of the previous machine space. When I create this project, I usually give each student (or pair of students) roughly 4-5 square feet of floor space to work with. Depending on your space, this could be around the perimeter of the room, somewhere in the middle, or even up and over an unused table or desk area! I have included a sample layout for reference above. Once the layout has been set, you can assign spaces for each person/group (or let them choose their spots if you are feeling adventurous).
Reminders/notes: I recommend using tape designed for gym floors like this for this task if you want to be able to pull it up easily at the end of the project without leaving a messy residue on your floor. Also, make sure to consider the fact that students will need a place to stand to work on their projects when you are creating the machine layout. A little extra room along the side of the taped-off machine spaces is extremely helpful!
Step 3: Design/sketch Ideas for Your Space

The main requirement for each space in our machine is that there must be at least three steps/actions, one of which must be a simple machine. (For more information about what simple machines are, check out this great overview from LiveScience.) The only other requirements for this project are that (1) the machines need to stay within the taped borders for each space, and (2) each section of the machine must be able to be reset in less than 2 minutes. (This last requirement helps ensure that testing can be completed efficiently throughout the project.)
To help students begin to formulate their ideas, their first assignment should be to create a rough sketch of the plan they have for their space. For this sketching assignment, I recommend having students design at least 5 steps/actions so it is easier for them to accommodate the starting/ending requests of other groups once they begin negotiating how their machines will connect.
Step 4: Negotiate With Surrounding People

In the real world, most engineers have to negotiate and or compromise their ideas to meet a goal. For instance, if you want to change something about the size of the engine in your car, you have to negotiate with the people who design the parts around the engine to see if it's possible to get extra space. The same concept holds true for this project. Before students begin building, they need to have meetings with the groups around them to reach an agreement about how the intersection between the machines will be handled. This is a great opportunity to show students the importance of documenting agreements and decisions with meeting minutes (and the soft skill of negotiation) in engineering. Students should document the decisions they mutually come to with groups on either side of them to complete this step of the project and move into building their machines.
Sample meeting notes are included for reference. Good notes will include the date of the meeting, a list of the attendees, and the key points of the discussion/negotiation, the results, and any outstanding homework items that need to be completed.
Step 5: Build, Tweak, Test, and Then Tweak Things a Little More

Now it's time for the fun part. Whether you have a set list of supplies you want to have students use or you allow students to go rogue and bring in/build any components they want to use for this project (the latter is my preference), students will now need time to turn their ideas into reality. (Or, if they are using a large cardboard cutout of Yoda like my students, almost reality...)
Make sure to plan time for them to make the initial machine and then work through all the glitches that will come up as they try to make their portion of the machine consistent and repeatable.
Step 6: Failure Mode and Effects Analysis (FMEA)

So far students have learned how to work within space confines, put their ideas on paper, negotiate with colleagues, and create and test a prototype with this project. The final (and most technical) engineering skill students have the opportunity to get experience with in this project is to develop a Failure Mode and Effects Analysis. This analysis is used to ensure that anything that could go wrong in the design won't. I have included a template for the analysis as well as a short introductory lecture to familiarize students with this concept.
Ultimately the goal here is to assess each component of each person's machine and think about what might go wrong. Then, students can ensure they have implemented design elements that will ensure that those failures do not happen.
Attachments

Step 7: Run Your Final Machine
For this final step, I set a whole class period aside to celebrate the end of the project. (Often students will bring in money to order pizzas or treats to celebrate as a class.) While they may feel confident about their own machine or even the connection between their machine and the ones on either side of them, this will likely be the first time the machine as a whole has been tested - and it is unlikely that it will go off perfectly without a few hiccups.
Have students set up their machines and then start the machine from the very beginning and test, test, test! If one part of the machine is constantly the failure point, this is a great time for the class to brainstorm together quickly to try to solve the problem to get a perfect run in before the end of the class. And even if that perfect run never happens, I guarantee they will still be excited about the experience overall. The attached video is a good example of a run that, despite a few hiccups, was still was a blast for the students to have worked on.
I guarantee that the excitement students have for getting a perfect run will be contagious and you will want to keep this project a part of your curriculum year after year!

Participated in the Simple Machines Challenge
Recommendations

Books and Bookshelves Contest

Remake It - Autodesk Design & Make - Student Contest

Green Future Student Design Challenge

- PRO Courses Guides New Tech Help Pro Expert Videos About wikiHow Pro Upgrade Sign In
- EDIT Edit this Article
- EXPLORE Tech Help Pro About Us Random Article Quizzes Request a New Article Community Dashboard This Or That Game Popular Categories Arts and Entertainment Artwork Books Movies Computers and Electronics Computers Phone Skills Technology Hacks Health Men's Health Mental Health Women's Health Relationships Dating Love Relationship Issues Hobbies and Crafts Crafts Drawing Games Education & Communication Communication Skills Personal Development Studying Personal Care and Style Fashion Hair Care Personal Hygiene Youth Personal Care School Stuff Dating All Categories Arts and Entertainment Finance and Business Home and Garden Relationship Quizzes Cars & Other Vehicles Food and Entertaining Personal Care and Style Sports and Fitness Computers and Electronics Health Pets and Animals Travel Education & Communication Hobbies and Crafts Philosophy and Religion Work World Family Life Holidays and Traditions Relationships Youth
- Browse Articles
- Learn Something New
- Quizzes Hot
- This Or That Game New
- Train Your Brain
- Explore More
- Support wikiHow
- About wikiHow
- Log in / Sign up
- Hobbies and Crafts
How to Build a Homemade Rube Goldberg Machine
Last Updated: September 24, 2023
This article was co-authored by wikiHow Staff . Our trained team of editors and researchers validate articles for accuracy and comprehensiveness. wikiHow's Content Management Team carefully monitors the work from our editorial staff to ensure that each article is backed by trusted research and meets our high quality standards. This article has been viewed 1,065,279 times. Learn more...
Rube Goldberg (1883-1970) was a scientist and cartoonist who produced satirical work on people’s overly complex problem solving methods. In his comical cartoons, he linked together chain reactions with simple machines to complete basic tasks, like turning on a lamp or frying an egg. [1] X Research source Designing and building a Rube Goldberg machine requires innovation and patience. While every machine is different, many builders include versions of other people's ideas, tweaking them or linking them in exciting ways.
Preparing for the Assignment or Competition

- If the material is unclear, ask your teacher, parent, or an official to clarify.
- If you don’t follow the rules, you may get a poor grade or be disqualified from the competition. [2] X Research source

- Open or close a door
- Turn on a light
- Turn off an alarm
- Pour a bowl of cereal
- Turn on a faucet

- Rube Goldberg’s original cartoons
- Rube Goldberg Competition submissions
- YouTube videos of functioning Rube Goldberg machines
Designing Your Machine

- Wooden boards
- Toilet paper rolls
- CDs or floppy discs
- Skateboards
- Action figures
- Get creative! [3] X Research source

- Ask yourself questions throughout the process. What object can you use to send a car down a wooden ramp? What materials will you need to make a pendulum? What can you make with a lever, a marble, and an action figure?

- Task: Pop a balloon.
- Step 3: A tack will pop the balloon. The tack will be attached to the front of a toy car.
- Link 1: The toy car will slide down a wooden ramp.
- Step 2: A pendulum will swing into the car and push it down the wooden ramp.
- Step 1: I will send the pendulum towards the car at the top of the wooden ramp.

- If you run into an issue, don’t panic. Return to your notes and see if you can combine the materials in a different way.
- If you are using tools, ask an adult for help. [4] X Research source
Testing and Revising Your Machine

- Can you quickly fix the problem?
- Do you need to replace an entire step?
- Are you using the best materials?
- Is your task possible to achieve?

- What steps are working?
- What steps are preventing the machine from working?
- Is your task achievable?

- Before you present the machine, practice taking it apart and putting it back together several times.
Community Q&A
- Use materials that you can easily adjust, like peg boards, building blocks, etc. Thanks Helpful 1 Not Helpful 0
- Before you construct your entire machine, you may want to test each step and link. Thanks Helpful 1 Not Helpful 0
Tips from our Readers
- It might be easier to work backward! Try starting with the final thing the machine will do and reverse-engineer your project from there.
- Remember, this is your own machine! You can get inspiration from others, but be creative and put your own twist on your machine.
- This can be a tough project but don't give up! Be proud of the hard work you're putting in and have fun with it.

- Be cautious and work under adult supervision if you are using potentially dangerous items. Thanks Helpful 22 Not Helpful 13
You Might Also Like

- ↑ https://www.rubegoldberg.org/all-about-rube/a-cultural-icon/
- ↑ http://static1.1.sqspcdn.com/static/f/853277/11788139/1303160446880/HowtoBuild.pdf?token=katFNsAhIL9TaIXmyhvObs5POFk%3D
- ↑ http://mousetrapcontraptions.com/tips-9.html
About This Article

A Rube Goldberg machine is a machine that's made out of building materials and everyday items that performs a simple task through a complex chain reaction. For example, the machine could turn on a lamp by rolling a ball down a slope to press a button. To make one, choose the materials you want to use, which can be anything from CDs to wooden boards, balls, pins, or fans. Once you have your materials, combine them in a unique way to perform your chosen task. For instance, if your machine is going to pop a balloon, you might pull a lever to send a car down a ramp so it pushes a pin into the balloon. You’ll probably want to build a simple prototype of your machine first out of less expensive materials so that you can make changes easily if something doesn’t work as planned. If your tests work, build the final version of your machine. For tips on how to troubleshoot your prototype, read on! Did this summary help you? Yes No
- Send fan mail to authors
Did this article help you?

Featured Articles

Trending Articles

Watch Articles

- Terms of Use
- Privacy Policy
- Do Not Sell or Share My Info
- Not Selling Info
Don’t miss out! Sign up for
wikiHow’s newsletter
Science in School
Conservation and transfer of energy: project-based learning with rube goldberg machines teach article.
Author(s): Sarah Ferguson, Francis Estacion, Nicole Del Russo, Becki Grimes
Silly or serious? Rube Goldberg machines are not only a lot of fun but can help students to understand the principles of conservation and transfer of energy.
What are Rube-Goldberg machines?
Reuben Garrett Lucius Goldberg (1883–1970) was an American cartoonist and inventor best known for illustrations of his contraptions, named Rube Goldberg machines, which solve simple tasks in the most complicated and funny ways possible. These contraptions live on in the form of pop culture and competitions. [ 1 ] Below is a comic demonstrating one of Rube Goldberg’s machines.
A comic of a self-operating napkin created by Rube Goldberg Artwork Copyright © and TM or ® marks as All Rights Reserved. RUBE GOLDBERG ® is a registered trademark of Rube Goldberg Inc. All materials used with permission. rubegoldberg.com
Project-based learning (PBL) builds on the notion that students will be more engaged in learning through a curriculum built on exploring real-world problems or designed challenges. [ 2 ]
Combining the idea of Rube Goldberg machines and PBL creates an engaging learning sequence designed to help students understand the conservation and transfer of energy. This activity is designed for physics students aged 15 to 18 and can be appropriately scaled up or down, depending on students’ learning needs and classroom dynamics. It provides an exploration of the conservation of mechanical energy. The main objective is to design and build a Rube Goldberg machine, while exploring the conservation and transfer of energy.
Through this project, students are expected to address the following performance objectives: [ 3 ]
- Demonstrate how energy in a closed system is conserved if no work is done on, by, or within the system.
- Use everyday life to illustrate that energy can be transformed from one form to another.
- Investigate conservation of energy in a mechanical system to verify whether any energy is lost outside the system.
The project concept map outlines the connectedness of all major and minor ideas that need to be explored.
The major terms that the map is built upon, mechanical energy and law of conservation, serve as the focal points of the concept map. These two major topics are connected via energy, more specifically, kinetic and potential energy, but the mechanical energy idea also includes work and force.
Implementation
The project is delivered in three class periods, spanning seven days to include a weekend, giving students a good amount of time to be creative with their Rube Goldberg machine designs and creations. These lessons are designed for a virtual experience, but they can also work well in an in-person classroom environment.
Lesson 1: Introductions and sketches
- Engagement video [ 4 ]
- Assignment worksheets
- Scratch paper
- Project website (optional – virtual learning)
- To begin the first day, the teacher should ask the class to list some chores that they must complete at home.
- The teacher can then ask students whether those listed chores could be accomplished by a machine. The students will excitedly discuss the chores that they dislike having to do and brainstorm if they think the task can be accomplished by a machine.
- Once the students are fully engaged with the discussion, they should watch the engagement video , which is a highly entertaining music video containing a complicated Rube Goldberg machine. [ 4 ]
- After the video, the teacher should ask the driving question: What kind of machine could you build that would complete a chore or task for you? To engage the students into figuring out how to answer this question, the teacher can probe with further questions, such as “ what is a Rube Goldberg machine” and “how does the machine continue after only one action?”
- After a brief discussion, the teacher introduces the full project via a PowerPoint presentation.
- Students are assigned a Project Worksheet to supplement their projects, which is due on the third and final day of the unit. The worksheet requires sketches as well as input–output energy equations, which students will work through to calculate potential, kinetic, and possibly rotational energy.
- After hearing about their assignment, students can begin to explore energy transfers and Rube Goldberg machines by participating in an online game . This game is broken into levels, each with their own challenges for students to work through. While exploring Rube Goldberg machines through the game, students are also instructed to pay attention to energy transfers and the initiating tasks that begin each machine. Students are encouraged to notate ideas from the game that they would like to incorporate into their own Rube Goldberg machine creations. The students are given ten minutes of class time to work through as many levels as possible for a little competition.
- After completing the game activity, the remaining lesson time is allotted for students to begin sketching their machines.
- Based on the sketches, the students should have created a list of materials needed to build their machines.
- Online teaching: there are many activities and learning sequences within this small unit of instruction, so a project website was created to house all supplemental materials and to provide easy access to directions, timelines, requirements, and project details for students. If using this, students can be shown the site at end of the lesson (where and how to upload their assignments) and be given their first exit ticket. The exit ticket requires the students to list two examples for each of the six different types of simple machines.
Lesson 2: Construction
- Engagement video [ 5 ]
- Video assessment worksheets
- Optional: exit tickets (available on the project website )
Below is a list of suggested materials to have in the classroom for students to use, but students are encouraged to bring materials from home.
- Paper clips
- Aluminium foil
- Ice lolly sticks
- The teacher introduces another engagement video to get students thinking about physics and their projects, [ 5 ] and the students are given the video assessment worksheet to supplement the video assigned. Afterwards, the worksheet problems are worked through as a class.
- The students are given the remaining class time to work on assembling their machines. In a virtual teaching environment, some students will build small machines near their computers and others will build larger machines elsewhere and check back in with the teacher periodically. The teacher assists students with building ideas or questions as needed.
- At the end of the class, students are instructed to create a video recording of their machines before the next class.
- The students are assigned their second exit ticket, which requires them to list three things they learned about simple machines, as well as two questions they still have about energy transfers. The teacher collects these questions, answers them, and distributes the questions and answers back to the students via email, prior to the next class. The questions posed by students are also listed, with answers, on the project website.
Lesson 3: Presentations
- PowerPoint slideshow of all Rube Goldberg machines
- Peer-review worksheet and rubric
- Voting ballots (strips of scratch paper)
The final component of a PBL lesson is presentation. In a virtual setting, it is best to have students create videos showcasing their Rube Goldberg machines, and class time on the third day will be dedicated to video sharing and peer review. The students will arrive at class excited to present their Rube Goldberg machines.
- The teacher explains how the presentations will be conducted and how the peer-review process functions.
- Students are given a peer-review worksheet to complete during the presentations. About half the class time is designated for the presentation showcase, so there is time for replaying video recordings multiple times as well as in slow motion.
- After all student videos are presented and peer-review comments are submitted, the teacher will show the students a national Rube Goldberg competition and discuss their smaller machines in comparison to the elaborate machines showcased in the national competition.
This project can be modified in many ways. If situations permit, this can be a good project for groupwork or for a competition. Also, the number of energy transfers can be scaled up or down, depending on the students’ abilities. Additionally, if the project is conducted in person, then the driving question can be changed to be more applicable to tasks that can be completed in the classroom. Along with being in person, the presentations can either be live or completed through video recordings. An option could be for students to record their machines in the classroom, so they are able to record multiple takes if their machines malfunction.
Student learning and understanding regarding energy transformations increases after having the opportunity to create their own energy transformations in a fun and educational way.
[1] An introduction to Rube Goldberg: https://www.rubegoldberg.com/rube-the-artist/
[2] Larmer J, Ross D, Mergendoller JR (2017) PBL Starter Kit . Buck Institute for Education, Novato CA. ISBN: 0974034320
[3] Board of Education (2018) Science standards of learning for Virginia public schools: https://www.doe.virginia.gov/testing/sol/standards_docs/science/2018/standards/stds_physics.pdf
[4] Demonstration of a Rube Goldberg machine from OK Go: https://www.youtube.com/watch?v=qybUFnY7Y8w
[5] A video from 3M demonstrating a Rube Goldberg machine: https://www.youtube.com/watch?v=GEzcO3nfjZk
- Find all the resources for this activity on the Rube Goldberg PBI site .
- Sign up for one of the fantastic Rube-Goldberg contests offered by rubegoldberg.com : The Rube Goldberg Machine Contest, The Rube Goldberg Crazy Contraption Cartoon Contest, or The Rube Goldberg/Minecraft Competition. These activities are free and open to all ages.
- Play a game on dynamic systems .
- Check out Joseph’s machines on YouTube for wonderful examples, such as passing the salt while maintaining social distancing.
- ESA (2021) Landing on the Moon – planning and designing a lunar lander . Science in School 51 .
- Florean C (2018) Adventures in creative recycling . Science in School 45 : 27-30.
- Toro S (2021) Biomimicry: linking form and function to evolutionary and ecological principles . Science in School 53 .
Dr Sarah Ferguson is a master teacher with the Old Dominion University’s MonarchTeach program. Experienced with problem-based instruction, she enjoys working with pre-service teachers to expand their understanding of problem-based instruction techniques.
Francis Estacion is a physics teacher with King’s Fork High School in Suffolk, Virginia. He enjoys bringing hands-on experiences into his physics classroom and encouraging his students to explore their curiosity.
Nicole Del Russo and Becki Grimes are pre-service teachers majoring in physics. They enjoy working with students in hands-on lessons that encourage curiosity while making physics relatable and understandable.
If you are looking for a novel and exciting way to teach classic physics concepts to older students, this article may be what you are looking for!
Energy transfers are investigated through a project-based learning activity intertwining science and popular culture to create a Rube Golberg contraption. This activity can be used as part of a seven day guided physics project or even be adapted into a fun, cross-curricular competition using skills from other subjects such as design and technology. Designed to be delivered online as well as in person, this activity offers a creative and easily adaptable physics option for today’s changing classroom.
Koulla Andronicou, Head of Science, Med High Private English School, Cypress
Supporting materials
Assignment worksheet
Peer-review worksheet
Student project worksheet
Video assessment worksheet
Download this article as a PDF
Rube Goldberg Machine Project (Carro IPS): Assignment
- Project Pledge Form
- Project Grading Rubric
- Online Resources
A Rube Cartoon!
Introduction.
The objective of this project is for you to build a 6-stage Rube Goldberg device whose purpose is to turn on a light bulb by flipping a switch. You can borrow the switch from school, but you must return it. Your machine DOES NOT have to have a light bulb. I will provide that and we will connect it to your switch when you run the machine.
You are free to be creative, but it is IMPORTANT that the design be yours and that YOU do most of the construction of the device.
The machine must have at least 6 separate steps, the last one will be to flip the switch, the first one will be an input from you (for example dropping a golf ball, pushing a lever or some triggering device, etc).
The objectives of this project are:
1) For you to be creative in applying some of the Physics concepts you’ve learned (this is what design engineers do).
2) For you to build something (many engineers do this: mechanical, construction, civil).
3) For you to try your best to build something for as little money as possible and trying to recycle old pieces and parts.
4) SAFETY! Good engineers always think about the safety of the devices they work on, and safety while building them!
5) To have a ton of fun while working and showing off your stuff.
Requirements
Requirements:
The machine must have at least one of the following:
1) An inclined plane
5) Stored potential energy (gravitational)
6) Stored potential energy (elastic-examples: a rubber band, a spring, etc)
7) Something that accelerates
8) Something that moves at constant speed (or pretty close to it)
Project Calendar
- Next: Project Pledge Form >>
- Last Updated: Jan 20, 2024 12:40 PM
- URL: https://libguides.montgomerybell.edu/rube
Science By Sinai
Middle School Science Tips, Ideas, and Resources
How to Create an Exciting But Structured Rube Goldberg Machines Unit
Have you tried having your students make Rube Goldberg machines and had the project drag on and on with several false starts? Did you have an abundance of random materials around your classroom? Did your students start the project with enthusiasm but then fizzle out, losing direction, making it hard to grade them?

Karen Sinai
Updated Feb 16, 2021
That happened to me so I decided to take control and design a structured project system. Students now create incredible Rube Goldberg machines within a reasonable time period. They do plenty of upfront planning before they start gathering materials and assembling. I was worried that this would take their creativity away and that they would whine from the beginning. I was very pleasantly surprised when they embraced the planning and brainstorming session and took their time to do the daily progress journals.
Why Make Rube Goldberg Machines?
First of all, they are incredibly fun! The satisfaction when the design works is so gratifying! The engineering, and trial and error process, really pushes the students to plan and use critical thinking.
I do this as part of my unit on forces and simple machines and I require them to use five simple machines. By the time they complete their machines they really understand simple machines and transfer of energy well! I rarely have to do any further unit assessments.
Start with Examples to Create Excitement!
I like to show the students examples from previous years and there are many examples on YouTube. Some are very long and elaborate, but I tell them to watch it with ideas as to how to make individual steps. They absolutely love watching these videos and get really inspired. I try to do the initial brainstorming on the same day that I show the videos to capture that excitement.
Set a Goal for the Students
The students should have an ultimate goal such as popping a balloon, pouring a drink, watering a plant, pushing a ball, dropping a ball into a cup or turning a light on and off. I find it easiest to ask them to work BACKWARDS from the final goal. For example, if their final goal is to drop a ball into a cup, then they should start with the step that will put the ball in the cup.

I have learned to set size parameters. In the past, I didn’t specify this and their projects ended up going all around the room. I share my room with different teachers in the morning and that became problematic when things were moved or touched. I now have students create components that will fit on a desktop, with a fixed base, that can be moved and stored at the back of the room.

Have Students Brainstorm and Plan
This component of the project has saved me a tremendous amount of headache and aggravation in the long run! I used to simply bring in bags and bags of materials and have them figure out what they wanted to use. Their visions did not always pan out and they would get very frustrated. I have found that if I flip it around, where they have an idea in their head and THEN they go gather materials, then the entire project goes much more smoothly. As I said earlier, I like to use the brainstorming prompts, in their digital science notebooks, the same day that I show the videos when they are full of creativity. I walk around and discuss the feasibility of their ideas. After they have their plans they then do the rough sketch. I have a rubric for their brainstorming session which really keeps them moving ahead.

Their sketches must be labeled with the simple machines and a rough idea of what materials they will use. They must have my approval before they begin to gather supplies.

Keep Daily Journals and Rubrics
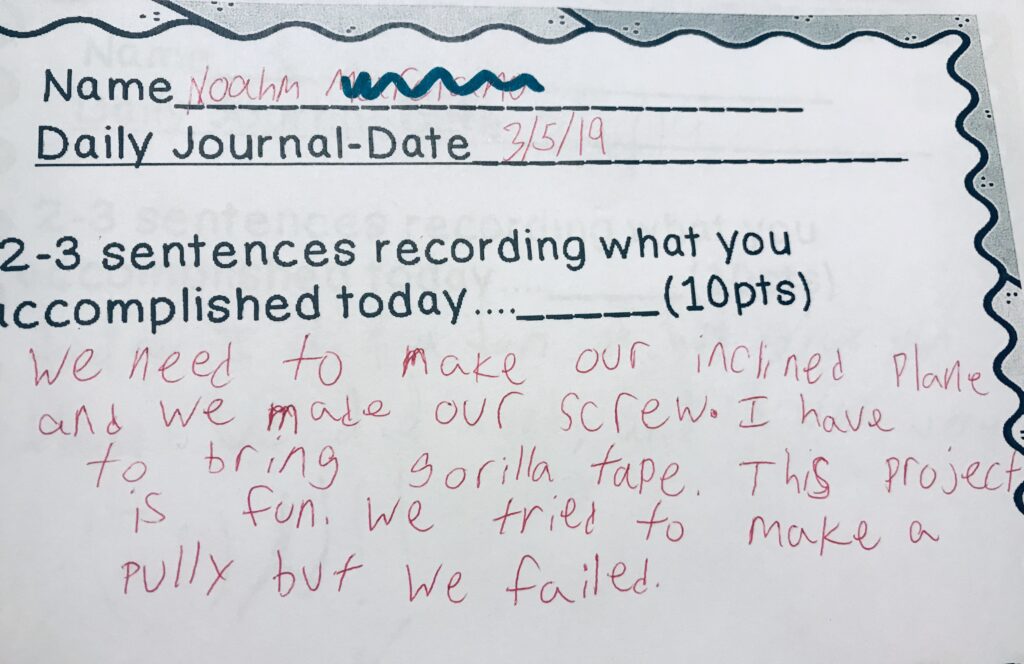
As I do with most of my projects, I have the students fill out daily journals describing what they accomplished each day. I make sure to budget the time for them to be cleaned up and still have three minutes to fill out these forms. (See my time management post ). They are worth 10 points each day which adds value to the project.
Along with this journal, I also walk around with daily rubrics that add up to 20 points. These include how well they are working cooperatively, whether or not they brought in the materials and how well they cleaned up. This simple addition has made a huge difference in the accountability in my classroom!

I am embarrassed to admit that, after weeks of working on this project in the past, I often had difficulty grading each student as the days blurred together. Having this system in place gives me daily points to add to my gradebook and helps me remember any problems we had along the way. The hard-working students really appreciate getting credit for their work and the students that were happy to let others do the work now had to step up.

Rube Goldberg Machine Final Presentation
After the students have completed their Rube Goldberg machines, they fill out the form that has step-by-step descriptions. They will also do a final sketch and take plenty of photographs. Since my students are 1:1 iPads, I have them take slow motion videos which they narrate with the required steps. I ask them to include the names of the simple machines and where the transfer of energy occurred.

Assessing the Final Products
I strongly believe that students should assess themselves as well as an assessment coming from me at the end of a project. I gave them a self-assessment form so they could pull all their thoughts together as to how they think the overall project went. It includes what ways they would improve how they worked, what new skills they learned and whether they were good with their time management. This ultimately helps me with the next project!
I also have a final rubric for each student and many of the questions involve the final product. This way, their grade is dependent on how the group worked along with their individual understanding.

Taking the Concept to Another Level
My students beg to do Rube Goldberg machines every year, which is not necessarily feasible as a stand alone project. However, if you add a new twist with some extra concepts it can be doable! During my environmental unit, when we are studying food chains, we finish off by making four step Rube Goldberg machines! I have a post on how we do this called STEM Energy Project Using Rube Goldberg Machines and Food Chains! The bottom line is that we take four step food chains and look at the energy transfer and represent that energy transfer with our Rube Goldberg machines! The students love it. I have 6 different ecosystems to choose from or a combined product as seen below.

This is an incredibly fun project with very visible results to be shared with the class and even other classes. By using my structured system you will have more peaceful, less chaotic sessions. A bonus is that you will also have plenty of tangible assessment points for your gradebook. I would love to hear how your projects went!

Similar Posts

Teach Biodiversity in Food Webs With a Dice Roll Game
Teach Biodiversity in Food Webs With a Dice Roll Game Are you looking for an engaging way to teach biodiversity in food webs? Let’s do it with a game! My food web, dice roll biodiversity game helps students understand that man-made or natural events can cause serious consequences in a food web. They will realize…

Use Backwards Lesson Planning to Create Science Labs
Use Backwards Lesson Planning to Create Science Labs Do you struggle with balancing time during labs and hands-on activities? Have you tried backwards lesson planning to create your science labs? I have mentioned this method in several of my blog posts, but I thought it would be helpful to focus only on this method to…

Dealing With Difficult Parents as a Teacher
Dealing With Difficult Parents as a Teacher Are you dealing more and more with difficult parents in your teaching job? Have you received an unexpected nasty email? Has a parent become angry about something in your classroom? What strategies can you use to diffuse the situation? Dealing with difficult parents, as a teacher, can be…

Planning Lab Activities for Middle School Science Class
Planning Lab Activities for Middle School Science Class Are you struggling with planning lab activities while teaching middle school science? How do you introduce the lab, execute it, clean up and draw conclusions in one class period? I use a method that I call “backwards lesson planning” as I am planning lab activities for my…

10 Ways to Assess Students in the Science Classroom
10 Ways to Assess Students in the Science Classroom It’s not so easy to assess students in the science classroom since it is not as straightforward as other subjects. Students are actively working out of their seats, working on projects and following procedures. I am a strong believer in multiple ways to gather data on…

Learn the Blood Pathway Through the Heart
Learn the blood pathway through the heart – activity Teaching the pathway of the blood through the heart? These cards get cut out and students attempt to arrange them in the correct order. They can then play games where a partner closes his eyes while the other one removes one card from the sequence. It…
Leave a Reply Cancel reply
Your email address will not be published. Required fields are marked *
Don't subscribe All new comments Replies to my comments Notify me of followup comments via e-mail. You can also subscribe without commenting.
Engineering Kids | Rube Goldberg Machine
- Elementary , Elementary - 1 , Engineering , Pre-School , STEAM
71 Comments
Build a rube goldberg machine with kids.
So, are you interested in building a Rube Goldberg-style machine with little kids? This post will give you a few tips and ideas to make your own complicated machine.
This project has long been on my to-do list with my kids. We are long-time fans of marble runs (see the resources page for recommendations), and extending our love for rolling balls and ramps into the world of Rube Goldberg was a no-brainer. And triple hurrah for projects that celebrate STEM and STEAM learning. We were on the hunt for easy Rube Goldberg ideas, watched a few videos, and came up with this fun solution that works for young children.
About Rube Goldberg

And apparently, Rube Goldberg is a now an adjective in the dictionary! You can read more about Goldberg here .

Step 1: Get Inspired
First things first, you’ll want to watch some Rube Goldberg contraptions in action to get inspired. My kids and I LOVE this video from OK Go. It’s incredible complicated, but oh-so-amazing, so don’t think for one hot second that you’ll be able to replicate this with little kids. I’ll add more inspiring videos below.
Step 2: Solve a Problem
Next, come up with a simple problem that you’re trying to solve. For example:
- Ring a Bell
- Pop a Balloon
- Open a Door
- Shut a window
- Put out a candle
Once you have a problem sorted out (and don’t worry – you can change this later if you want), gather supplies…
Step 3: Gather Supplies
You can print out the following list here.

Things that Roll
- Balls: Tennis, Baseball, Bowling, etc.
- Roller Skate
Things that Move
- Toy Train Tracks
- Marble Runs
- Plastic tubing
Recyclables
- Cereal Boxes
- Cardboard Rolls
- Plastic Water Bottles
- Aluminum Foil
Household Materials
- Popsicle Sticks
- Wooden Blocks
- Vinegar and Baking Soda
Step 4: Build Your Machine!
Once you have the supplies ready, start building. While the OK Go video (and others like it) includes some pretty complex machines and concepts, keep this simple for preschoolers. The basic concept that we’re exploring is that of a chain reaction, so anything that tips something else over (and so one) is what you’re going for. Don’t worry too much about building things like pulleys and levers for young children.
Take a look at our machine to get a sense of what’s possible.
Our Rube Goldberg Machine in Action
5 tips for success.
- Success breeds enthusiasm, so keep the steps to a minimum. You can always add more as you go.
- Keep your expectations low
- Ask your child for ideas and input
- Work collaboratively
- Aim to have fun
A Note on Failure
As you test and try out different set-ups, you’ll undoubtedly fail a few times. I could have filled a 20 minute video with outtakes from all our misses (the balloon is a good example of that). But this is great news! Failure is an intrinsic piece of the invention process, and without these mistakes we won’t learn how things really work. So embrace failure and celebrate it as part of the learning process.
Next Steps: Full STEAM Ahead
- Ask: What other simple problems could we solve?
- Ask: What materials could we use?
- Ask: Why didn’t that work? How could we fix it or try it again?
- Encourage your child to problem solve by seeking out materials and moving objects.
Did you enjoy this project? Join the semi-secret Club TinkerLab on Facebook to swap and share more ideas like this.

Inspiring Rube Goldberg Machines
Watch this one light up a Christmas tree
Learn about Rube Goldberg Machines on Sesame Street
Easy Rube Goldberg Example
More Projects like this one
DIY Paper Tube Marble Run
Fort Building Kit
DIY Water Wall, it’s like a marble run, but with water!
Build an easy light table
Make Gumdrop Sculptures
Activate Learning with STEAM
In that vein, you may also enjoy these projects that circle around STEAM (science, technology, engineering, art, and math) ideas. This week’s theme is REACT , and you can see the other reaction-related ideas here:
Stixplosions | Babble Dabble Do
Smoosh Painting | Meri Cherry
Color Changing Chemistry Clock | Left Brain Craft Brain
Zoom Ball | What Do We Do All Day?
Glowing Hands | All For The Boys
Rainbow Reactions | Lemon Lime Adventures
Colorful Chemical Reaction | Frugal Fun for Boys
STEAM on Pinterest
You might also enjoy following my STEAM + STEM Activities board on Pinterest for more ideas like this.
Online Art Classes for Kids
Engaging kids art classes - from the comfort of home you set up the space, we'll provide the instruction..

I adore this idea. I have actually wanted to make something like this ever since I was a little girl and watched that truffle-shuffle scene in The Goonies 🙂 I will definitely have to get a kit together for my little STEAM obsessed friends. Thank you!
Thank you, Cait! I’m so glad that you mentioned that AWESOME Goonies scene. How could I not have included that in this post? So memorable. Here’s a link to anyone who misses it: https://www.youtube.com/watch?v=V-Ln03xgaUc
[…] Create a Rube Goldberg Machine from Tinkerlab […]
[…] Rube Goldberg Machine – Tinkerlab […]
[…] Rube Goldberg Machine // TinkerLab […]
I just happened to check out your site this morning to see what was new for art class and immediately changed my plans for K/1 science! We found materials around our classroom and borrowed some bells from the music classroom. The kids didn’t want to clean up for lunch 🙂 I promised more time for inventing this week. Thanks for the great explanation and lists, they made it easy to get started!
Are you serious, Brianna? That’s so amazing. I’m DELIGHTED that this post was helpful and that you were able to get this off the ground so quickly. Have a great day.
Oh, it was great! We had two weeks of inventing. We’re just coming off of March Break, but we’ll probably revisit it again. The activity fit in very well with the new full day kindergarten curriculum we have in Ontario, which is centred around play-based learning. If I can find a video or picture of our machines that don’t have kids in them, I’ll send you one 🙂 I’m fortunate enough to team-teach a Kindergarten-Grade 1 class part time, and my subjects are Science, Art, Health and Phys. Ed. (I do teach other subjects as well). So I’m excited to check out the other STEAM Power projects next!
I love Rube Goldberg Machines! I even have vintage toy based on his cartoons. This is a great project to try and so inventive!
Oh, I would love to see that toy, Ana. It will be interesting to see how the contraption-invention process changes as my kids get more experience with this.
Rachelle, I don’t know if I can love a post more. The pictures, the video, the ideas! The coolness of Rube Goldberg. I just love everything about this. Well done woman! Will share this week for sure.
Meri, you are the loveliest! This was a fun project to work through and the ideas that my daughter had were priceless. I wish I had the energy to compile a big video of outtakes.
i have been doing rube goldberg machines and this post was amax=zin
Super post & project for kids! It reminds me of the game Mousetrap that we use to LOVE to set up but hated the clean up part 🙂 I wonder if his work inspired that game? Also reminds me of a few scenes from the movie “Home Alone”. My daughter will really love doing this — she’s a born builder with a great sense of humor 🙂
Thank you so much for the comment Jacquie! I’ve never played Mousetrap, but have heard of it. It sounds like fun. I just looked into it, and apparently the game designer, Marvin Glass, WAS in fact inspired by Goldberg and never acknowledged him! Yikes. I forgot about that Home Alone scene. So, so good.
This is fantastic! Have you seen the Rube Goldberg Sesame Street scene (on YouTube)?? Spent two hours building this morning! Thanks for the inspiration.
Hi Jacq, No, I haven’t seen it! You guys are all sharing so many great scenes and I have to look for this one. Awesome! I’m so glad to hear that this inspired you. I left the pieces set up in my studio, and a friend came over and couldn’t stop playing with them. Fun for everyone!
My almost 5 year old and I just built our first Rube Goldberg invention. She loved it. I almost never write comments like this but am so appreciative for the post and ideas. We had a great time. She is now brainstorming other ones we could create.
Hi Heidi, I’m honored that you’re leaving a comment for me. I’m so glad that this was a hit in your home, and look forward to hearing from you again! Rachelle
[…] totally cool is this Tinker lab Engineering Kids and Rube Goldberg Machine and while you are over at Tinkerlab… did you see these solar […]
What a great blog on Rube Goldberg contraptions! Not long ago we met Rube Goldberg’s granddaughter at a science convention.What a charming lady! She has a website and runs a contest for older kids. She inspired us to write a blog on Rube Goldberg contraptions in which we included a list of great picture books for this theme. http://www.getcaughtengineering.com/brainy-zany-contraptions-stem/ We love your book and website and frequently recommend it to teachers and parents who are looking for STEM projects for younger children. Thanks for all your wonderful ideas. Wendy Get Caught Engineering
[…] Engineering Kids | Rube Goldberg Machine TinkerLab Using Pool Noodles to Build a Playhouse From ABCs to ACTs PVC Pipe House Building Project Engineering STEM Activity Little Bins Little Hands STEAM Challenge: Build a structure you can balance on one finger (or your nose!) Gift of Curiosity Build a Satellite NASA Jet Propulsion Laboratory How to Make Projector Using Smartphone and Magnifying Glass STEM Little Explorers Pneumatic Machine Made for STEAM Cardboard Automata Exploratorium How to Make a Water Wheel Home Science Tools Global Cardboard Challenge Imagination.org […]
This is a good idea! my 4th grade class and I are making one next week! <3
[…] about Rube Goldberg Machines, can you make one at home? (Lego rube goldberg […]
[…] will love building their own Rube Goldberg machine! // Tinker […]
[…] Rube GoldBerg Machine | Tinker Lab […]
[…] Create a Rube Goldberg Machine (check out this link) […]
[…] https://tinkerlab.com/engineering-kids-rube-goldberg-machine/ […]
[…] Get creative together. Think outside the box to create your own activities that the whole family can participate in. Use household items to create an obstacle course, think of a theme and create a scavenger hunt, or have your child pick two objects from every room in the house and create a Rube Goldberg (chain reaction) machine. […]
[…] Get creative and make a Rube Goldberg machine (Tinker Lab). This can be done with many items found around the house. Your machine […]
[…] Build a Rube Goldberg machine […]
[…] Construct a Rube Goldberg machine […]
this is almost the coolest thing in my life.
[…] Build a Rube Goldberg system […]
[…] STEM: Rube Goldberg Machine […]
this is really smart for kids like me.
[…] For more detailed instructions on making your own Rube Goldberg machine, click here. […]
[…] the contest, you can just have fun with the challenge. Read about making a Rube Goldberg here: https://tinkerlab.com/engineering-kids-rube-goldberg-machine/ and watch this video to hear about the […]
[…] that the goal is to solve a problem repeatedly. An example of a well-explained outline is https://tinkerlab.com/engineering-kids-rube-goldberg-machine/ . The instructor will provide in-class support to learners in finding other resources and videos of […]
wow that was so long to read i a surpised
[…] Tinkerlab: Rube Goldberg Machines […]
[…] a Rube Goldberg machine or a paper plate marble […]
Sooooooo goood
[…] R – Rube Goldberg Machine Making – tinkerlab.com/engineering-kids-rube-goldberg-machine […]
[…] This is a great way to do something new with those unused boxes of toys! Rube Goldberg (or chain reaction) Machines help children to understand physics and are a brilliant way to develop perseverance and patience when things don’t work so well the first time. Start with a simple example of a line of dominos falling into each other, and then let children’s imaginations run wild! There are some ideas and links to videos in this old but very good resource from Tinkerlab. […]
Very nice idea. Surely this is a good activity to try.
[…] Rube Goldberg Machines and Marble Roller Coasters – Have your children look through their toys and come up with some objects that they can use to create a Rube Goldberg Machine. Or grab some leftover pipe insulation from your last winterizing project and have them create a roller coaster for marbles. Both activities provide lots of opportunities to experiment with the laws of physics! […]
[…] Create a Rube Goldberg Machine […]
[…] Engineering Kids | Rube Goldberg Machine on Tinker Lab – Watch videos, get a printable supply list, and read tips for success in this post. […]
[…] Rube Goldberg Inventions Ideas for zany inventions inspired by the Rube Goldberg, the cartoonist whose ridiculous “time-savers” were more trouble to put together than the task itself ever might have been. This site offers video examples, ideas to get you started, and lists of materials you might find around the house. If you don’t have one of these items, just try something else. Maybe small books will work as well as dominoes. Try paper towel rolls if you don’t have plastic tubes. And we sure will want to see your pictures and videos for this one, so please tag us on Instagram. Just google Rube Goldberg Inventions if you want to see more. […]
Comments are closed.
TinkerLab is a creative studio dedicated to sparking curiosity and a love for art through hands-on making. Our mission is to inspire creativity and experimentation in parents, educators, and artists of all ages, transforming everyday moments into creative adventures.
USEFUL LINKS
Testimonials
Privacy Policy
Terms & Conditions
GET IN TOUCH
855 El Camino Real
Suite 13A-144
Palo Alto, CA 94301
10 WAYS TO INTRODUCE ART TO PRESCHOOLERS
An inspiring 10-point poster for your fridge, planning binder, or to share with colleagues or friends.

TinkerLab acknowledges the ancestral land of the Muwekma Ohlone Tribe, and pays respect to elders both past and present. This land was and continues to be of great importance to the Ohlone people, and we have a responsibility to acknowledge, honor and make visible the our relationship to Native peoples. Donate to the Association of Ramaytush Ohlone.
75 Rube Goldberg Project Ideas [Updated]

Have you ever heard of Rube Goldberg machines? They’re like super cool and crazy inventions made to do simple stuff but in the most fun and complicated ways ever! Imagine rolling marbles or making a book page flip with a bunch of cool gadgets and doodads. These machines are all about being creative, solving problems, and having a blast with science and engineering stuff. So, in this blog, we’re going to check out some awesome Rube Goldberg project ideas that you can totally try on your own, whether you’re just starting out or you’re ready for a big challenge. Let’s dive in and have some fun!
How Do You Do A Rube Goldberg Project?
Table of Contents
Doing a Rube Goldberg project is all about letting your imagination run wild and having fun with it! Here’s a simple step-by-step guide to get you started:
- Pick a Simple Task: Choose a basic task you want your Rube Goldberg machine to accomplish, like turning off a light switch, popping a balloon, or ringing a bell.
- Gather Materials: Look around your house for items you can use to build your machine. Think about things like toy cars, dominos, ramps, balls, string, tape, cardboard, and anything else you can find.
- Plan Your Design: Sketch out a rough design of how you want your machine to look and how each part will connect to the next. Start with the end goal in mind and work backward to figure out the sequence of actions.
- Build Your Machine: Start building your machine one step at a time, connecting each part together as you go. Test each step as you add it to make sure everything is working properly.
- Test and Tweak: Once your machine is built, it’s time to test it out! Start at the beginning and watch as each action triggers the next one in a chain reaction. If something doesn’t work, don’t worry! Just tweak it until it does.
- Share Your Creation: Finally, share your Rube Goldberg machine with friends and family. You can make a video of it in action or invite them over to see it in person. They’ll be amazed by your creativity and ingenuity!
Remember, the most important thing is to have fun and be creative. There’s no right or wrong way to build a Rube Goldberg machine, so let your imagination soar and see where it takes you!
75 Rube Goldberg Project Ideas: Category-Wise
Simple rube goldberg project ideas.
- Dominoes knocking over to trigger a series of events.
- Using a rolling marble to activate switches and levers.
- Dropping a ball onto a seesaw to launch another object.
- Pulling a string to release a spring-loaded mechanism.
- Placing a weight on one end of a lever to lift an object on the other end.
- Tipping over a cup to pour water into a container.
- Balancing objects on a beam to cause it to tilt and activate a switch.
- Using a pulley system to lift and drop objects.
- Pushing a toy car down a ramp to hit a target.
- Blowing air through a straw to move an object.
Intermediate Rube Goldberg Project Ideas
- Constructing a mini-golf course with various obstacles.
- Creating a chain reaction with falling dominos and flying toys.
- Setting up a simple alarm clock to ring using a series of actions.
- Building a device to pop a balloon with a dart.
- Designing a contraption to flip a light switch on or off.
- Using magnets to attract and repel objects in motion.
- Incorporating pulleys and counterweights to create movement.
- Designing a machine to dispense a treat for a pet.
- Setting up a series of gears and cogs to turn a crank.
- Creating a device to launch a paper airplane.
Advanced Rube Goldberg Project Ideas
- Designing a complex system to water plants automatically.
- Building a mechanism to sort different types of objects into separate containers.
- Constructing a contraption to crack an egg into a bowl.
- Creating a device to mix ingredients for baking.
- Designing a machine to launch a rocket or model spaceship.
- Setting up a system to play a simple musical tune.
- Building a miniature roller coaster with loops and twists.
- Constructing a device to feed a pet on a timer.
- Designing a contraption to blow out candles on a birthday cake.
- Creating a machine to draw a picture or write a message.
Kitchen-Themed Rube Goldberg Project Ideas
- Making a simple breakfast using a series of kitchen gadgets.
- Creating a device to make a cup of coffee or tea.
- Setting up a system to pour a bowl of cereal and milk.
- Designing a contraption to butter a slice of bread.
- Building a machine to crack and scramble an egg.
- Constructing a device to peel a piece of fruit.
- Creating a mechanism to stir a pot on the stove.
- Designing a contraption to squeeze juice from a fruit.
- Setting up a system to toast a slice of bread.
- Building a machine to scoop and serve ice cream.
Science-Themed Rube Goldberg Project Ideas
- Demonstrating simple physics principles like gravity and inertia.
- Building a contraption to demonstrate how a simple machine works.
- Designing a machine to demonstrate the transfer of energy.
- Setting up a system to show how pulleys and levers can be used to lift heavy objects.
- Creating a device to illustrate how gears and cogs work together.
- Constructing a machine to show the properties of magnets.
- Designing a contraption to demonstrate how sound waves travel.
- Setting up a system to show how light can be refracted or reflected.
- Building a machine to demonstrate the properties of air pressure.
- Creating a device to show how heat energy can be transferred.
Nature-Themed Rube Goldberg Project Ideas
- Setting up a system to water plants using rainwater collected in a container.
- Designing a contraption to scare away pests from a garden.
- Creating a machine to feed birds or squirrels in the backyard.
- Building a device to catch rainwater for watering plants.
- Constructing a contraption to create a mini-ecosystem in a terrarium.
- Designing a machine to simulate the movement of ocean waves.
- Setting up a system to create a mini-avalanche using sand or soil.
- Building a device to mimic the movement of animals in the wild.
- Creating a contraption to create a mini-thunderstorm using sound effects and lights.
- Designing a machine to simulate the growth of plants from seed to harvest.
Art-Themed Rube Goldberg Project Ideas
- Creating a contraption to mix colors and create a painting.
- Building a machine to create a sculpture using various materials.
- Setting up a system to play a musical instrument like a piano or guitar.
- Designing a contraption to create a kinetic sculpture that moves in interesting ways.
- Constructing a device to create a piece of digital art using a computer program.
- Building a machine to create a stop-motion animation using objects and props.
- Setting up a system to create a piece of performance art using actors and props.
- Designing a contraption to create a piece of interactive art that responds to the viewer.
- Creating a machine to create a piece of art using unconventional materials like food or recycled objects.
- Building a device to create a piece of art using a specific technique like collage or printmaking.
Holiday-Themed Rube Goldberg Project Ideas
- Designing a contraption to deliver a gift on a holiday like Christmas or Hanukkah.
- Building a machine to create a festive decoration like a wreath or garland.
- Setting up a system to play a holiday-themed song or music.
- Creating a device to create a festive light display using LED lights.
- Designing a contraption to launch fireworks on a holiday like the Fourth of July.
Tips for Designing and Building Rube Goldberg Projects
Designing and building Rube Goldberg projects can be both challenging and rewarding. Here are some tips to help you along the way:
- Start with a Clear Goal: Define the simple task you want your Rube Goldberg machine to accomplish. Whether it’s turning off a light switch or popping a balloon, having a clear goal will guide your design process.
- Plan Carefully: Sketch out your design and think about how each step will connect to the next. Consider the materials you’ll need and how they’ll interact with each other. Planning ahead will help you avoid problems later on.
- Keep It Simple: While Rube Goldberg machines are known for their complexity, it’s important to start with a simple design, especially if you’re new to building them. Focus on creating a smooth sequence of actions that lead to your end goal.
- Use Household Items: Look around your house for materials you can use to build your machine. Common items like dominoes, toy cars, ramps, and balls can be repurposed to create exciting chain reactions.
- Test as You Go: As you build each step of your machine, test it to make sure it works as intended. This will assist you in pinpointing any problems at an early stage and adapting your approach as necessary.
- Embrace Trial and Error: Constructing a Rube Goldberg contraption frequently requires extensive experimentation and refining. Don’t be afraid to experiment with different designs and techniques until you find what works best for your project.
- Incorporate Simple Machines: Explore the use of simple machines like levers, pulleys, inclined planes, and wheels to add movement and complexity to your machine. Understanding how these machines work can help you design more efficient mechanisms.
- Pay Attention to Timing: Timing is crucial in Rube Goldberg machines, as each action needs to happen at the right moment to trigger the next one. Experiment with the placement of objects and the speed of movement to achieve the desired timing.
- Document Your Progress: Take photos or videos as you build your machine to document your progress and capture any noteworthy moments. Not only is this helpful for troubleshooting, but it’s also a fun way to share your project with others.
- Have Fun and Be Creative: Above all, remember to have fun and let your creativity shine! Rube Goldberg projects are all about thinking outside the box and coming up with inventive solutions to everyday tasks. So don’t be afraid to get creative and enjoy the process of building something truly unique.
Rube Goldberg projects are more than just fun and games—they’re a celebration of creativity, ingenuity, and the joy of invention. Whether you’re a beginner or an experienced engineer, there’s always something new to explore in the world of Rube Goldberg project ideas. So gather your materials, unleash your imagination, and embark on your own Rube Goldberg adventure. Who knows what amazing contraptions you’ll come up with next?
Related Posts

Step by Step Guide on The Best Way to Finance Car

The Best Way on How to Get Fund For Business to Grow it Efficiently
Leave a comment cancel reply.
Your email address will not be published. Required fields are marked *
51 Easy Rube Goldberg Project Ideas For Students [2024]

Rube Goldberg is a name that sparks curiosity and creativity! Imagine a storyteller who turned simple tasks into an adventure. His unique devices, using everyday things, set off a chain reaction, making the ordinary extraordinary. Now, let’s explore the importance of these unusual inventions.
In this blog, we will unravel the interesting world of Rube Goldberg, tailored especially for students. We won’t just entertain; we will showcase how these projects blend creativity with engineering, making learning an exciting journey. Join us as we discuss Rube Goldberg project ideas, explaining the incredible fusion of imagination and education. So, get ready to ride into the world where Rube Goldberg’s creativity meets your curiosity and learning.
What is Rube Goldberg?
Table of Contents
Rube Goldberg is not just a name; it is a creative genius! He was a super-talented cartoonist who won a significant award. Even though he was not an inventor, he had a particular skill – he could draw excellent, crazy machines. In his comics, a character named Professor Lucifer Gorgonzola Butts made these wild contraptions that seemed complicated but were supposed to work. Imagine machines with funny names doing funny things! Rube Goldberg used his drawings to poke fun at how much people loved machines in the early 1900s. So, when we talk about a “Rube Goldberg machine,” it’s like stepping into his world of hilarious inventions!
Benefits of Rube Goldberg Projects for Students
Explore the many advantages of using Rube Goldberg projects as part of your learning for a fun and useful experience.
- Hands-On Learning Fun: Rube Goldberg projects offer a hands-on and engaging way for students to apply science, technology, engineering, and math (STEM) concepts playfully. It’s like turning classwork into a cool experiment!
- Critical Thinking Boost: These projects encourage students to think creatively and solve problems. They must plan, test, and tweak their designs, fostering critical thinking and analytical skills.
- Teamwork and Collaboration: Putting together a Rube Goldberg machine requires working with others. Students learn how to work together, share ideas, and use their skills to make a chain reaction that works and is fun to watch.
- Practical Application of Physics: Students see physics principles in action. Concepts like gravity, force, and energy become more than textbook material – they become the building blocks of their fun inventions.
- Spark for STEM Interest: Rube Goldberg projects can interest people in STEM subjects. Making learning fun and hands-on can help students become interested in science and engineering for a long time. It’s not just about finishing a project; it’s about getting people excited about learning!
Getting Started of Rube Goldberg Project: Step-by-Step Guide
We will show you the steps to make your project ideas come true. Dive into the world of creative opportunities!
- Define the Task: Clearly outline the simple task your machine will perform, ensuring it’s achievable yet allows for creativity.
- Brainstorm Ideas: Gather your team and brainstorm various concepts. Encourage thinking outside the box for inventive solutions.
- Select Materials: Identify materials readily available. Everyday household items like dominos, marbles, and cardboard are excellent choices.
- Plan the Sequence: Sketch a rough plan detailing the sequence of steps your machine will take. Consider the flow and interaction between components.
- Review and Refine: Evaluate your plan for feasibility and complexity. Make adjustments to enhance the machine’s functionality and entertainment value.
- Allocate Roles: If working in a team, assign specific roles based on individual strengths, ensuring a collaborative and efficient workflow.
- Gather Materials: Collect the chosen materials, ensuring everything is in place before construction begins.
- Start Building: Initiate the construction phase, following your plan. Test each component as you progress to identify and address any issues.
- Test Iteratively: Regularly test the machine during the building process. Identify and troubleshoot any problems, adjusting components for optimal performance.
- Finalize and Refine: Finalize the design once the machine completes the task. Refine details for a polished and cohesive Rube Goldberg project.
Simple Rube Goldberg Project Ideas For School Students
Let the creativity flow as we present a spectrum of intriguing Rube Goldberg project ideas that are perfect for school students.
1. The Rolling Ball Symphony
Create a musical masterpiece by setting off a series of rolling balls that trigger various instruments. As each ball moves, it strikes different objects, producing harmonious sounds. This project explores physics and mechanics and introduces students to the creative integration of music and engineering.
2. The Book Page Turner
Design a gadget that turns the pages of a book. Use a combination of levers, strings, and simple machines to achieve this seemingly simple task. This project enhances understanding of mechanical systems and encourages problem-solving skills.
3. The Popcorn Popper
Transformed the process of making popcorn into an entertaining spectacle. Develop a machine that pops corn kernels through whimsical actions, combining elements of physics and culinary creativity.
4. The Artistic Drawing Machine
Constructs a device that creates an abstract drawing through a chain reaction. Explore the intersection of art and engineering as each component contributes to the final artistic composition. This project encourages students to think beyond functionality and embrace the aesthetic aspects of their creations.
5. The Simple Alarm Clock
Build a Rube Goldberg machine that wakes you up in the morning. Combine elements like rolling balls, levers, and pulleys to set off an alarm clock, turning waking up into an amusing and dynamic process. This project introduces students to the principles of time-triggered mechanisms.
6. The Candy Dispenser Extravaganza
Develop a candy dispenser that releases treats through a complex series of actions. Incorporate elements like inclined planes, ramps, and moving platforms to engage students in designing a sweet and entertaining project while learning about basic physics concepts.
7. The Balloon-Powered Car Race
Construct a Rube Goldberg machine that sets off a balloon-powered car race. Students can explore the principles of air pressure, friction, and motion as they design a contraption that inflates balloons to propel miniature cars forward.
8. The Domino Effect
Create a visually stunning domino effect using various objects to perform different tasks. As one domino falls, it triggers events, demonstrating the interconnectedness of actions and reactions. This classic Rube Goldberg project enhances understanding of cause and effect relationships.
9. The Recycling Revolution
Design a machine that sorts and processes recyclables. Incorporate elements like conveyor belts, levers, and containers to simulate the recycling process. This project not only educates students about the importance of recycling but also reinforces engineering and problem-solving skills.
10. The Rainbow Color Mixer
Explore the fusion of science and art by designing a Rube Goldberg machine that mixes colors. Use a series of mechanisms to blend different colored liquids, creating a visually appealing and educational experience. This project introduces students to fluid dynamics and color theory in an engaging way.
11. The Ping Pong Ball Rollercoaster
Construct a captivating rollercoaster for ping pong balls that explores concepts of potential energy, slopes, and curves. As the balls traverse the complex track, students will witness the conversion of potential energy into kinetic energy, learning fundamental principles of physics in an entertaining way. This project encourages creativity in designing rollercoaster elements and provides hands-on experience in engineering and physics.
12. The Toothpaste Squeezer
Develop a whimsical contraption that squeezes toothpaste onto a toothbrush. This project allows students to delve into the world of gears, levers, and tubes to accomplish a seemingly simple task in a unique and playful manner. Exploring concepts of mechanical advantage and fluid dynamics, students gain insights into practical applications of engineering while making the mundane act of squeezing toothpaste an exciting and educational endeavor.
13. The Automatic Plant Waterer
Create an automated system for watering plants using sensors, tubes, and containers to simulate irrigation. This project introduces students to plant care, engineering, and automation principles. Students gain practical knowledge about efficient resource distribution and environmental awareness by designing a machine that mimics the watering process.
14. The Magnetic Maze Solver
Construct an innovative machine that navigates through a maze using magnetic forces. This project explores principles of magnetism, navigation, and problem-solving. As students design a gadget that responds to magnetic cues, they gain a deeper understanding of magnetic fields and their applications in navigation, offering a unique blend of science and creative problem-solving.
15. The Paper Airplane Launcher
Build a device that launches paper airplanes, transforming a simple activity into an exciting event. This project combines elements of force, motion, and trajectory, allowing students to explore physics principles through hands-on experimentation. As they design and refine a launcher, students gain insights into aerodynamics and engineering, turning the art of launching paper planes into an engaging and educational experience.
16. The Soccer Goal Scorer
Develop a Rube Goldberg machine that scores a goal in a mini-soccer game. This project simulates the scoring process by integrating pulleys, inclined planes, and strings while introducing students to the mechanics of simple machines. Through creative problem-solving and engineering, students gain hands-on experience in designing a gadget that adds an element of playfulness to the concept of scoring goals in soccer.
17. The Shadow Puppet Show
Create a captivating contraption that puts on a shadow puppet show. This project blends light sources, cutout shapes, and moving parts to bring storytelling to life in a visually engaging way. As students design and refine their puppet show machine, they explore concepts of light and shadow, developing an appreciation for the interdisciplinary nature of art and science.
18. The Magnetic Maze Solver
Construct a machine that navigates through a maze using magnets. By exploring magnetic forces and navigation concepts, students engage in a unique and interactive project that combines problem-solving with scientific principles. Designing a gadget that responds to magnetic cues, students gain practical knowledge about magnetic fields and their applications in navigation, fostering a deeper understanding of physics.
19. The Rainbow Waterfall
Build a cascading waterfall of colored liquids to create a visually stunning display. This project explores fluid dynamics, density, and the visual interplay of colors. As students experiment with different liquids and flows, they gain insights into the scientific principles governing the behavior of fluids. The result is an artistic and mesmerizing display and a hands-on exploration of physics concepts.
20. The Magnetic Domino Cascade
Design a chain reaction using magnetic dominoes, exploring magnetism, alignment, and kinetic energy. This project captivates students with a mesmerizing cascade of magnetic interactions, providing a hands-on experience in the principles of physics. As students design and refine their magnetic domino setup, they gain insights into the properties of magnets and the potential for creative applications of magnetic forces.
21. The Bubble-Blowing Bonanza
Construct a machine that creates a spectacular bubble display, combining fluid dynamics, airflow, and artistic expression. This project engages students in hands-on experimentation with bubble solutions, wands, and airflow mechanisms. As they design a gadget that produces bubbles in a creative and controlled manner, students explore the scientific principles governing the behavior of fluids while unleashing their artistic flair in a visually captivating display.
List of Other Rube Goldberg Project Ideas
Let’s dive into the realm of creative possibilities with these interesting Rube Goldberg projects:
- Pendulum Painter
- Marble Run Symphony
- Magnetic Maze Race
- Cereal Box Dispenser
- Domino Effect Art Gallery
- Balloon-Powered Boat Race
- Rainbow in a Jar
- Egg Drop Challenge
- Toothpick Tower Builder
- Coin Sorter Contraption
- Spoon Catapult Launch
- Pencil Sharpener Carousel
- Sticky Note Waterfall
- Light-Up Constellation
- Zip-Line Zipper Puller
- Straw Rocket Launch
- Miniature Golf Hole-in-One
- Butterfly Effect Mobile
- Flashlight Shadow Theater
- Tea Bag Rocket Propulsion
- Pop-Up Storybook Mechanism
- Floating Boat Buoyancy
- Hair Dryer Windmill
- Bubble Wrap Stomper
- Book Page Flipper
- Ping Pong Ball Catapult
- Spoon and Fork Ramp
- Dice Roller Dice Tower
- Magnet Maze Challenge
- CD Spinner Light Show
Tips for Successful Rube Goldberg Projects
- Begin with a straightforward task before adding complexity.
- Sketch out your design and identify materials needed in advance.
- Ensure individual components work seamlessly before assembling the complete machine.
- Expect challenges and use them as opportunities for improvement.
- Integrate science, technology, engineering, and math principles for an educational experience.
- Let imagination flourish in design and problem-solving.
- Record tests, adjustments, and final runs for a comprehensive overview.
- Recognize and applaud creative solutions and unique approaches.
In conclusion, Rube Goldberg’s project ideas transcend mere engineering; they transform learning into an exciting journey of creativity and problem-solving. These whimsical contraptions encourage students to explore science, technology, engineering, and math concepts in a hands-on and entertaining manner. As students design and construct their elaborate machines, they gain a deeper understanding of fundamental principles and foster a love for innovation. Rube Goldberg projects teach valuable STEM skills and celebrate the joy of inventive thinking, turning each endeavor into a memorable and fulfilling experience.
1. Can Rube Goldberg projects be adapted for different age groups
Yes, Rube Goldberg projects can be tailored to suit various age groups, ensuring age-appropriate complexity and engagement.
2. What is an example of a Rube Goldberg project?
A classic example of a Rube Goldberg project is a machine designed to turn off a simple desk lamp, involving intricate and amusing chain reactions.
Related Posts

Science Fair Project Ideas For 6th Graders
When it comes to Science Fair Project Ideas For 6th Graders, the possibilities are endless! These projects not only help students develop essential skills, such…

Java Project Ideas for Beginners
Java is one of the most popular programming languages. It is used for many applications, from laptops to data centers, gaming consoles, scientific supercomputers, and…
We use cookies to enhance your browsing experience, serve personalized ads or content, and analyze our traffic. By continued use, you agree to our Privacy Notice .
- All Fashion
- Accessories
- All Lifestyle
- Entertainment
- Transportation
- Valentine's Day
- Mother's Day
- Father's Day
- Editorial Submissions
Get the Cool Material Newsletter
Insider recommendations, the best deals, and the most unique products & experiences, delivered right to your inbox.
By submitting your information you agree to the Terms & Conditions and Privacy Policy .
Share Article
Share through your preferred social media platform:
Copy the link and send it directly to everyone:
10 Brilliant Rube Goldberg Machines That Are Endlessly Fun to Watch

When it comes to getting things done from a pure efficiency standpoint, the simpler the better. But when it comes to adding a little bit of flair (and internet cred), Rube Goldberg machines rule.
And what, exactly, is a Rube Goldberg machine? While it can be many things, at its heart a Rube Goldberg machine is something that completes a simple task in a complicated way. The machines require a high level of skill and patience to create, and they’re the ultimate expression of doing something just because you can. For the outsider, they’re simply a lot of fun to watch in action.
How Do Rube Goldberg Machines Work?
Rube Goldberg was an American cartoonist who was famous for drawing characters that completed simple tasks in obscenely complicated ways. The most important aspect to making a Rube Goldberg machine work is that tasks are completed in the correct series.
Each action starts another action in succession until the task is complete (which is often done using the six simple machines). For example, a ball rolling down a ramp could complete its action by hitting a block, which in turn is knocked over to hit a weight that falls off of a lever and starts a pulley that rings the door bell. One event leads to another until the task is complete.
What Are the Six Simple Machines?
At the heart of every Rube Goldberg machine are six simple machines.
The Six Simple Machines of Rube Goldberg
- Wheel and axle
- Inclined plane
In real life, as in the cartoons, building a Rube Goldberg machine is a lesson in how to use those six simple machines in various methods.
10 Rube Goldberg Machine Examples
The Page Turner
Honda – The Cog
Ok Go Music Video
Rube Goldberg Photobooth
Toy Factory
Time Machine
The Christmas Tree Lighter
MineCraft Rube Goldberg Machine
Melvin the Machine
The Longest Rube Goldberg Machine
In December of 2021, Guinness World Records put up a video of the latest record holder for the longest Rube Goldberg machine. It was built by Chevrolet Menlo, Wang Xiqi, and Guan Jian, and consists of 427 individual steps. No matter how you frame it, anything that takes 427 steps to complete (let alone that many steps to flip the switch on a neon sign).
More Features

The Best Men’s Digital Watches You Can Buy
Black book: the cool material editors’ favorite things right now: march 2024.
A new must-read whiskey book, classy new Nike Air Ships, and performance pants all make the list.

Performance Golf Can Drastically Level Up Your Game With These 4 Simple Products
Backed by pros, Performance Golf offers expert videos & gear for your best round yet.
Rube Goldberg Machine Video No Prep Assignment
Description
This is an awesome way to teach Rube Goldberg machines. No prep needed! The assignment has 5 fun video examples of Rube Goldberg machines that can be found on YouTube (17 minutest total). The videos could be shown to the class as a whole or posted to Canvas and would become an individually led assignment. This assignment makes for a fun and easy teaching day! Perfect for those end-of-the-year, please-don't-talk-to-me days! :)
Questions & Answers
Stay curious.
- We're hiring
- Help & FAQ
- Privacy policy
- Student privacy
- Terms of service
- Tell us what you think
Cool chain reaction contraption built from air conditioners breaks Rube Goldberg record

Generally, people tend to break down a big, difficult task into smaller, simpler ones and tackle them individually to achieve the ultimate goal.
However, there is a subset of individuals who prefer to complicate things - achieving a simple goal through a series of complex steps. This is where the Rube Goldberg Machine comes into play.
The name "Rube Goldberg Machine" may sound unfamiliar at first, but you've probably seen it in action: a small ball or object navigating through a series of contraptions to reach its final destination. These videos are characterized by their soothing nature, with each step executed perfectly and the contraptions intricately designed.
Recently, Domino World, Midea Air Conditioning, and Film Hurricane (all China) collaborated to create the world's largest household air-conditioning unit Rube Goldberg machine .
The machine, consisting of 68 air conditioning components and featuring over 70 steps, took more than a month to design and construct, with the goal of activating an air conditioner.

Read this article in Chinese and check out more content in Chinese here !
"The Rube Goldberg Machine operates in a delicate balance, and we need to disrupt this balance through the interconnected mechanisms to allow the force to continue transmitting," explained Wang Lei, a member of Domino World.
"It's a very meticulous job. Each mechanism requires testing and adjustments down to the millimeter. Fortunately, Midea Air Conditioning's control of the quality of the detailed materials of its products has somewhat eased the burden of our measurements.
“One tiny mechanism took less than two seconds, but our team used over a dozen materials to test it repeatedly."
Domino World, founded by Mr. Ma Lihua, has over 10 years of experience and has broken six Guinness World Records titles.
When asked about the source of his passion for dominoes and Rube Goldberg Machines, Wang Lei mentioned witnessing Mr. Ma Lihua's focused and serene demeanor during a building activity, which deeply inspired him and fuelled his interest in the activity.
"It took us about 70 days from start to finish, during which we were solely focused on this project," Wang Lei said.
"To be honest, it wasn't smooth sailing at the beginning. When we disassembled the air conditioner to separate the components, we found only 46 usable parts. The inability to separate a significant portion of the parts greatly affected our morale."
"So, we printed out all the parts and enlarged them, sticking them around our office. For one-third of the project's duration, we were brainstorming how to connect them all," Wang Lei continued. "From 0 to 1, that was the hardest step."

Fortunately, their perseverance paid off, and the team successfully clinched their seventh Guinness World Records title. Moreover, they exceeded the required 50 steps by more than 20.
Expressing his joy after breaking the record, Wang Lei said: "This is my most satisfying, impressive, and challenging work to date."
When asked for advice for newcomers interested in dominoes or Rube Goldberg Machines, Wang Lei emphasized the importance of staying calm and giving oneself positive encouragement, as it helps solve many problems along the way.
Does your brand have what it takes to become Officially Amazing™? Visit our Business Solutions page to find out how we can help or contact us .
Want more? Follow us on Google News and across our social media channels to stay up-to-date with all things Guinness World Records! You can find us on Facebook , Twitter/X , Instagram , Threads , TikTok , LinkedIn , and Snapchat Discover . Don't forget to check out our videos on YouTube and become part of our group chat by following the Guinness World Records WhatsApp channel . Still not had enough? Click here to buy our latest book, filled to the brim with stories about our amazing record breakers.
Related Articles

Cars create colossal ox head image to celebrate Chinese New Year

Top Gear presenter Chris Harris and Porsche break electric car drift record

Video: Old Mutual Wealth makes its name with largest coin mosaic

JOY brand makes history with longest line of washed plates

16-year-old Chloe Chambers breaks world record for fastest vehicle slalom
Virgin Mobile South Africa launches new concept store with iconic world record as 25 cram into Mini
IMAGES
VIDEO
COMMENTS
Part 2: Build the Rube Goldberg (50-60 minutes) Have students spend a few minutes reviewing their drawings from Part 1 before starting to build. Have student teams gather their materials and begin to build their designs. Emphasize that each group member participates. Direct the students to follow the planned design as closely as possible.
Group Rube Goldberg Machine Project: Everyone loves watching a Rube Goldberg machine run, but getting them to work reliably can be a real test of engineering. ... For this sketching assignment, I recommend having students design at least 5 steps/actions so it is easier for them to accommodate the starting/ending requests of other groups once ...
Turn on a faucet. 3. Look for inspiration. Developing a zany, complex machine is not an easy task. Before you create your own Rube Goldberg machine, you may find it helpful to see some examples. While you should use these examples as a source of inspiration and direction, do not copy someone else's machine.
Assignment worksheet . Design project: Design a Rube Goldberg Machine . Cartoonist Rube Goldberg (1883-1970) was famous for his sketches of complicated contraptions designed to accomplish simple tasks, such as fetching a glass of water. His comical vision of engineering lives on. Every year in colleges across the country, teams of students ...
• Write a Rube Goldberg machine explanation to describe the machine's actions. Central Focus . This lesson can be used as hands-on practice with simple machines and the concepts of energy transfers. Students will be collaborating together to design a working Rube Goldberg machine to complete the
Student Project Worksheet. After hearing about their assignment, students can begin to explore energy transfers and Rube Goldberg machines by participating in an online game.This game is broken into levels, each with their own challenges for students to work through.
Any questions or edits, or for further materials, please contact [email protected]. Rube Goldberg (1883-1970) was a Pulitzer Prize winning cartoonist best known for his zany invention cartoons. He was born in San Francisco on the 4th of July, 1883 - and graduated from U. Cal Berkeley with a degree in engineering.
Once students have explored the concept of kinetic energy, they will use it to design a Rube Goldberg machine. Rube Goldberg machines are named after the American cartoonist, author, engineer, and inventor Rube Goldberg (1883-1979). According to Webster's New World Dictionary, a Rube Goldberg machine is "a comically involved, complicated ...
The objective of this project is for you to build a 6-stage Rube Goldberg device whose purpose is to turn on a light bulb by flipping a switch. You can borrow the switch from school, but you must return it. Your machine DOES NOT have to have a light bulb. I will provide that and we will connect it to your switch when you run the machine.
During my environmental unit, when we are studying food chains, we finish off by making four step Rube Goldberg machines! I have a post on how we do this called STEM Energy Project Using Rube Goldberg Machines and Food Chains! The bottom line is that we take four step food chains and look at the energy transfer and represent that energy ...
Group Assignment Your team will be responsible for giving an 8-10 minutes oral presentation about your Rube Goldberg project (for poster preparation, a 4''x3'' cardboard is needed,
A Rube Goldberg machine is a complex contraption designed to complete a simple task. The machine uses a set of tasks that work in succession and trigger one event after another until the final event. ... A Rube Goldberg science project can take on many different shapes and sizes. Get inspired by Caroline's Guinea Pig Feeder . Creativity knows ...
Physics Block Group Project: Rube Goldberg Machine 1 Reuben Goldberg (1883-1970) was a San Francisco Bay Area newspaper cartoonist who was ... and the assignment of the concepts of physics. The teacher must sign off your information to receive full credit on this assignment Contact information: You may need to contact a group member during the ...
Here are a few other Rube Goldberg machine ideas to help you choose the task your machine will accomplish. You could: Drop ice cubes into a glass. Water a plant. Pop a balloon. Turn off an alarm clock. Deposit a coin into a piggy bank. Squeeze toothpaste onto a toothbrush. Crack an egg into a bowl.
Step 1: Get Inspired. First things first, you'll want to watch some Rube Goldberg contraptions in action to get inspired. My kids and I LOVE this video from OK Go. It's incredible complicated, but oh-so-amazing, so don't think for one hot second that you'll be able to replicate this with little kids.
The students build a Rube Goldberg machine that can pop a balloon. Students must use higher level thinking to come up with a successful design. ... Rube Goldberg Machine Project. 4 Ratings. Previous Next. Copepod Corner. 32 Followers. Follow. Subject. Chemistry, Physics, General Science. Grade Levels. 5 th, 6 th, 7 th, 8 th, 9 th, 10 th ...
Rube Goldberg Poster Assignment Objective: Illustrate your Rube Goldberg machine design on a full-size poster. The poster should have a short title. Include the name of your team, ... The poster is worth 15% of your total grade for Rube Goldberg project. In addition, you need to prepare a short oral description of your machine (5 min max). Use ...
Advanced Rube Goldberg Project Ideas. Designing a complex system to water plants automatically. Building a mechanism to sort different types of objects into separate containers. Constructing a contraption to crack an egg into a bowl. Creating a device to mix ingredients for baking. Designing a machine to launch a rocket or model spaceship.
5. The Simple Alarm Clock. Build a Rube Goldberg machine that wakes you up in the morning. Combine elements like rolling balls, levers, and pulleys to set off an alarm clock, turning waking up into an amusing and dynamic process. This project introduces students to the principles of time-triggered mechanisms. 6.
At the heart of every Rube Goldberg machine are six simple machines. The Six Simple Machines of Rube Goldberg. Wheel and axle; Lever; Inclined plane; Pulley; Screw; Wedge; In real life, as in the cartoons, building a Rube Goldberg machine is a lesson in how to use those six simple machines in various methods. 10 Rube Goldberg Machine Examples
Rube Goldberg Machine. by. Mme La Carson. $1.00. PDF. This Rube Goldberg Machine assignment is a great final project for a unit on simple machines and/or Newton's Laws. It contains instructions, rubrics, self and peer-assessments, as well as a few resource links to get started. Subjects: Physics, Science.
Description. This is an awesome way to teach Rube Goldberg machines. No prep needed! The assignment has 5 fun video examples of Rube Goldberg machines that can be found on YouTube (17 minutest total). The videos could be shown to the class as a whole or posted to Canvas and would become an individually led assignment.
While Rube Goldberg Inc. encourages educational, non-profit, and commercial reprint and use of Rube's work, permission to reproduce drawings and images or use our trademark (RUBE GOLDBERG) in any way or in any media (including presentations, training materials, etc. both in-house and to clients), must be secured prior to use and requested in ...
Recently, Domino World, Midea Air Conditioning, and Film Hurricane (all China) collaborated to create the world's largest household air-conditioning unit Rube Goldberg machine.. The machine, consisting of 68 air conditioning components and featuring over 70 steps, took more than a month to design and construct, with the goal of activating an air conditioner.